Aconcagua The Normal Route
Tips and Advice
We know what it takes to climb Aconcagua because we have run over 40 trips to climb this mighty mountain. We also know that the two most important things for a safe and successful journey is the acclimatization schedule, along with excellent physical preparation.
Our Top 20 Tips for climbing Aconcagua are designed to help you plan and prepare when taking on an expedition like this. To get more information, CONTACT US, and we can help you fully prepare and get up to speed on how you should be thinking about your training. If you sign up to one of our trips, then we will send you our Aconcagua Dossier, with all relevant information on the trip. This information is based off the Vacas Valley Traverse Route on Aconcagua, which is our preferred route up the mountain.
1). Have Previous Altitude Experience
Having previous altitude experience is imperative when planning an attempt on Aconcagua. We believe that everyone should have 6,000m/ 19,685 feet experience, before attempting a peak like Aconcagua. There are a number of high altitude peaks you need to consider before even thinking about climbing Aconcagua. You need to be as self-sufficient as possible and be used to carrying your own gear, on long, multiday hikes. If you are not hiring a porter to carry some or all of your gear, we recommend that you have experience with hiking at altitude with weight before taking on this challenge. We are available to talk with you directly to make sure that Aconcagua is the right choice for you.
2). Do Not Underestimate Your Training
Can you carry a 25kg/ 55lbs pack for 4 to 6 hours at sea level? Do not underestimate the training needed to be safe and successful climbing Aconcagua. Follow a regular training regime. If you are not using porters high on the mountain, then you should be comfortable carrying a 25kg/ 55Lb pack for 1,000m/ 3,000 feet in 5 hours, several days in a row. We highly recommend finding a Hypoxic training facility and using a machine 3 weeks before the trip. Creating red blood cells is key for success on Aconcagua.
However, if you want to carry less weight every day be sure to book porters in advance. We can not emphasize how important your physical preparation is for this challenging trip at high and extreme altitude. We have climbed Aconcagua many times and always happy to help you develop the training plan you need.
3). Acclimatization is Very Important
Make sure you have adequate acclimatization built into your trip. We have additional days available on the mountain, to give you the best chance at safely reaching the summit. Make sure that you choose an itinerary that gives your body the necessary time to acclimatize lower down on the mountain, at the critical acclimatization points. Check out our itinerary on the Vacas valley route, which in our opinion, is the best route to climb Aconcagua. Acclimatization is a critical component for safety and success on any high and extreme altitude expedition.
4). Bring Lightweight Equipment
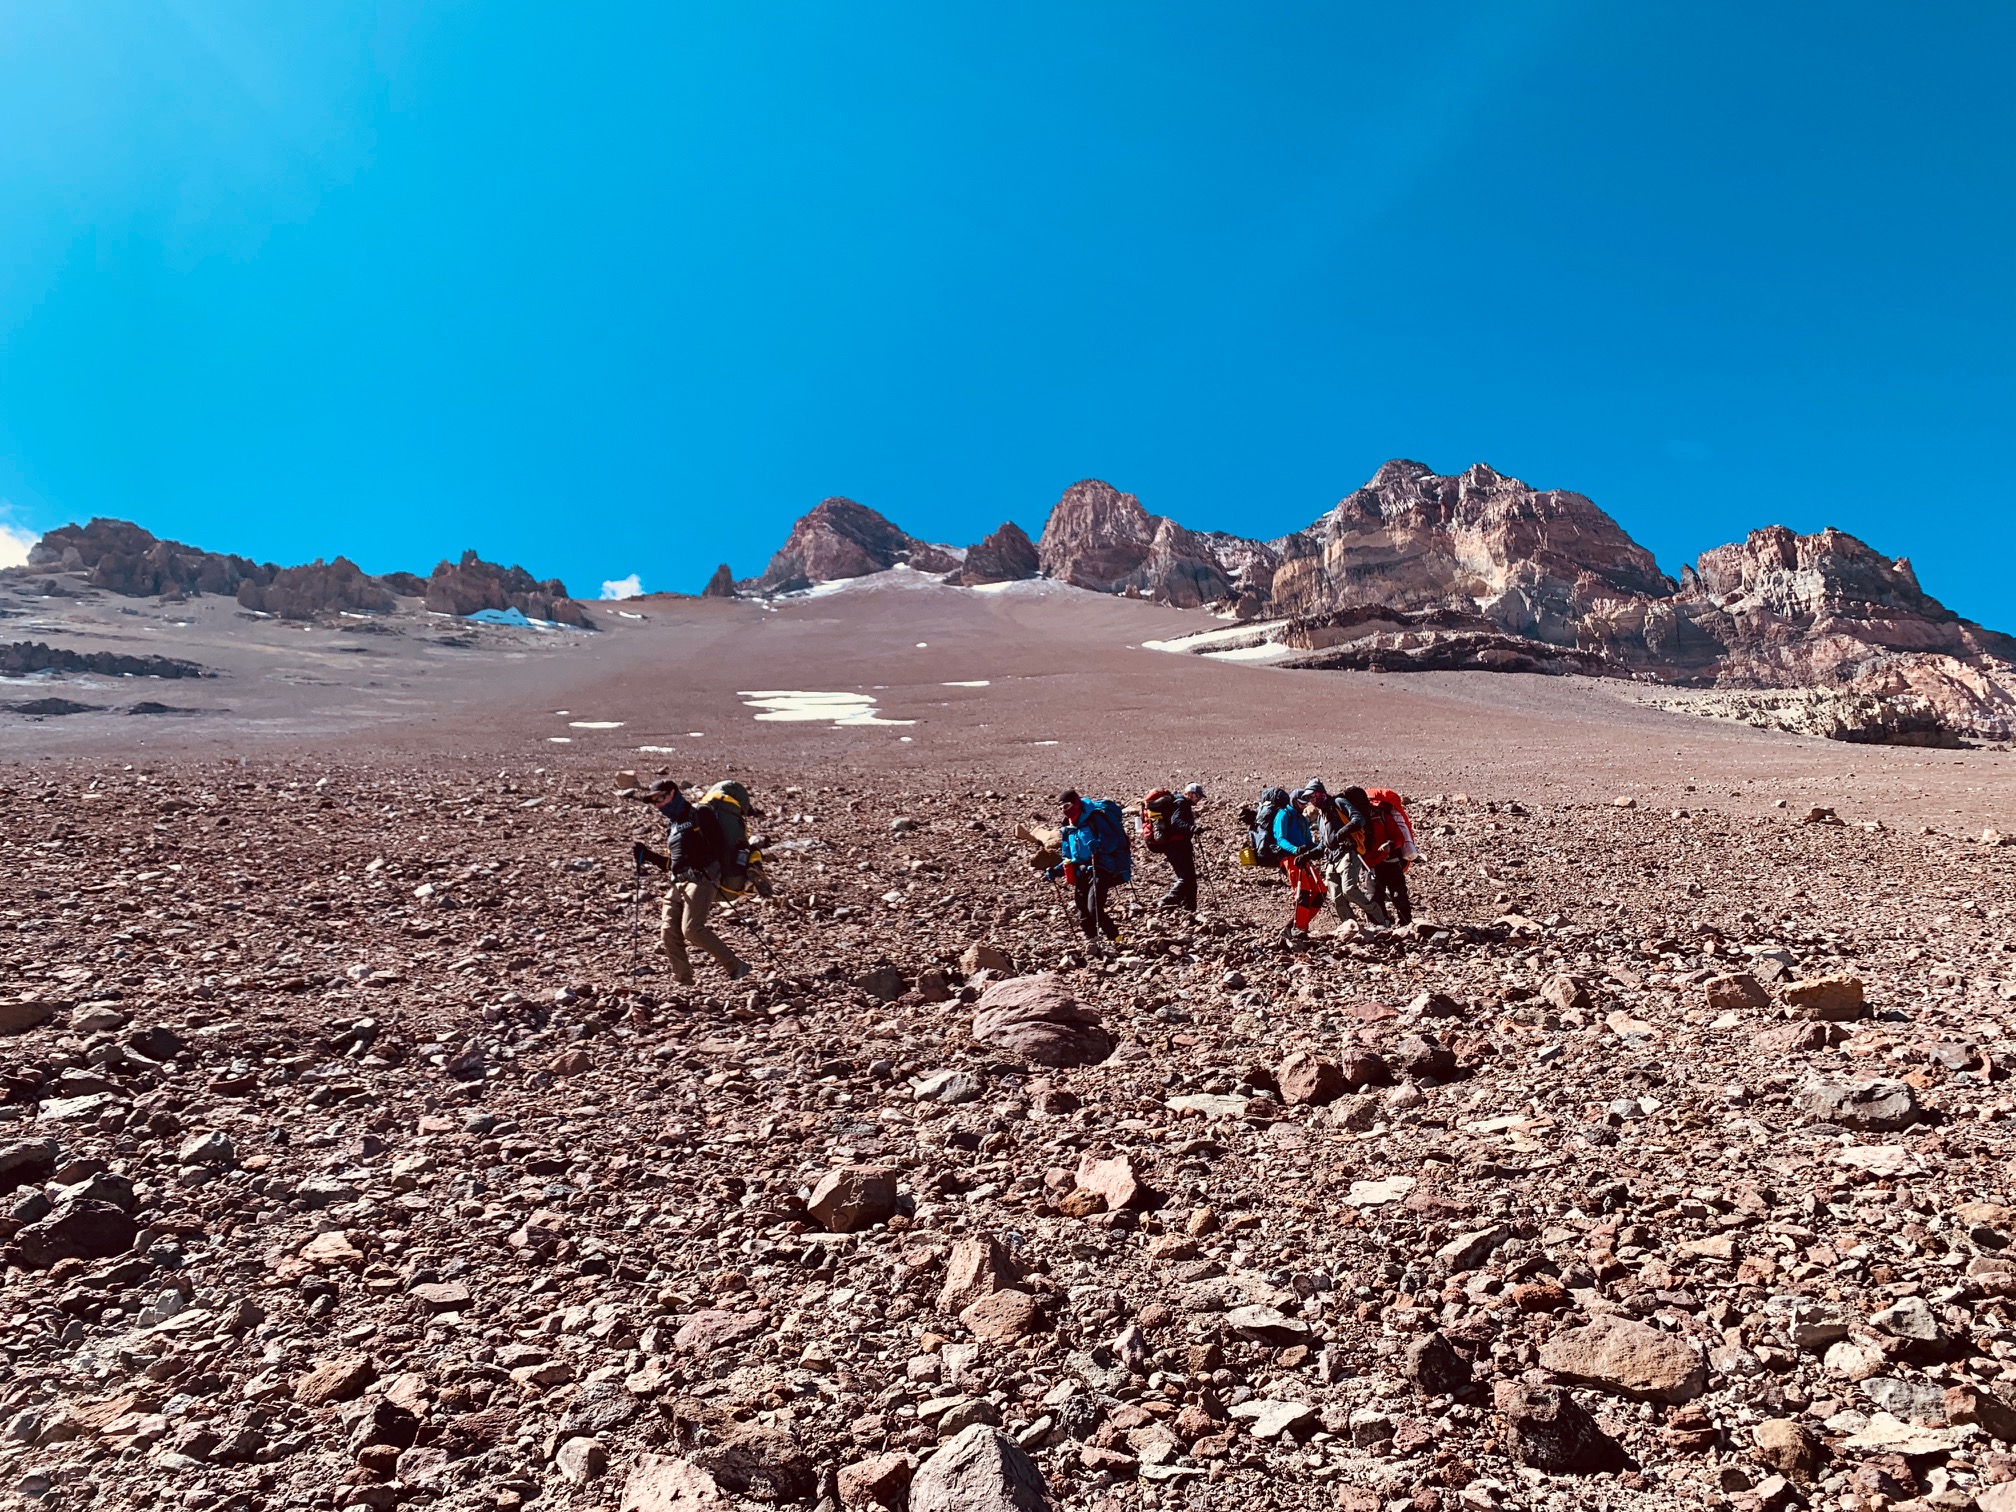
On any Aconcagua expedition, you have to make numerous ascents up and down the mountain. One reason for this is to help the body adjust to the lower levels of oxygen. You also have to carry team equipment, along with your own personal gear. Make sure you have all items on the gear list and know how to use them. Having lightweight clothing and equipment will make a difference in how much weight you are carrying. Also, practice using your gear and equipment and make sure it fits comfortably. Having lightweight equipment and clothing means you will have to carry less weight up and down the mountain. Having prepared your gear and using each piece before the trip, helps you become mentally prepared.
5). Get a VO2 Max Test
Schedule a physical with your doctor to make sure you are in good health before you start training. You should then consider getting a VO2 MAX test or fitness test. The results should indicate your current level of fitness and provide a road map for the way ahead. Use the results to develop a proper training plan, so you are not guessing how your fitness is developing. You need to know at what heart rate your body produces lactic acid in your muscles. Knowing your lactic threshold helps you develop a training plan best suited to your needs. Training in the right heart rate zone and building the right training is important for your safety and success.
6). Understand Altitude Sickness
If you have been on a number of altitude expeditions with us you will know all about altitude related issues and problems. You should be up to date with statistics. Did you know around 30% of people make it to the summit of Aconcagua. Read and understand the principles of acclimatization and altitude illness. We have personally developed our itinerary on the Vacas Valley Traverse to give you the best chance at success. By picking the best itinerary with more acclimatization, you give yourself a safer journey into extreme altitude. You also need an itinerary with built in contingency days for bad weather. Aconcagua is notorious for harsh weather conditions, so you want to make sure that you have extra days to summit if the weather is not suitable.
7). You Should Consider Taking Diamox
If you are taking prescription drugs, make sure you bring a sufficient supply to last more than the length of your trip. We highly recommend taking Diamox for the duration of the trip. Our high altitude specialist doctor recommends 125mg in the morning and 125mg in the afternoon. Make sure your Diamox is in tablet form. You will also need to bring a number of antibiotics. There are alternatives to taking Diamox and you most certainly should bring ibuprofen on this trip.
8). Be Upfront With Your Medical History
Make sure your guides and trekking staff are informed of any previous conditions or medical situation you may have. Don’t keep any issues to yourself, altitude sickness can kill. We implement a slow pace for all trekking and acclimatization days on the trip, however, you can still have altitude related issues. Make sure that your guide knows your medical history.
9). Take Your Time in the Early Stage of the Trip
The pace of your trip is critical to recovery each day. Moving too quickly at altitude often leads to altitude illness and does not aid in your recovery. Fatigue is not your friend on a multi day trekking expedition. Good recovery is critical for a safe and successful trip. Don’t let your climb on Aconcagua be miss-managed by the guides who have no understanding of pacing or hydration in low oxygen environments. A slow pace and slow movement to high and extreme altitude is very important.
10). Hydration, Hydration, Hydration
One of the most important tips we will give you is to make hydration a priority. Hydration in the dry desert of Aconcagua is extremely important. When you wake up you need to drink 1 liter of water before breakfast. You need to drink 2 liters before lunch and another 1 to 2 liters in the early afternoon. Using a water bladder system is ideal because you can then drip feed water into your body on a regular basis. This will be used on the trek in and lower on the mountain, however during the summit attempt it can not be used as it will freeze. Forcing water in, is not a good idea as you will just pee it out. You will need hyper hydration sachets, multi-vitamins and electrolytes while on the trip.
11). Separate all Your Gear into Dry Packs
Manage your gear well and keep all items separated in dry packs. Alternatively, you can keep your clothes in plastic bags. While you are on the mountain you will need to manage your gear in the tent correctly. Having a good tent routine is very important, keeping separate bags for gear is very useful. The dry bags are useful to keep your gear organized when you do gear drops up the mountain.
12). Make Sure you Eat as Much as Possible
We always have quality food on our trips and this is critical to your expedition. Sometimes at altitude, your appetite can dwindle, but you need to try and finish every meal. It will give you the strength and energy for each day on the trip. You do not want to over pack snacks as you have to carry everything up and down the mountain. You should have some recovery and protein bars in your duffel bag, which is carried by mules up to Base Camp. After that you will want to limit the amounts you carry on the mountain. Lightweight is best and snacks can be heavy.
13). Bring a Lightweight Air Mattress and Sleeping Bag
Remember above Aconcagua Base Camp, you will have to carry all your gear up the mountain. Make sure all your gear is as light as possible. You need to have a lightweight air mattress and warm sleeping bag. We recommend a Marmot Col -20F sleeping bag or similar on Aconcagua. You spend a lot of time in the your tent on the mountain, so you need to be comfortable throughout the whole trip. Sleep is a key ingredient to acclimatization and essential for success. Also, make sure that you have tested out your sleeping pad and bag out in the elements, so that you are comfortable with the set-up.
14). Work With your Teammates
Working as a unit and team is important in achieving the groups goals. Communicate with the guides if you are having problems. They can only help if they know that you are struggling. Aconcagua requires you to be a team player and maintaining a positive mental attitude at all times throughout the expedition. Encourage others and others will encourage you. We are much stronger as a group, not as individuals.
15). Bring Multi-Vitamins
We recommend taking multi-vitamins on a daily basis before and during the trip. These can either be the type that we dissolve in our water or as a tablet to take daily. You need to consider a range of supplements to maintain a strong immune system. Aconcagua is a dry high desert, so bring hydration tablets for your water to take daily. If you sign up with Ian Taylor Trekking for your Aconcagua expedition, we will send you a trip Dossier, that includes a complete kit-list for the trip.
16). Only Bring Essentials
Have a small medical kit that is easy accessible while climbing. This medical kit should have Ibuprofen, blisters plasters, tape, sunscreen, lip protection, medication, plasters and personal items. Also, make sure you have your personal medication you take with you at all times. You need to streamline your medical kit, in the same way you would on any trekking and mountaineering trips. Bring lightweight clothing and lightweight camping utensils.
17). Come With the Correct Mental Training
Having the experience of sleeping in a tent, in harsh weather conditions, will be essential in your preparations. Also carry a weighted backpack in your training, in order to be physically ready for the summit. Mentally prepared for your Aconcagua experience, for example, pushing the limit in your training sessions helps. Additionally, the more comfortable you are in a mountain environment, the more mentally prepared you will be. Staying positive with a good mental attitude on the mountain, is important for you and the people around you. Aconcagua is a mental and physical challenge. Staying positive in the face of harsh, challenging conditions is needed to be successful. Mental preparation starts at home in the hard training you do before the climb.
18). Expect Harsh Weather Conditions
Be ready to cope with diverse weather conditions. You may experience drastic changes in the weather from warm/dry conditions to freezing and windy weather. Some days you may have temperatures lower down on the trek that are 18C (65F) and sunny to -18C (0F) in the tent at camp 3 at 6,000m/ 19,685 feet. Likewise, on the summit night, you may experience temperatures as cold as -30C (-22F). High winds are usually the biggest challenge on Aconcagua, similarly freezing temperatures can cause you pain and discomfort. Understanding that some factors are beyond your control, and weather being a big one of these. Focus on the elements of the trip you can control, for instance you can come with the right attitude, gear and physical preparation.
19). Hit the Wall in Your Training
Know your limit on any mountain. One of the ways to achieve this is to hit the wall in your training at home. Remember your safety and the safety of others should be your number one concern on the mountain. Make sure that you have pushed yourself hard in your training and have prepared correctly before stepping foot onto the mountain. While you are on Aconcagua, don’t push yourself to the point of putting your life or the life of others in danger.
20). Respect Your Team and the Mountain
Respect your team and other climbers. You are climbing as a part of a team and therefore, you have to be aware that timelines have to be kept and differences have to be accepted. An expedition can be a multicultural experience with people joining our trips from all over the world. That means different cultural backgrounds with different religious ideals or philosophies. Everyone in your expedition is struggling to reach the same goal, so respect the team. If you see your team member struggling on any given day, be there to help them. It could be you the next day that needs the extra support! Team work and relaxed attitude will be valuable assets on a trip like this, finally respect the mountain and extreme altitude.
We have been running premium level trips to Aconcagua since 2010. We work with a highly qualified local team with major logistics in place so we can offer you the best possible service. Aconcagua can be a harsh and challenging environment so we designed an itinerary and service for maximum comfort, safety and success. Read some REVIEWS from our trips.
1). Highly Experienced Guides
Our mountain guides are qualified professionals of the Argentinean Association of Mountain Guides and school of High Mountain and Trekking Guides. The last qualification is a result of 3 years of Studying. We believe that to succeed in our expeditions, professionals with experience and the ability to offer security should guide our teams. Their equipment includes: VHF radio, Satellite phone, a first aid kit, complete with the appropriate drugs for altitude sickness, ropes, an altimeter, and professional clothing and equipment. All will provide security and comfort.
All of our guides hold professional mountaineering qualifications and wilderness First Aid Certificates. They are able to get you the help you need in case of an emergency. Also, our guides have continuous access to Base Camp and Head Office. We want to make sure all of our teams have the best chance at safely reaching their goal. With more guides with your team, they will be able to more efficiently manage your safety on the mountain and also give you a better experience along the way.
2). Expert Training Advice
We offer personal service with training advice for our clients, 5 days a week. A lot of people underestimate the physical preparation needed for Mount Elbrus. If you decide to climb on the northern side there is minimal safety in place, no helicopters and no snow cats. Therefore, we use the southern side of Mount Elbrus for our final ascent. This offers you better safety and success.
We want to make sure that you have the best information on how to complete this adventure safely and successfully. There are some long 8+ hour days, with over 1,000m/ 3,280 feet of up and down hills on steep terrain while on the trail and mountain. We have professional training advice available to you 5 days a week. All you have to do is e-mail us and we can schedule a call. Read more. We also provide you with a 40 page Aconcagua Dossier with a lot more information on how to prepare for the trip.
3). Climb with an Everest Summiteer
Why not sign up to one of the trips that Ian personally leads. You can climb Aconcagua with someone who not only has reached the top of Mount Everest! but who has been on 7 Aconcagua Expeditions. Ian usually leads one Aconcagua trip every other year with 14 spaces open. You will need to book far enough in advance for these trips. Sign up and get access to Ian today. Read Ian’s Top 20 Tips for climbing Aconcagua.
4). 20 Years of High Altitude Experience at Your Service
We have years of experience managing teams on the ground in Argentina and around the world. Ian has led over 150 expeditions above 17,000 feet. Our head guides have been at the forefront of setting the standard on Aconcagua for the last 20 years. Our team is well connected on the ground with access to all the key organization and authorities. All our other guides are highly qualified in a range of mountaineering disciplines. We always have 1 guide for every 3/4 clients high on the mountain.
5). Quality Hotel, Service, Tents, Food and Equipment
In Mendoza we use the Diplomat Hotel. This hotel is centrally located. On the mountain we mostly use North Face VE 25 tents or Mountain Hard wear tents. These tents are tried and tested at high and extreme altitude. They have plenty of space for two people and the highest quality tents for mountain travel. We do have the option for a single tent for an additional fee for the trek in and Base Camp portion of this trip. For Safety reasons we like to have two people to a tent high on the mountain.
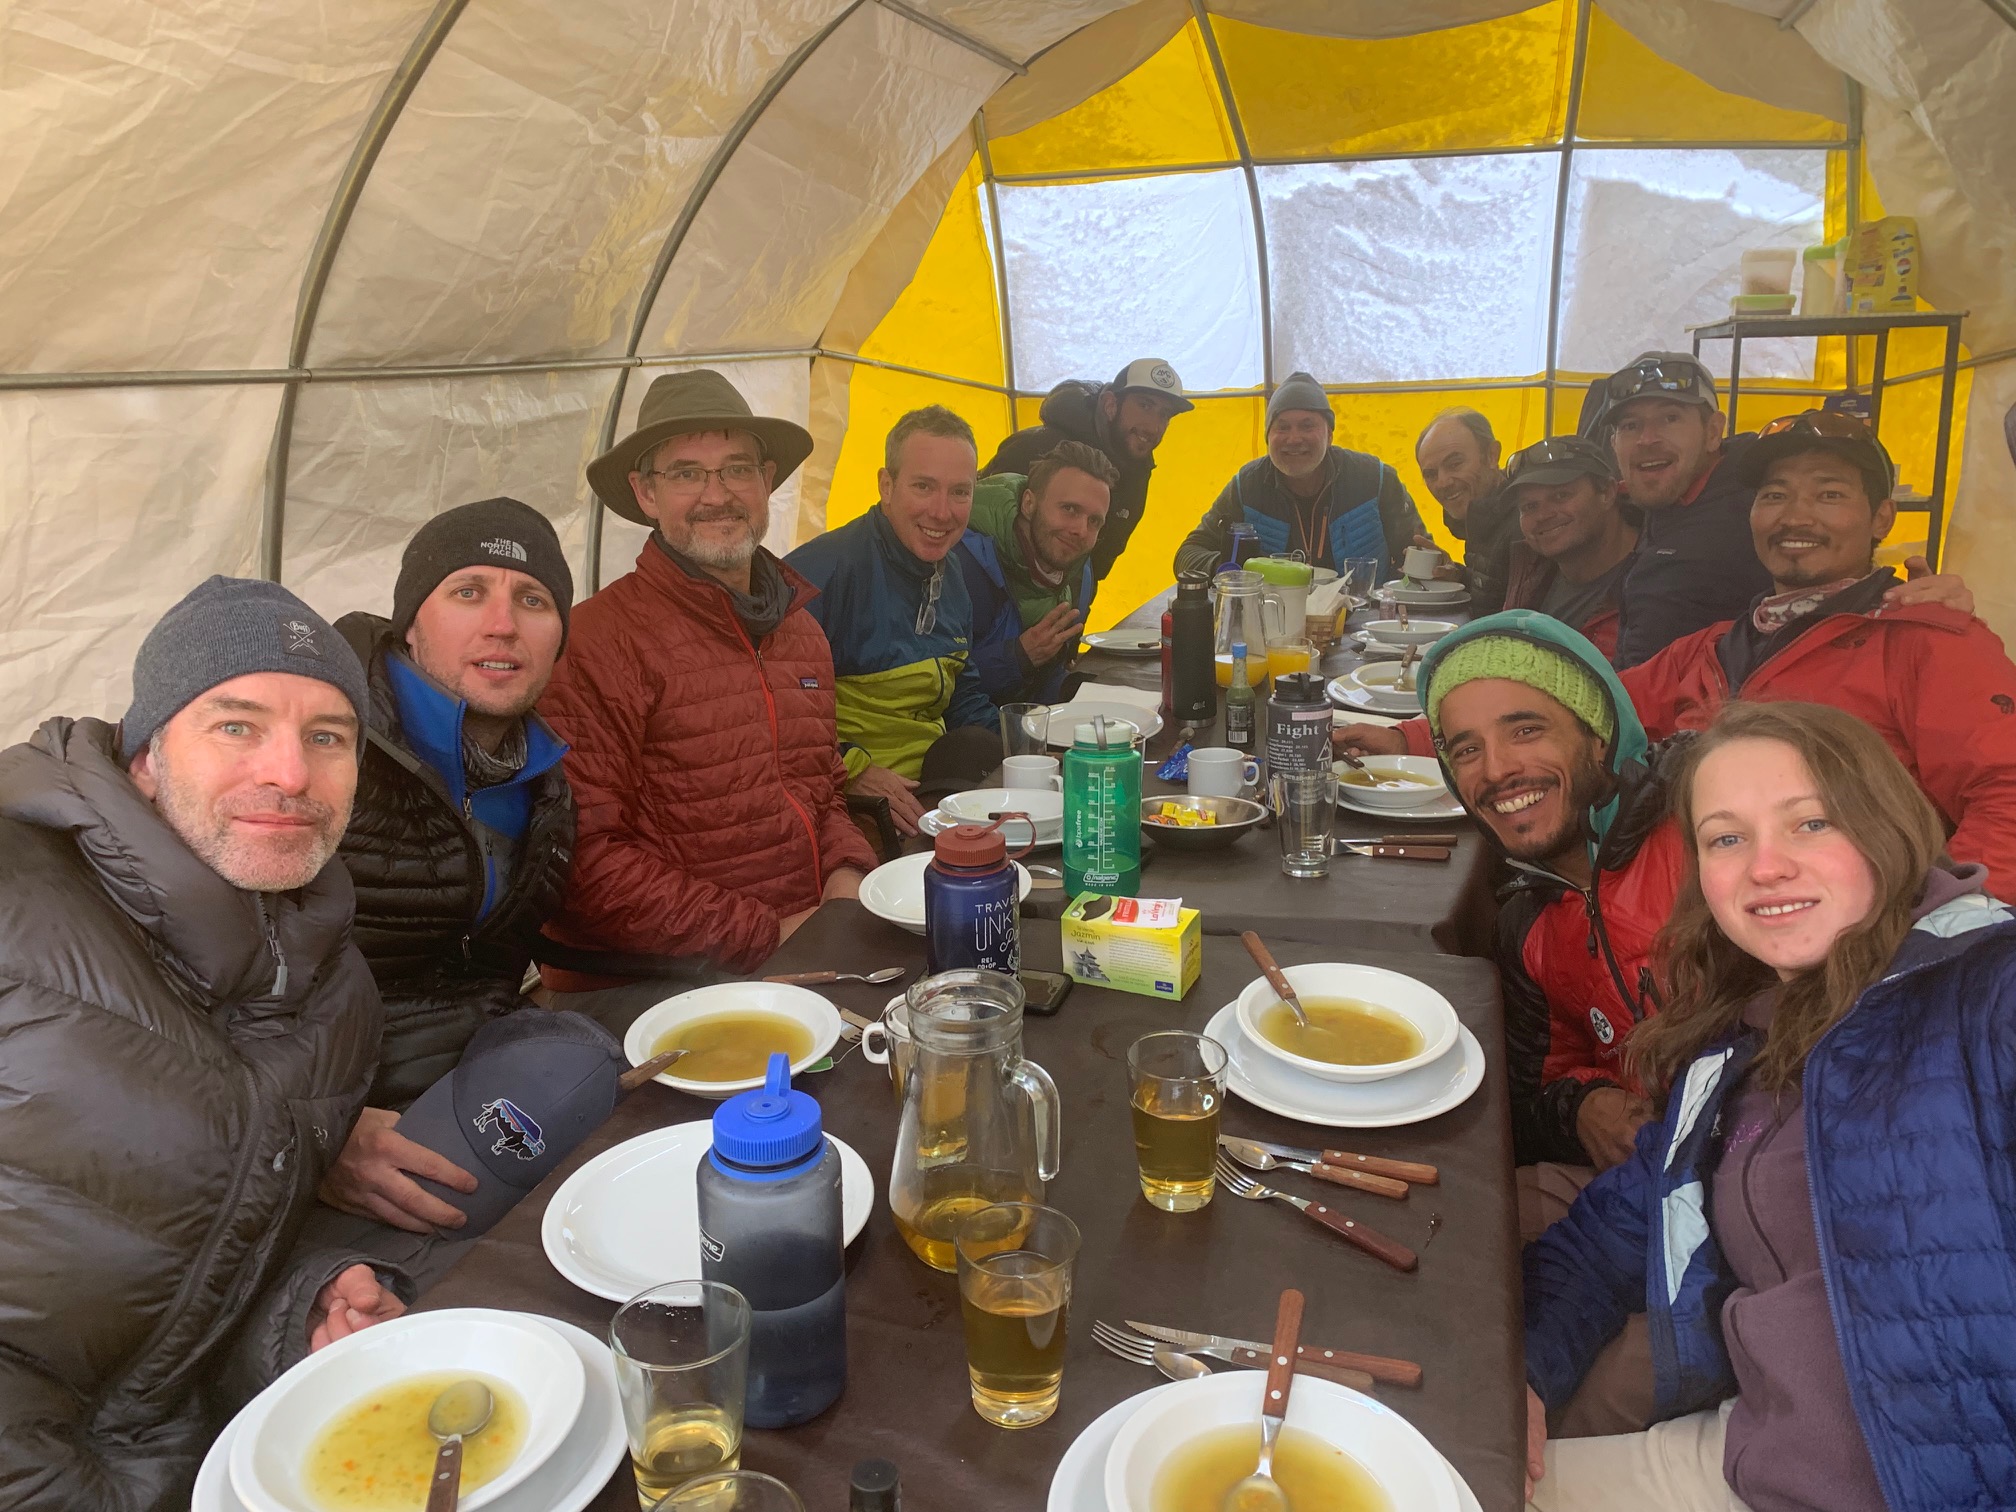
We have chefs in both Base Camps serving high quality food daily. There is access to showers, Wi-Fi, fruit, tea’s and snacks throughout the day. You can also charge phones and batteries in our dining tent.
6). Our Itinerary
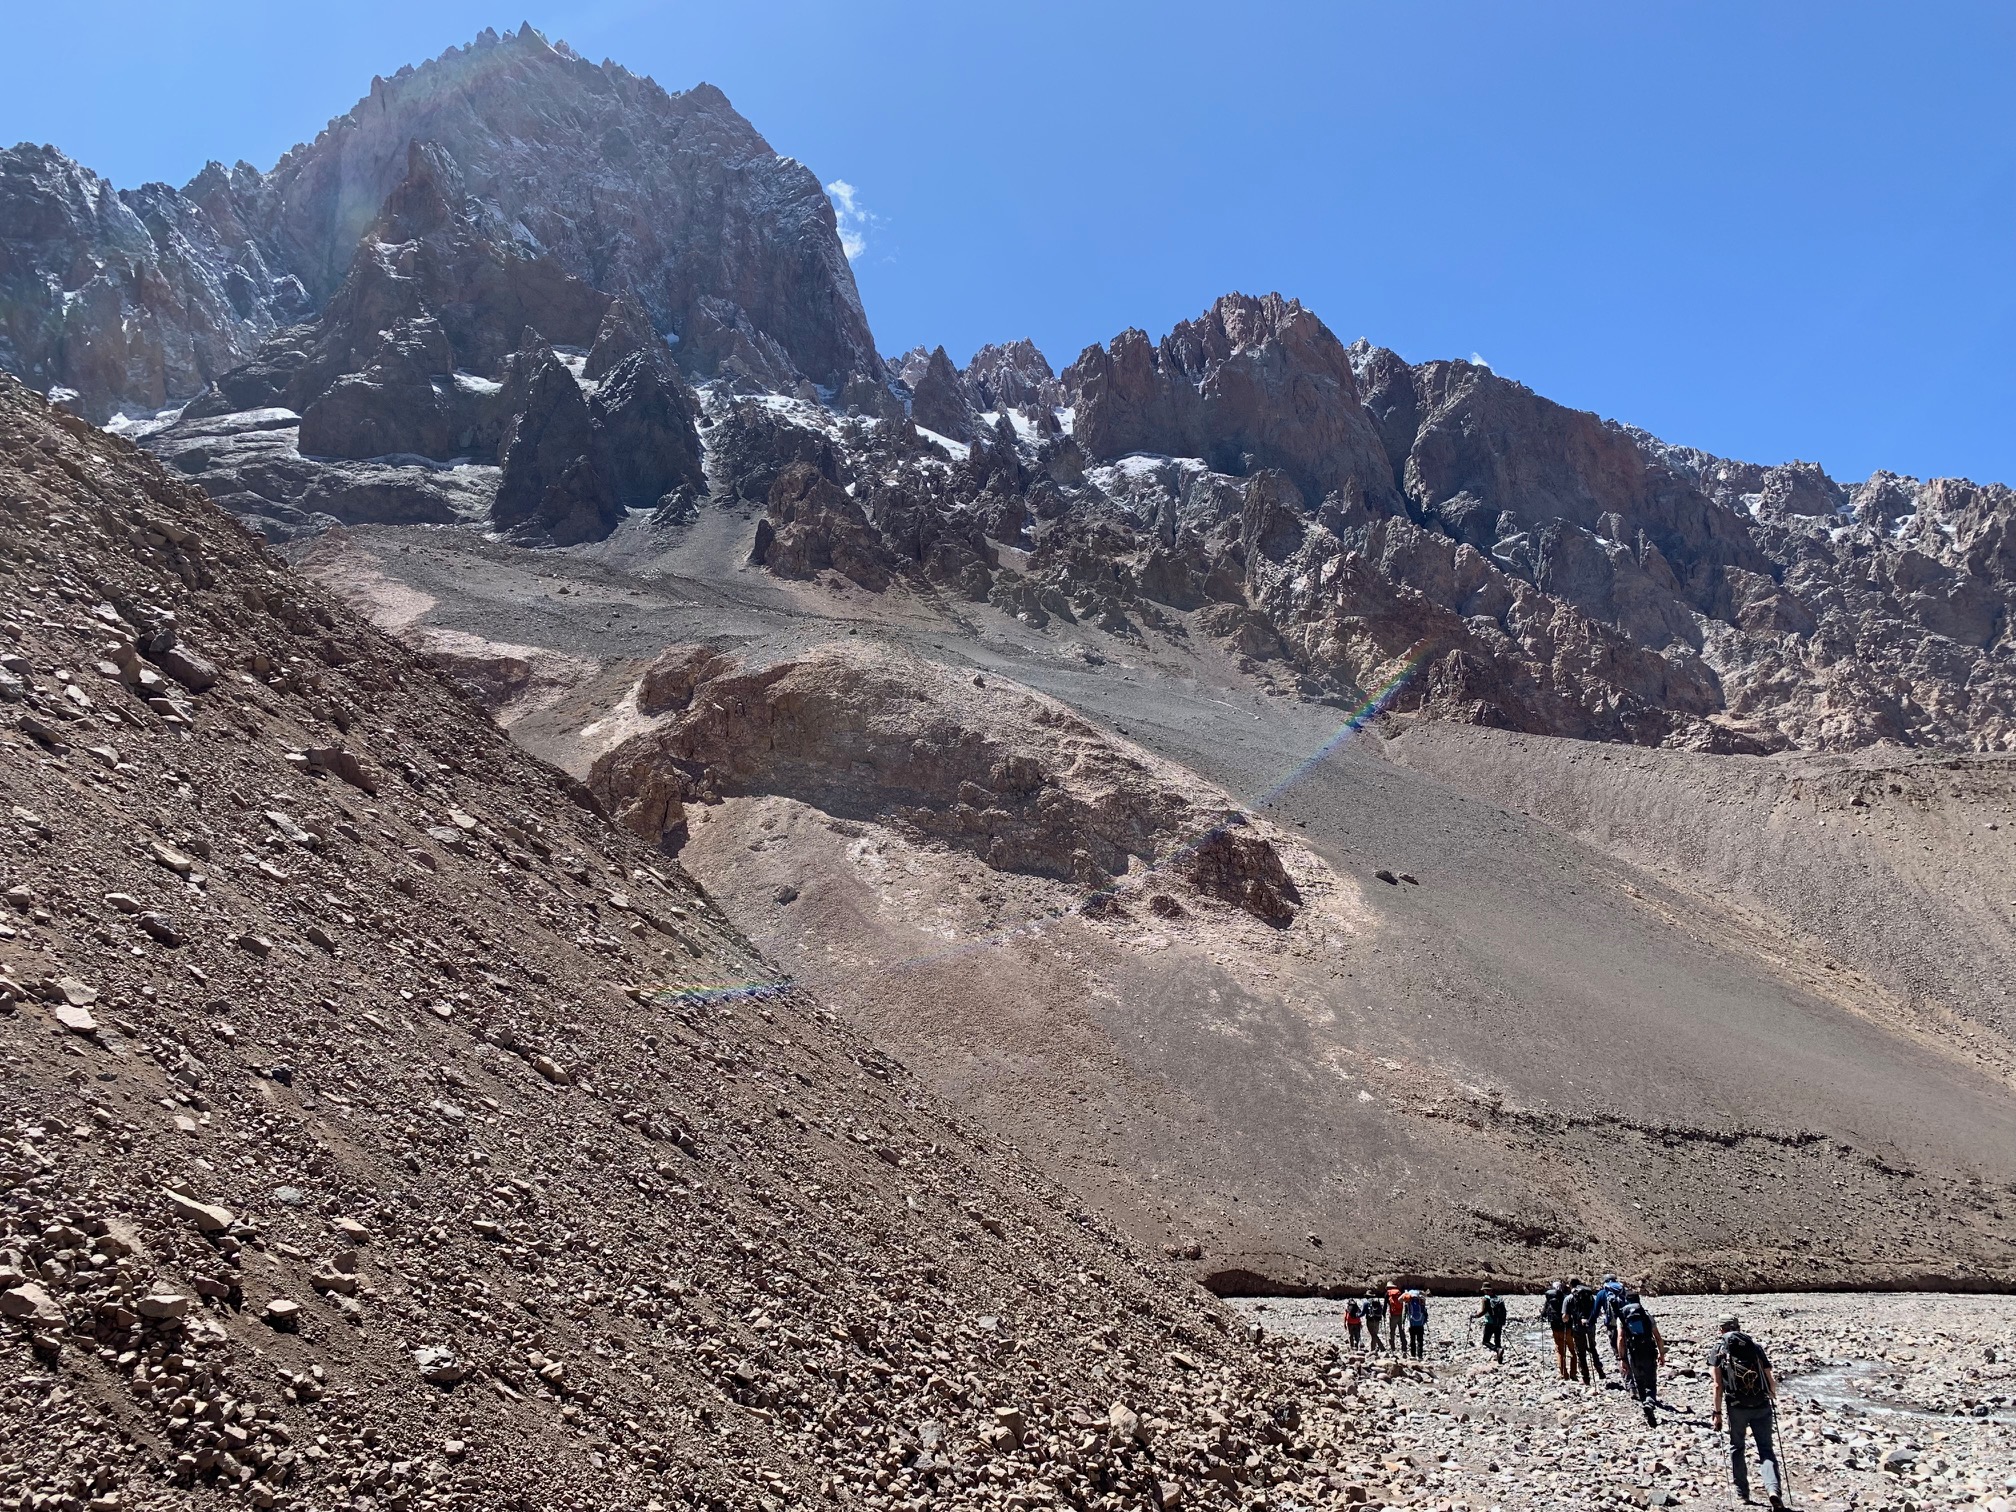
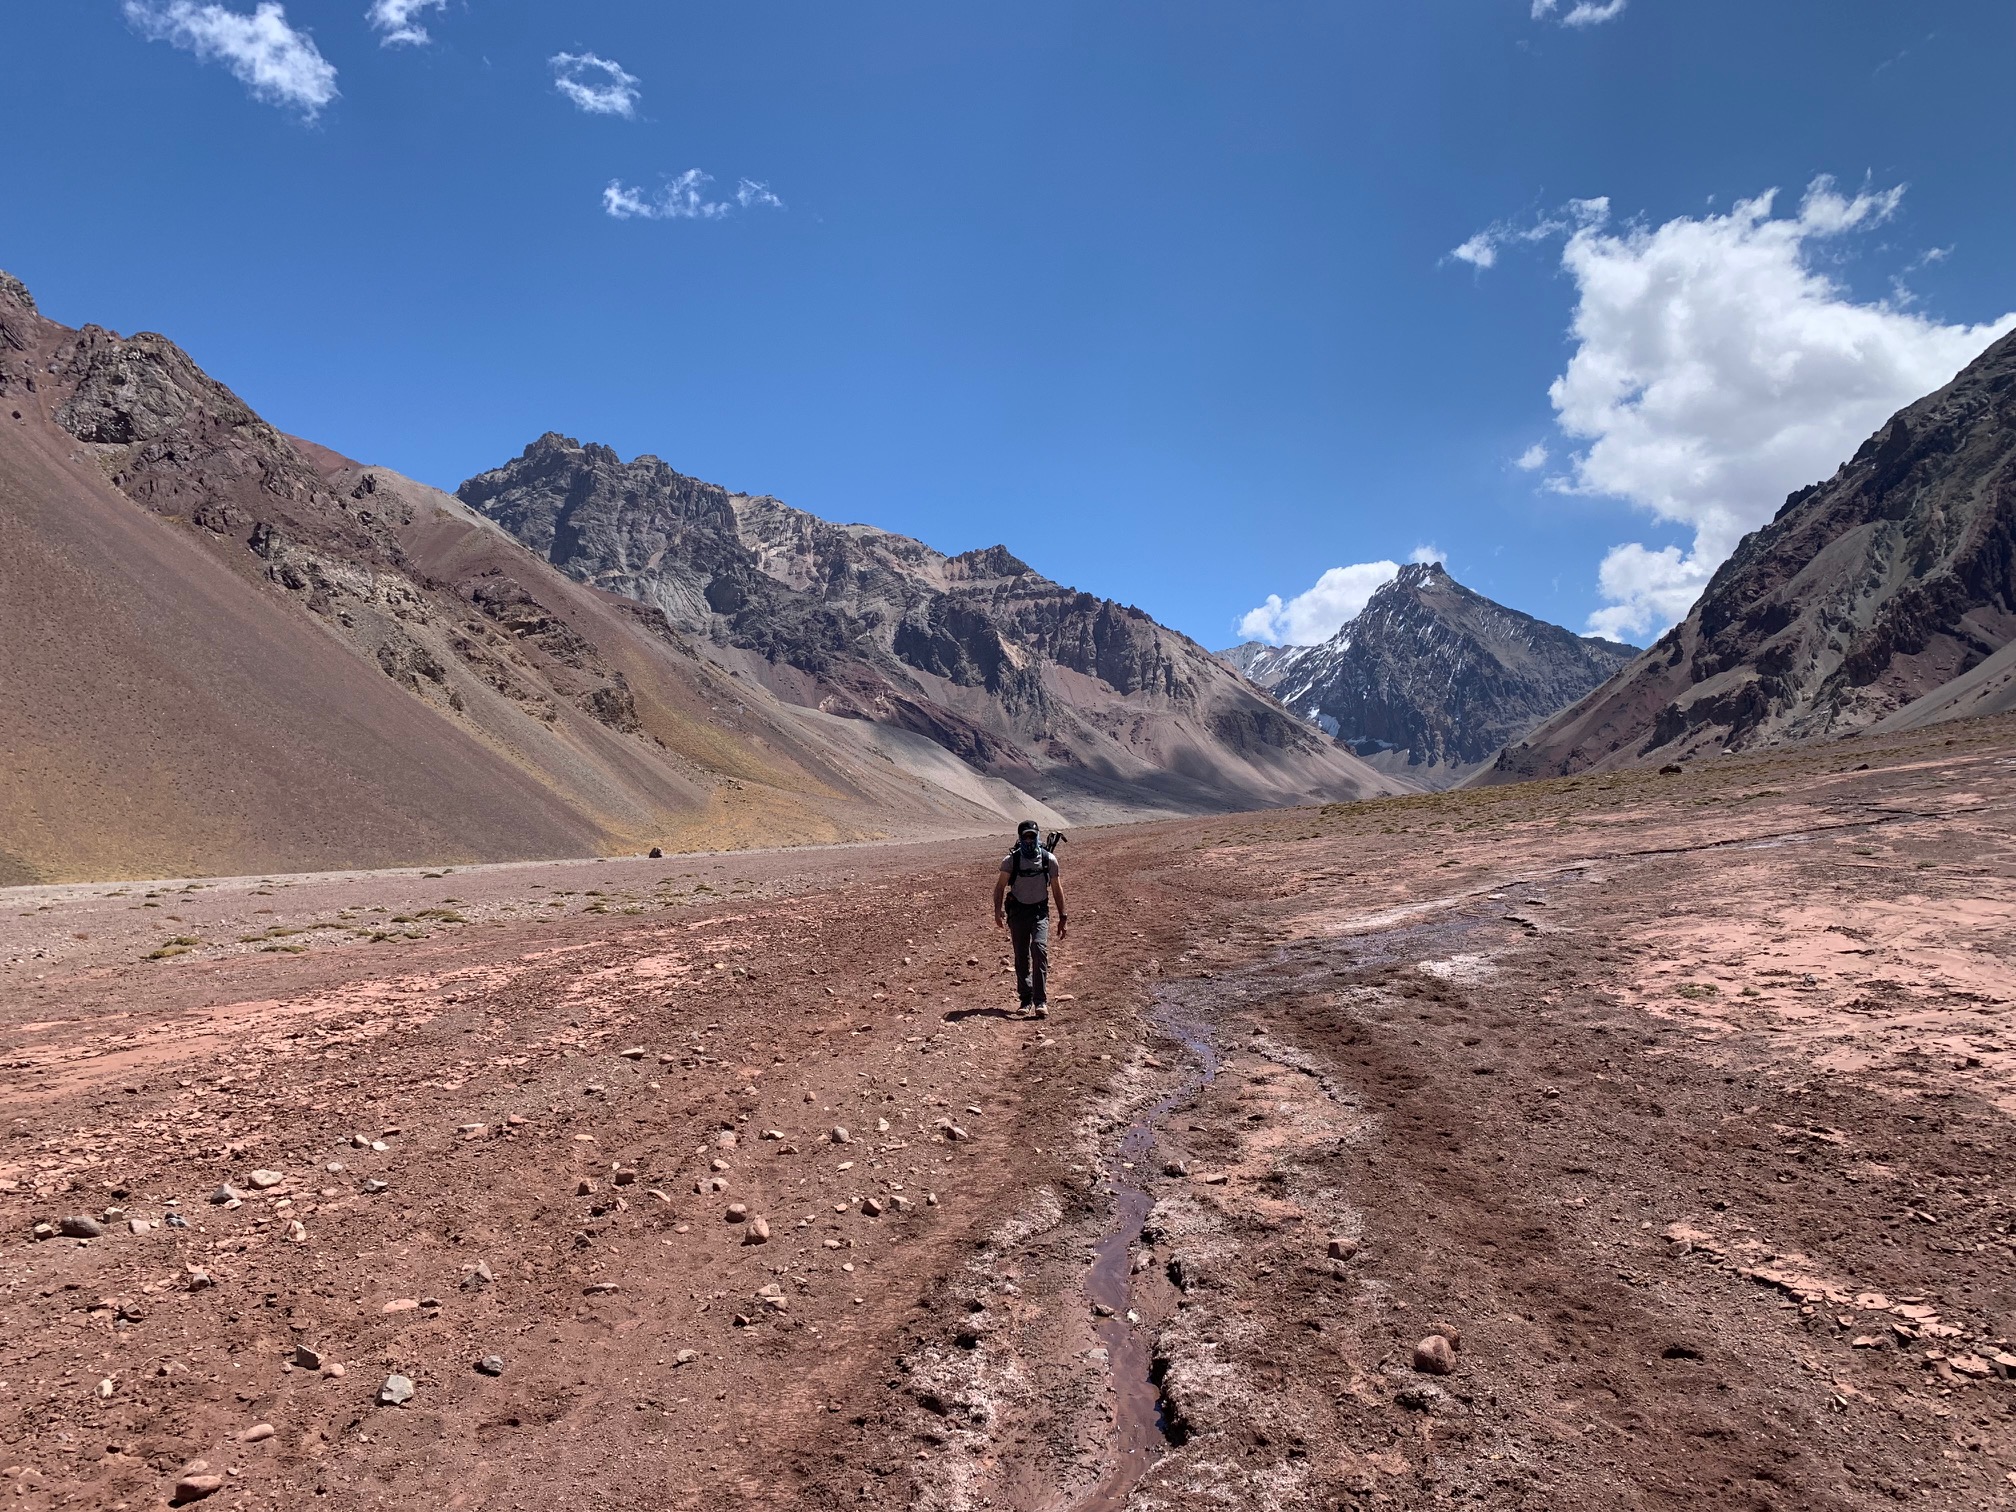
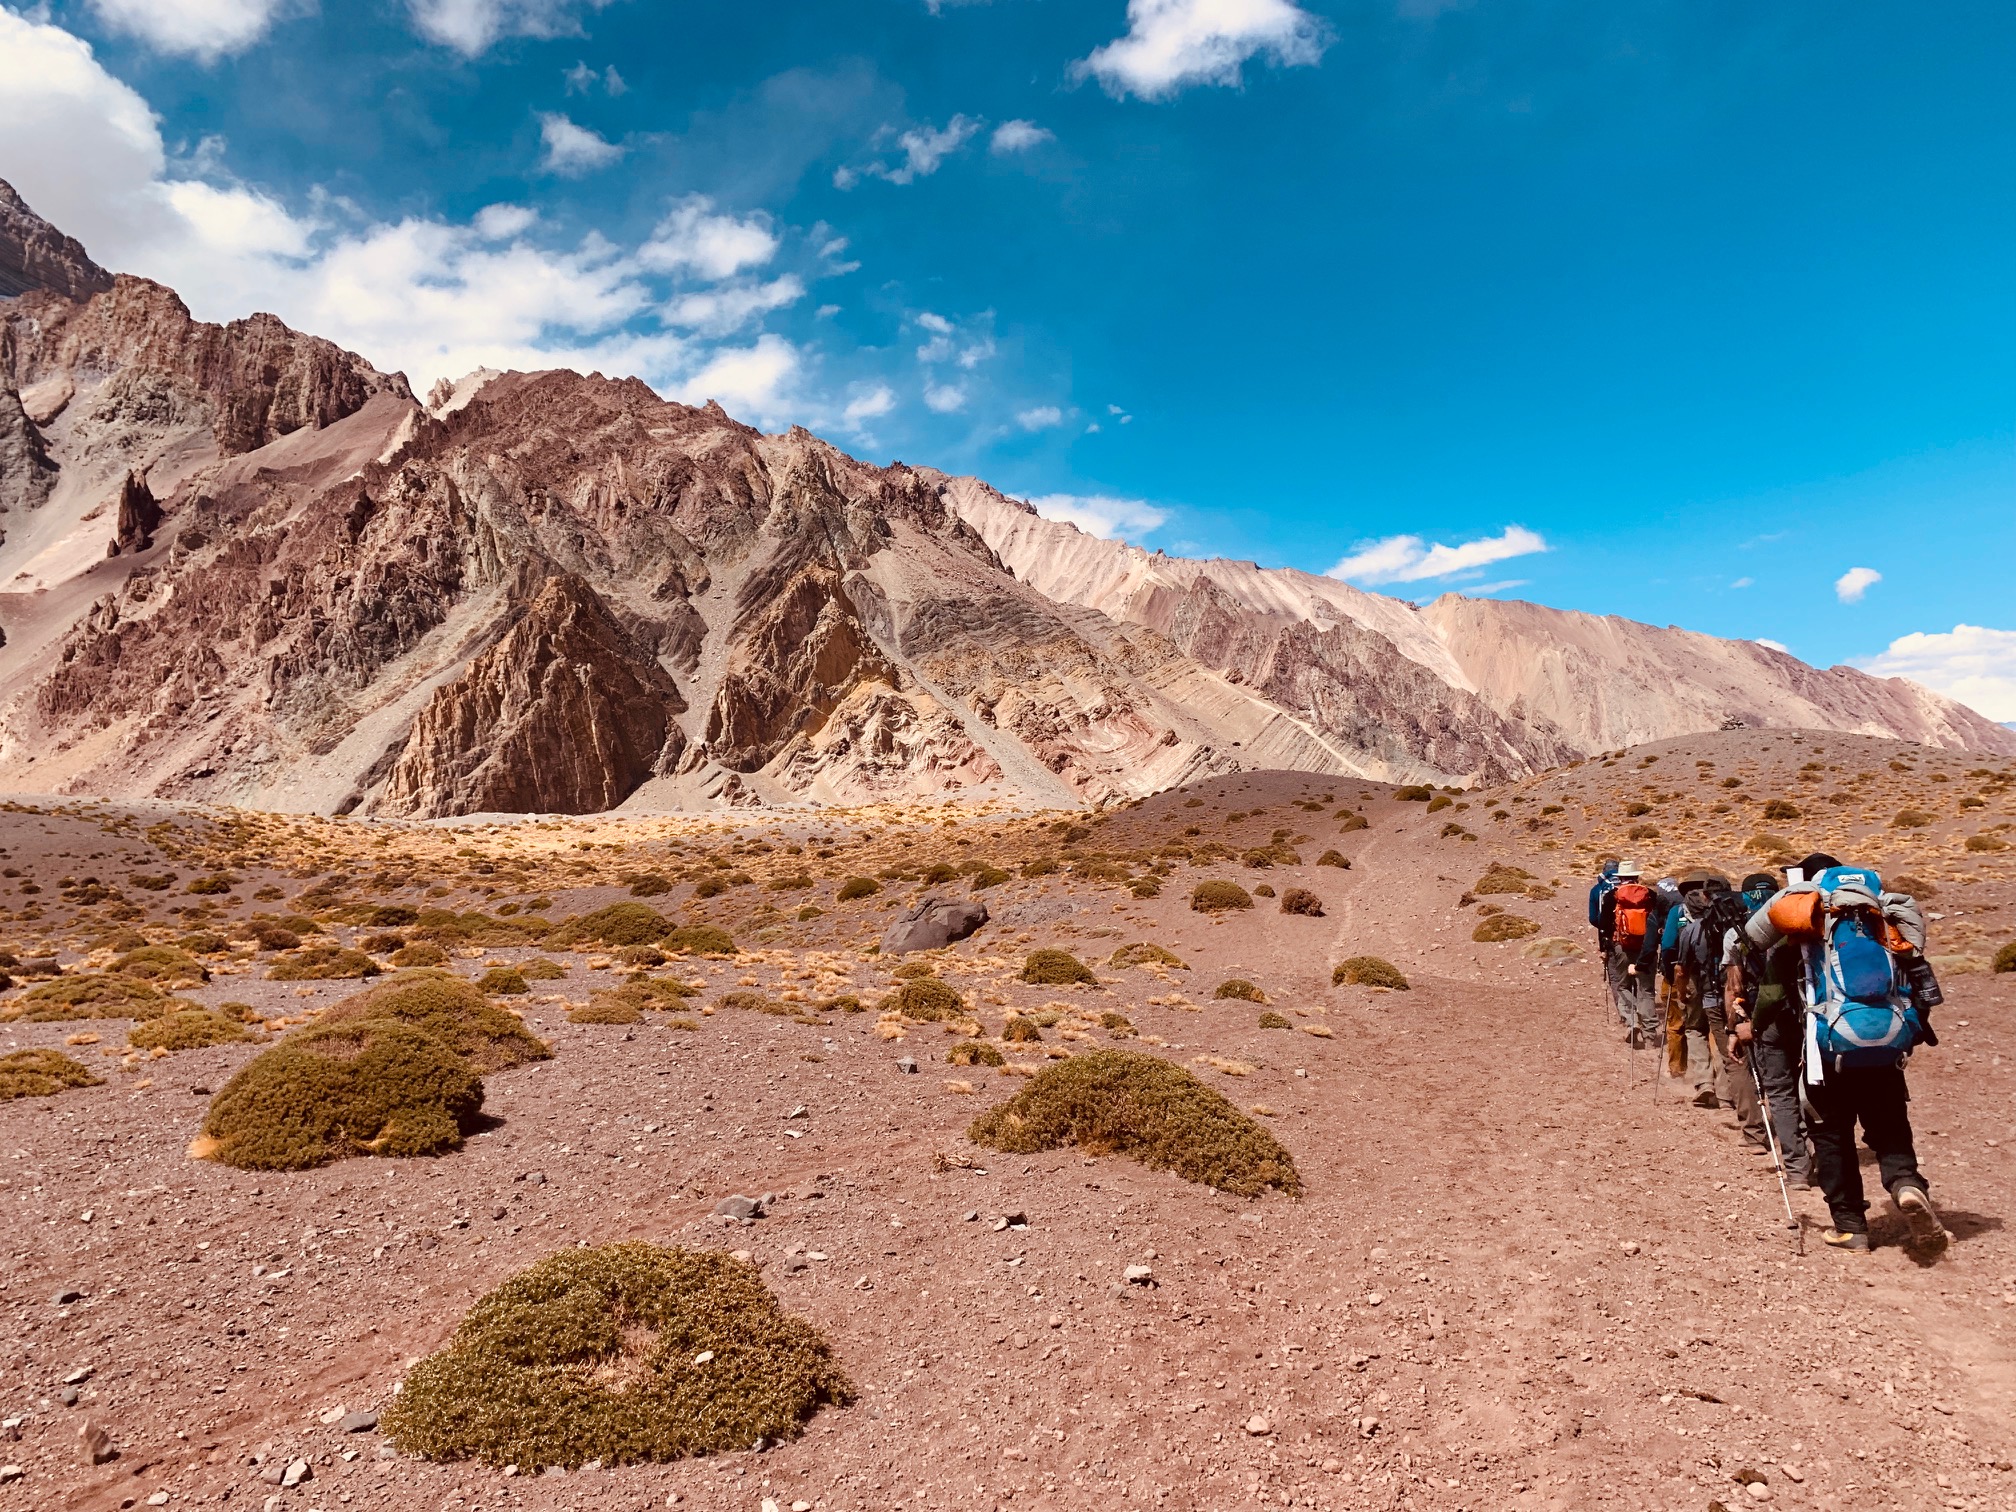
Feel free to review our Aconcagua Itinerary and we are happy to explain why we prefer the Vacas Valley route over the boring normal route for climbing Aconcagua. The Vacas valley offers a more interesting trek into Aconcagua. There are less people on this side of the mountain and traversing the mountain is far more interesting for our groups. Camp 1 and Camp 2 are in more beautiful setting than anything on the normal route up Aconcagua. It is more expensive but worth it to have less people or more interested scenery.
7). All Inclusive Packages
We will pick you up from the airport and bring you to the Diplomat Hotel in Mendoza. Our staff will collect your permit fee and process the permit so you do not have to go and wait at the permitting office. All transport will be in high quality private vehicles. All of our trips include four nights when you can make a summit attempt. This is important to give the team the best chance at the summit.
On the mountain we service two course meals each day on the mountain. Therefore, you do not have to worry about bringing extra food. We have professional chefs in Base Camp on either side of the mountain. We can guarantee quality food throughout the trek because we fury fresh food into our campsites and Base Camps.
9). Small Group Sizes
We only work with small group sizes. The maximum number of people per team will be 12 people. Some of our groups are even less people with only 6 or 8 team members. We also run private groups to Aconcagua. This will therefore give you are more personalized experience on Aconcagua. We recommend this trip in the shoulder season as there can be too many people on the mountain.
We believe the journey is far more valuable than the destination. Building a team throughout our program so you can acclimatize well and experience the best of this region of the world. Our guides will monitor your heart rate and oxygen saturation morning and night to make sure you are acclimatizing correctly to the lack of oxygen.
10). Work with the Experts
Climbing Aconcagua is no easy task and you need the team, support and experience with you and behind you prior to your trip and on the mountain. Contact us for more information on our unique itinerary that we have tried and tested over many years. Read some REVIEWS and book early to secure your space on this trip of a lifetime!
Contact Us Today!
We know exactly what it takes to be safe and successful on Aconcagua. You will have years of experience available to you as you prepare for this challenging Expedition. Pick up the phone or e-mail us today for further information.
We have learned a lot from climbing Aconcagua over the years. Below are the four most important things you need to consider before signing up to any Aconcagua Expedition. I have been lucky enough to climb Aconcagua 5 times and we have led hundreds of people to the summit of Aconcagua. Get in touch today and learn more from our experience.
1). Acclimatization and Spare Days
Every expedition to high and extreme altitude needs specific acclimatization. Aconcagua also requires at least four days when you can make a summit attempt. On my last expedition we had to make a summit attempt a day early. The weather forecast was showing four days of bad weather during our planned summit attempt.
The first time I went to Aconcagua we were on the summit on day twelve. It was way to fast and it was a terrible experience. The guide was moving too fast and made for a terrible experience and lessons learned.
You need to take your time for your body to adjust to the low levels of oxygen. Acclimatization is everything on Aconcagua. As you go higher, the barometric pressure decreases, although the air still contains 21% oxygen, every breath contains less molecules of oxygen.
2). Physical Preparation
Aconcagua requires excellent physical preparation. We are available to help our clients understand the physical demands on climbing at high and extreme altitude. Learn more and get in touch with us directly as we can help you develop a training plans that will work for you. From experience the best way to prepare will be hiking up and down hills building from 500m/ 1,640 feet to 1,500m/ 5,000 feet over the course of months.
Daily training sessions our a must in supporting your longer weekly training session or hike. You should consider using the Stairmaster and develop a weight training plan. Strength building and endurance will be your core training. The Stairmaster carrying weight, building up to being comfortable carrying 20kg/ 44lbs will be important. You will need to carry different weights in different training sessions and we can help you develop this plan.
3). Weather
The weather on Aconcagua is unpredictable and challenging at the best of times. The success rate on Aconcagua is around 30% of people make the summit. There are many factors like lack of physical preparation, acclimatization but the weather, specifically high wind are the reason the success rate is so low.
Aconcagua is only 80 miles from the Pacific ocean, leading to extremely high winds and storms, similar to Denali in Alaska. The wind chills can drop well below zero in Fahrenheit in the better climbing months. This is why you need more contingency days for your expedition.
4). Prior Altitude Experience
Having specific conditioning and altitude experience from years of high altitude trips will only help you on Aconcagua. If you are thinking of climbing Aconcagua we recommend going on a number of high altitude trips prior to signing up to an Aconcagua trip.
Learning more about how you respond to low oxygen environments is critical for your safety on this mountain. You should consider, Everest Base Camp Trek, Kilimanjaro, Mount Elbrus, Island or Mera Peak. Everyone acclimatizes differently and it is important for you to understand how your body reacts in low oxygen environments. The more experience you have the better prepared you will be.
The climbing season on Aconcagua starts in November and continues until the middle of beginning of March each year. In reality there is no set weather window. You could aim to summit on the 1st of February every year and the weather will be different every year. You might find better weather in February than December or January. The key is to have more available days for your summit attempt. Having the correct acclimatization along with spare summit days it really important. Read some reviews from our trips.
Climbing December and January
You will hear people talking about mid December and mid January being the best weather window and this really is, this is not the case. I can tell you one thing that a lot of people crowd the mountain at this time and makes it more dangerous. A lot of people flock to the mountain at this time so they can maximize annual leave from work. In saying this, December and January are great months for climbing Aconcagua. We recommend climbing when there are less people.
Climbing Aconcagua in February
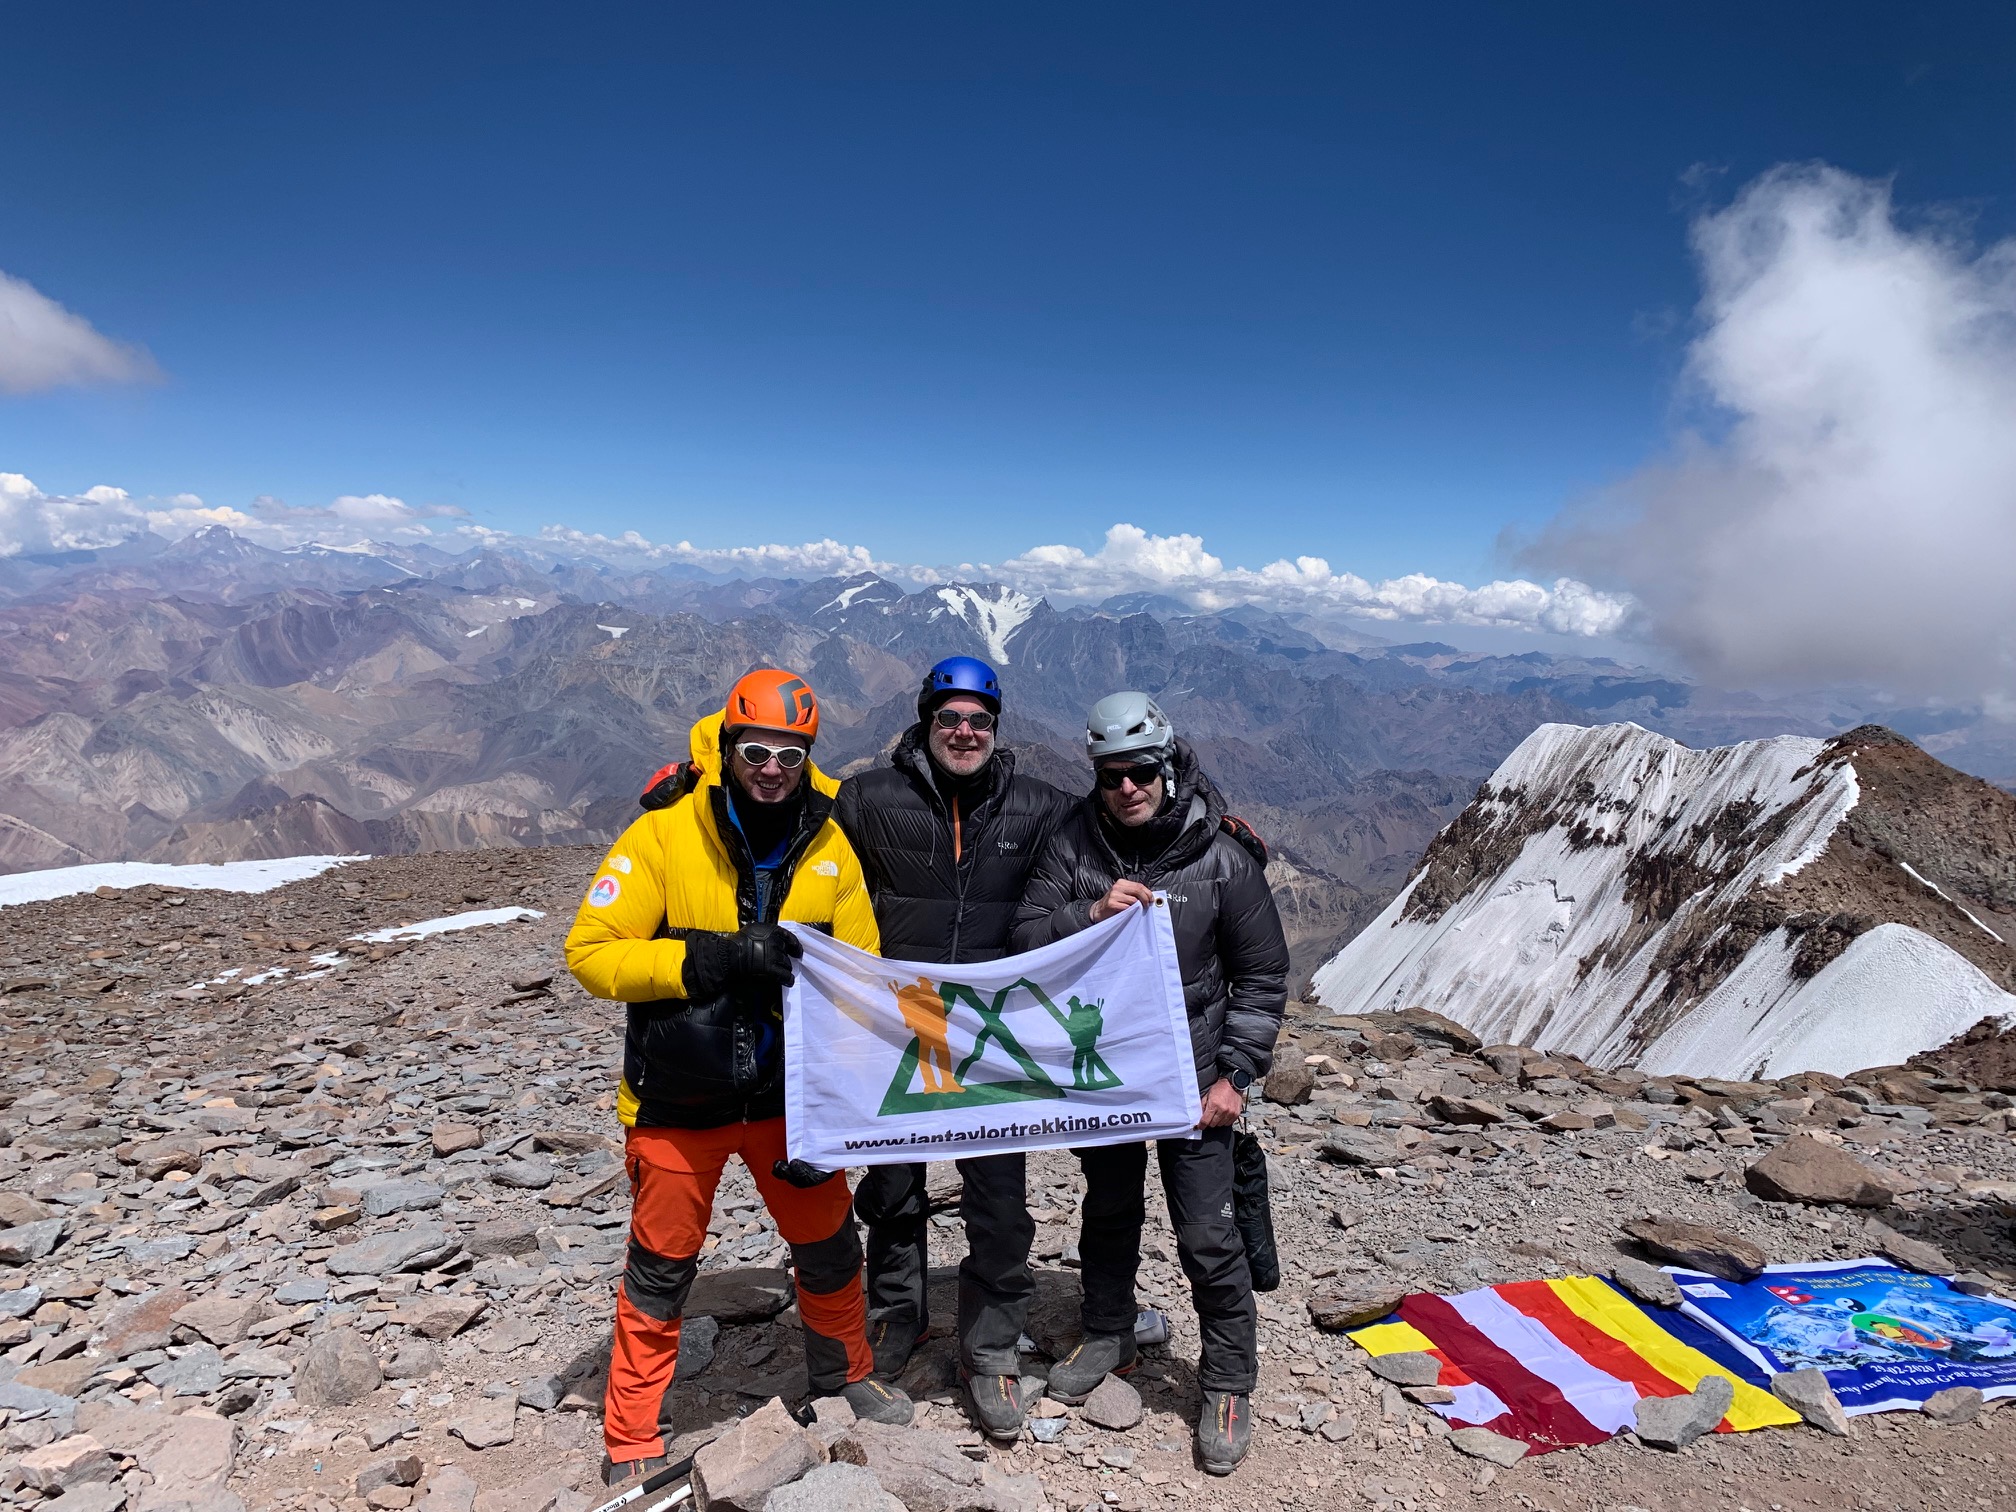
There have been years where it has been impossible to reach the summit in December and January on specific trips. A good few times I have been there in February and standing on the summit with liner gloves and fleece. This year one of our teams reached the summit on the 28th February. There was no wind and it was 37 Fahrenheit/ 3 Celsius on the summit.
Access to Water on Aconcagua
There can be challenges gaining access to water high on Aconcagua. The Vacas Valley Traverse Route has better access to water than the normal route later in the season and all the way into February.
Snow disappears off Aconcagua very quickly even after a big snow fall. The wind and sun do not help. Ice is melting very quickly on Aconcagua. The difference in the past 15 years of going to this mountain is immense. Sometimes we have to carry extra water from Camp 2 to Camp 3 before the team can move into a position to make the summit attempt. It is normal to see big snow falls disappear within a matter of weeks on the mountain. By the time we come to February and March the mountain can be complete bare of snow.
When are There less people on Aconcagua
Choosing the right month for your Aconcagua expedition need some consideration. You also need to consider the number of people on the mountain and the permit cost. The largest number of mountain climbers will be on the mountain in December and January. Most of those climbers will join via the normal route via Plaza de Mulas Base Camp. If you don’t want to climb surrounded by crowds of climbers, try to avoid arriving mid December to mid January. We recommend the Vacas Valley traverse to avoid crowds.
Permits and the Right Month
Firstly, high season permits are more expense and something to consider. The cost of permits has risen significantly over the years. We used to pay USD $250 per person the main season. Now, at the same time the permit can be USD $950 depending on the exchange rate at the time you go. Off season permit is around USD $730.
In 2020 the off season permit cost our clients USD $630 per person with the exchange rate. The challenge with permitting is that there maybe be no more high season and no low season. Be prepared for permitting, costs so change at any time.
We have access to the best permit rates and we have a staff member manage all logistics around permits. You just need to show your Helicopter evacuation cover and card and bring the permit fee in cash and we will do the rest.
Contact Experts
Before deciding the month you want to go to Aconcagua contact us and we can chat with you. We only run quality run trips working with a great locate team to provide the highest level of safety. We look forward to helping you reach your goal of standing on the highest mountain in South America.
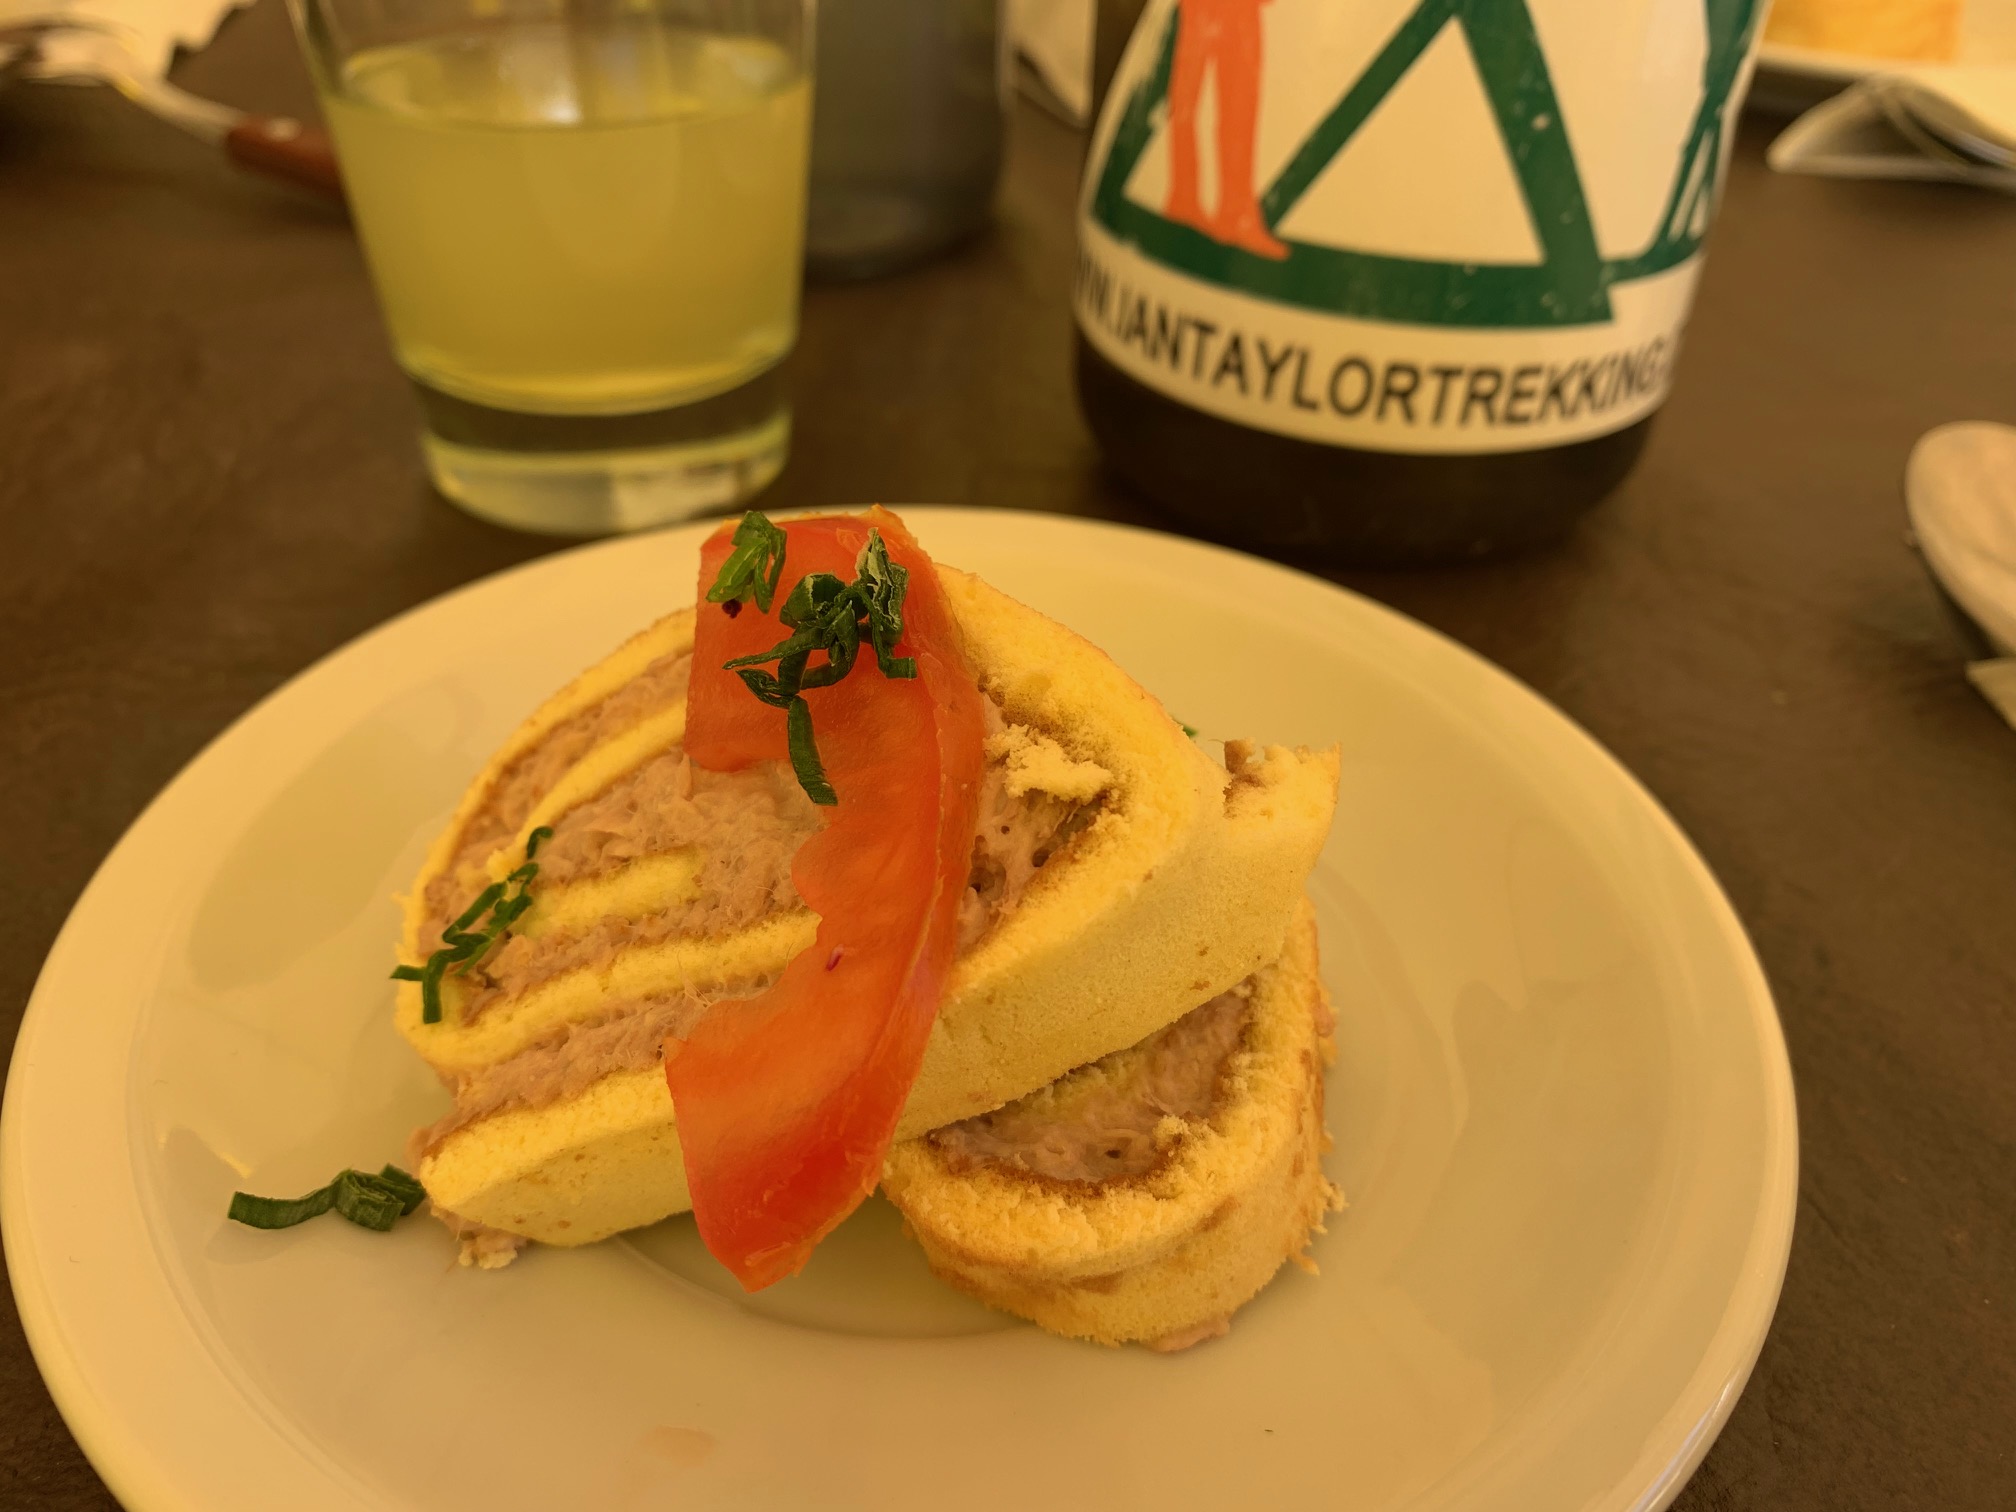
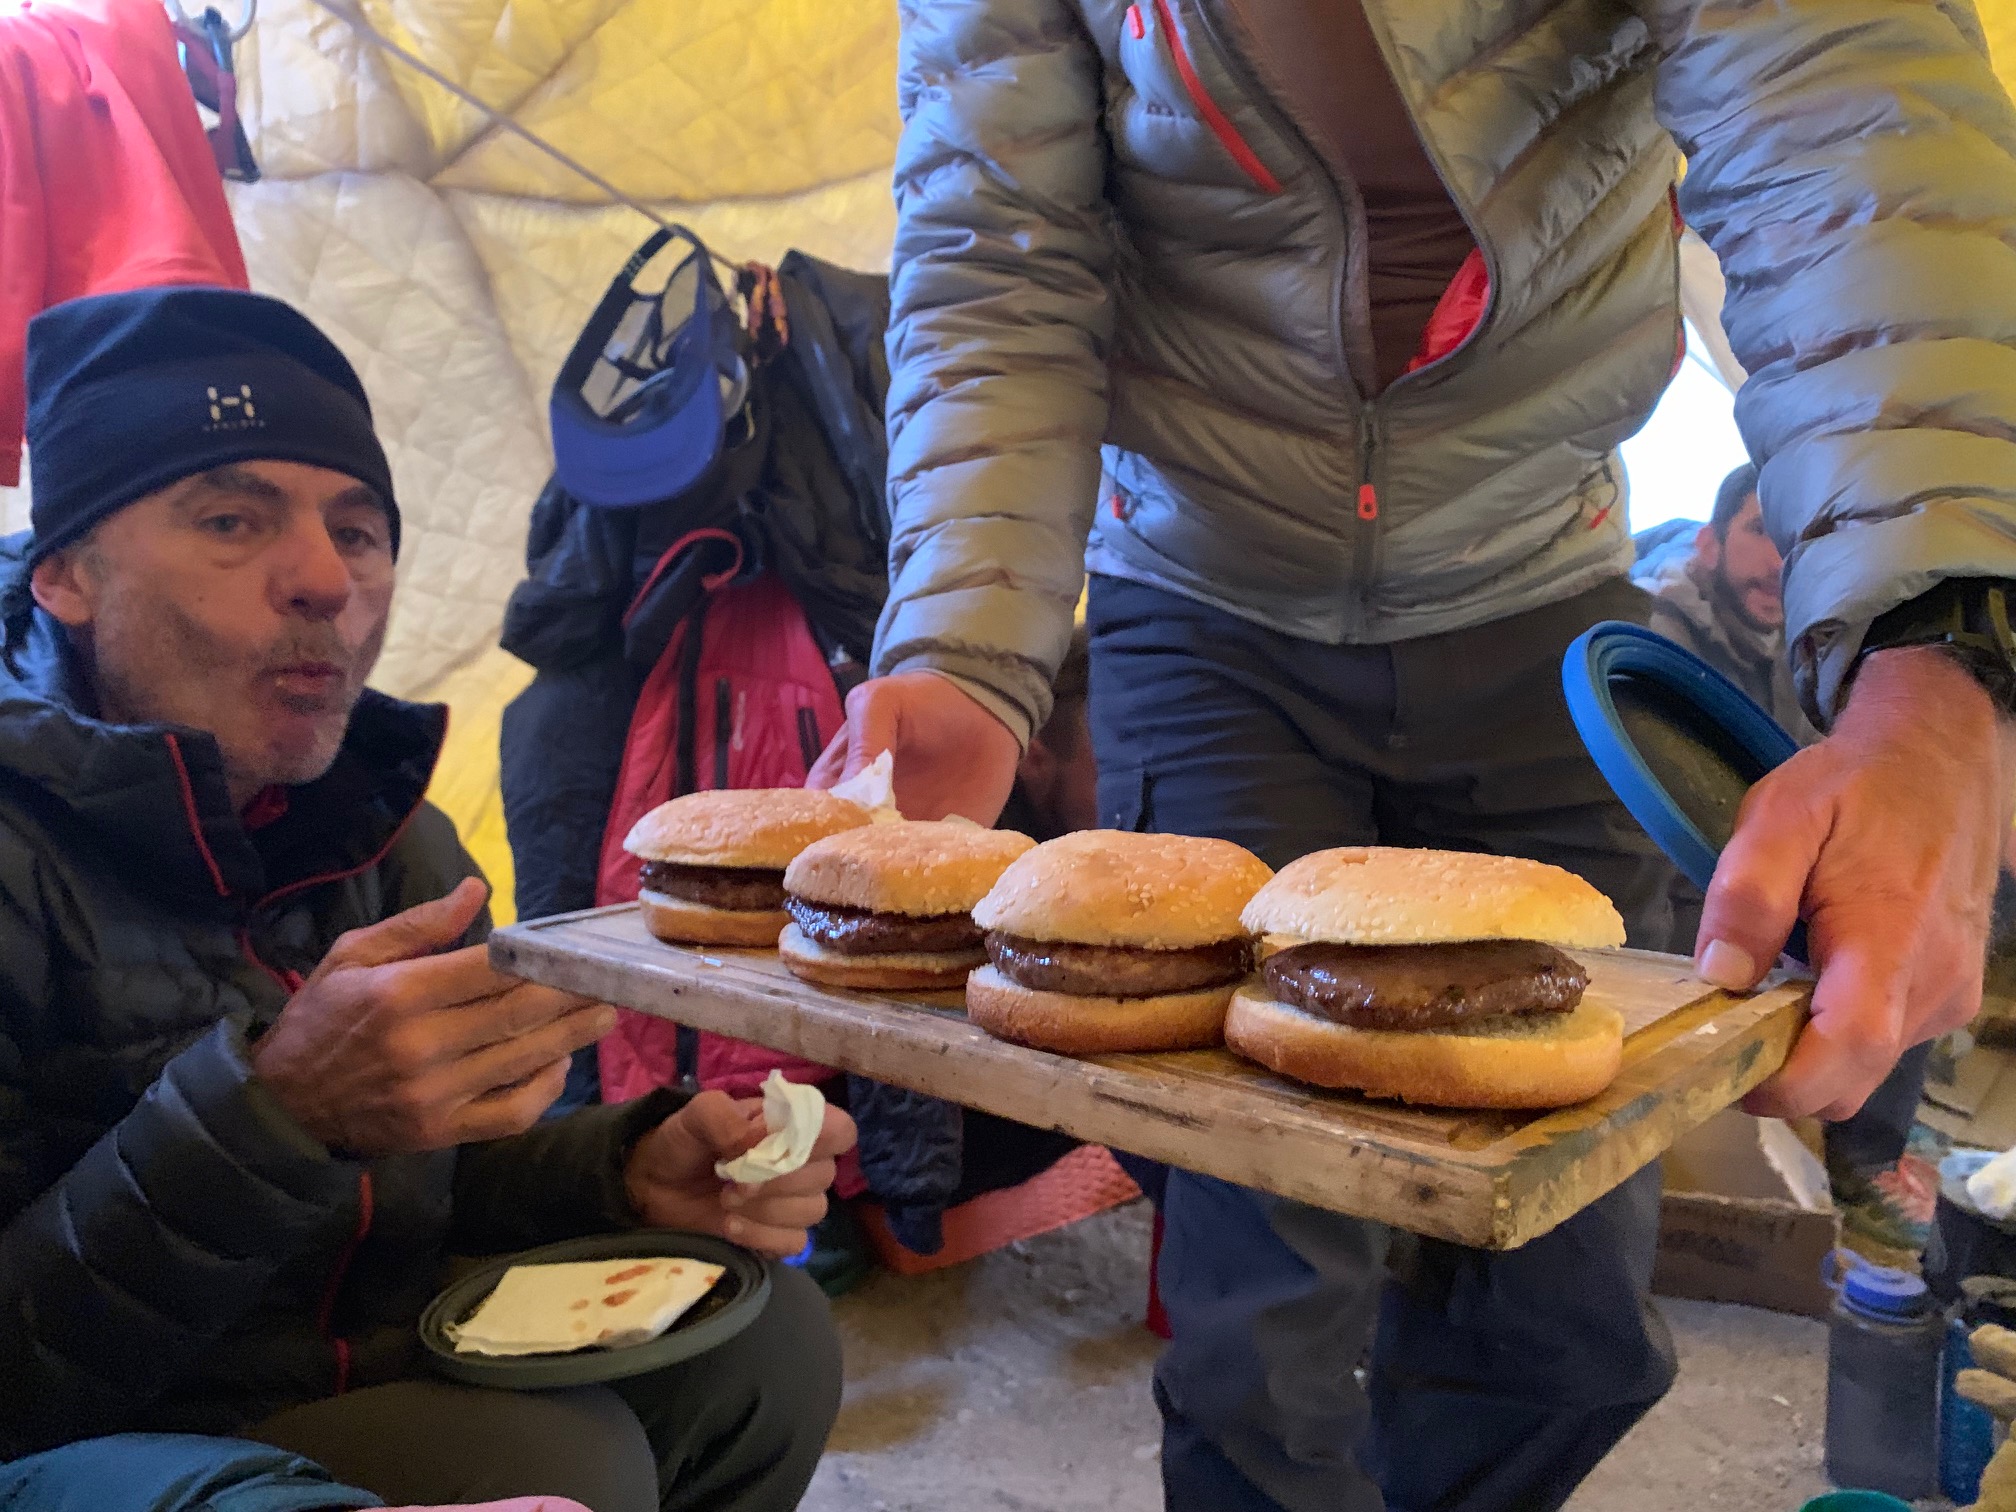
Depending on the service you are looking for, you will find a wide range of food options on an Aconcagua Expedition. We only run quality trips with professional service and quality food. Aconcagua can be a challenging place, so some home comforts are important on our trips.

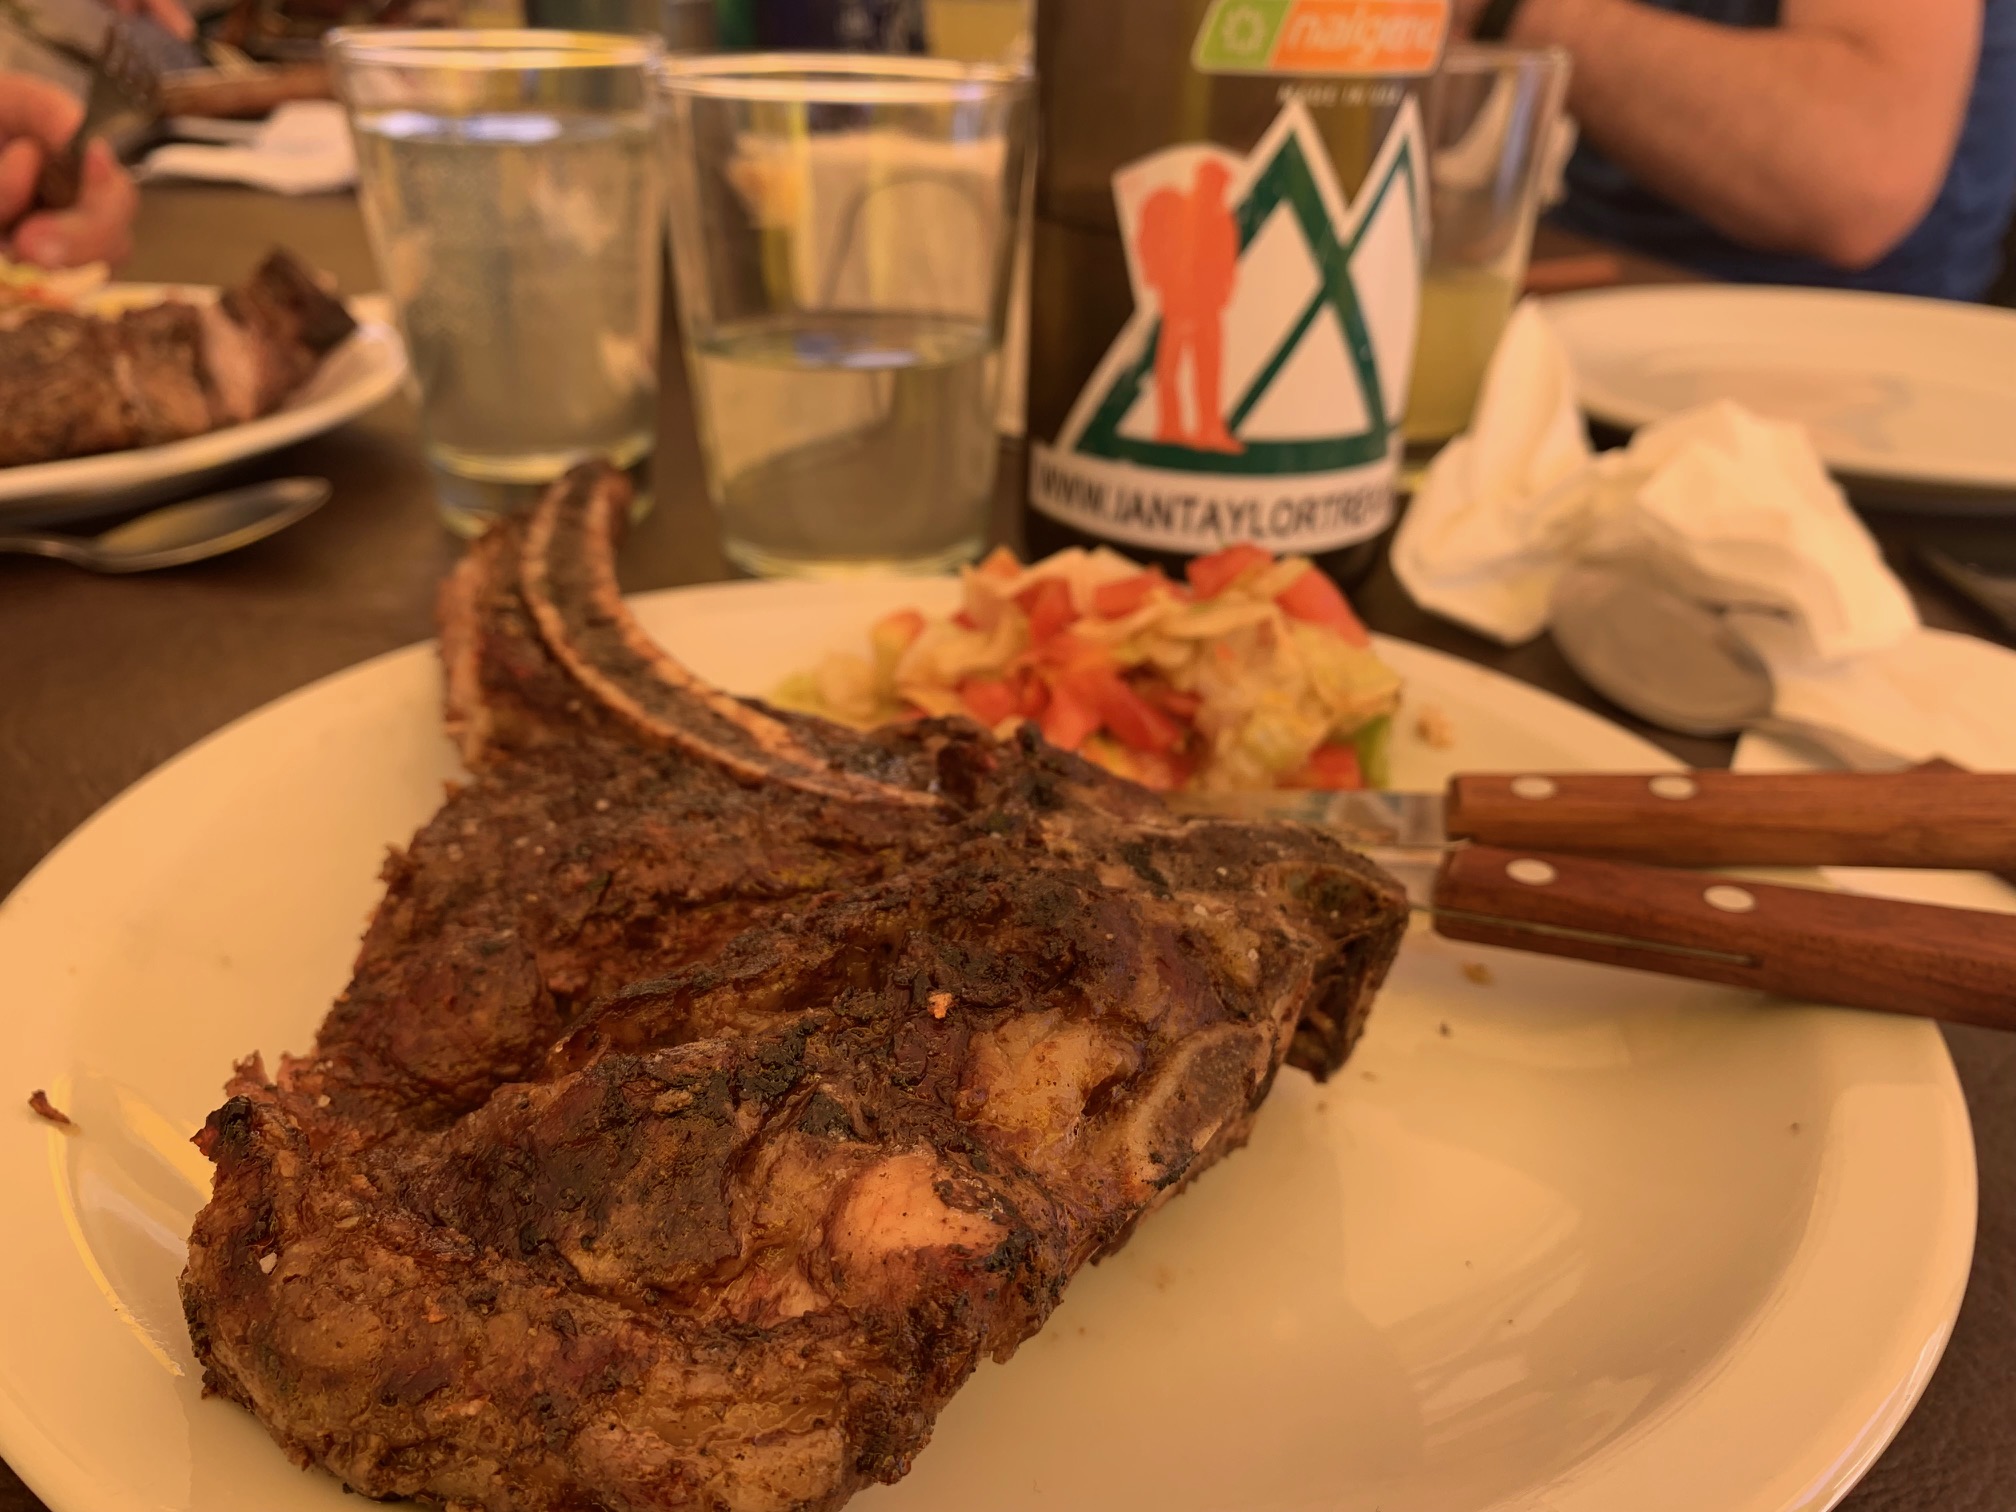
Quality Food
Your choice, but we like to have access to better food and service for our Aconcagua Expeditions. For us this is so important for your enjoyment and comfort. Quality food also adds to a successful mountain experience. We have helped hundreds of people reach their goal and they pick Ian Taylor Trekking for a quality run trip. Read some reviews from our trips.

Picking the Right Trekking Group
Ian Taylor Trekking work with professional local guides to offer the highest level of service on Aconcagua. Here are 10 reasons to pick us for your Aconcagua trip. We have control over the service we offer on the ground and have developed the service over a number of years. We have extra days 3/4 for summit attempts and we provide the highest level of equipment and food throughout the expedition. Check out all our important pages for climbing Aconcagua.
Information on our Menu
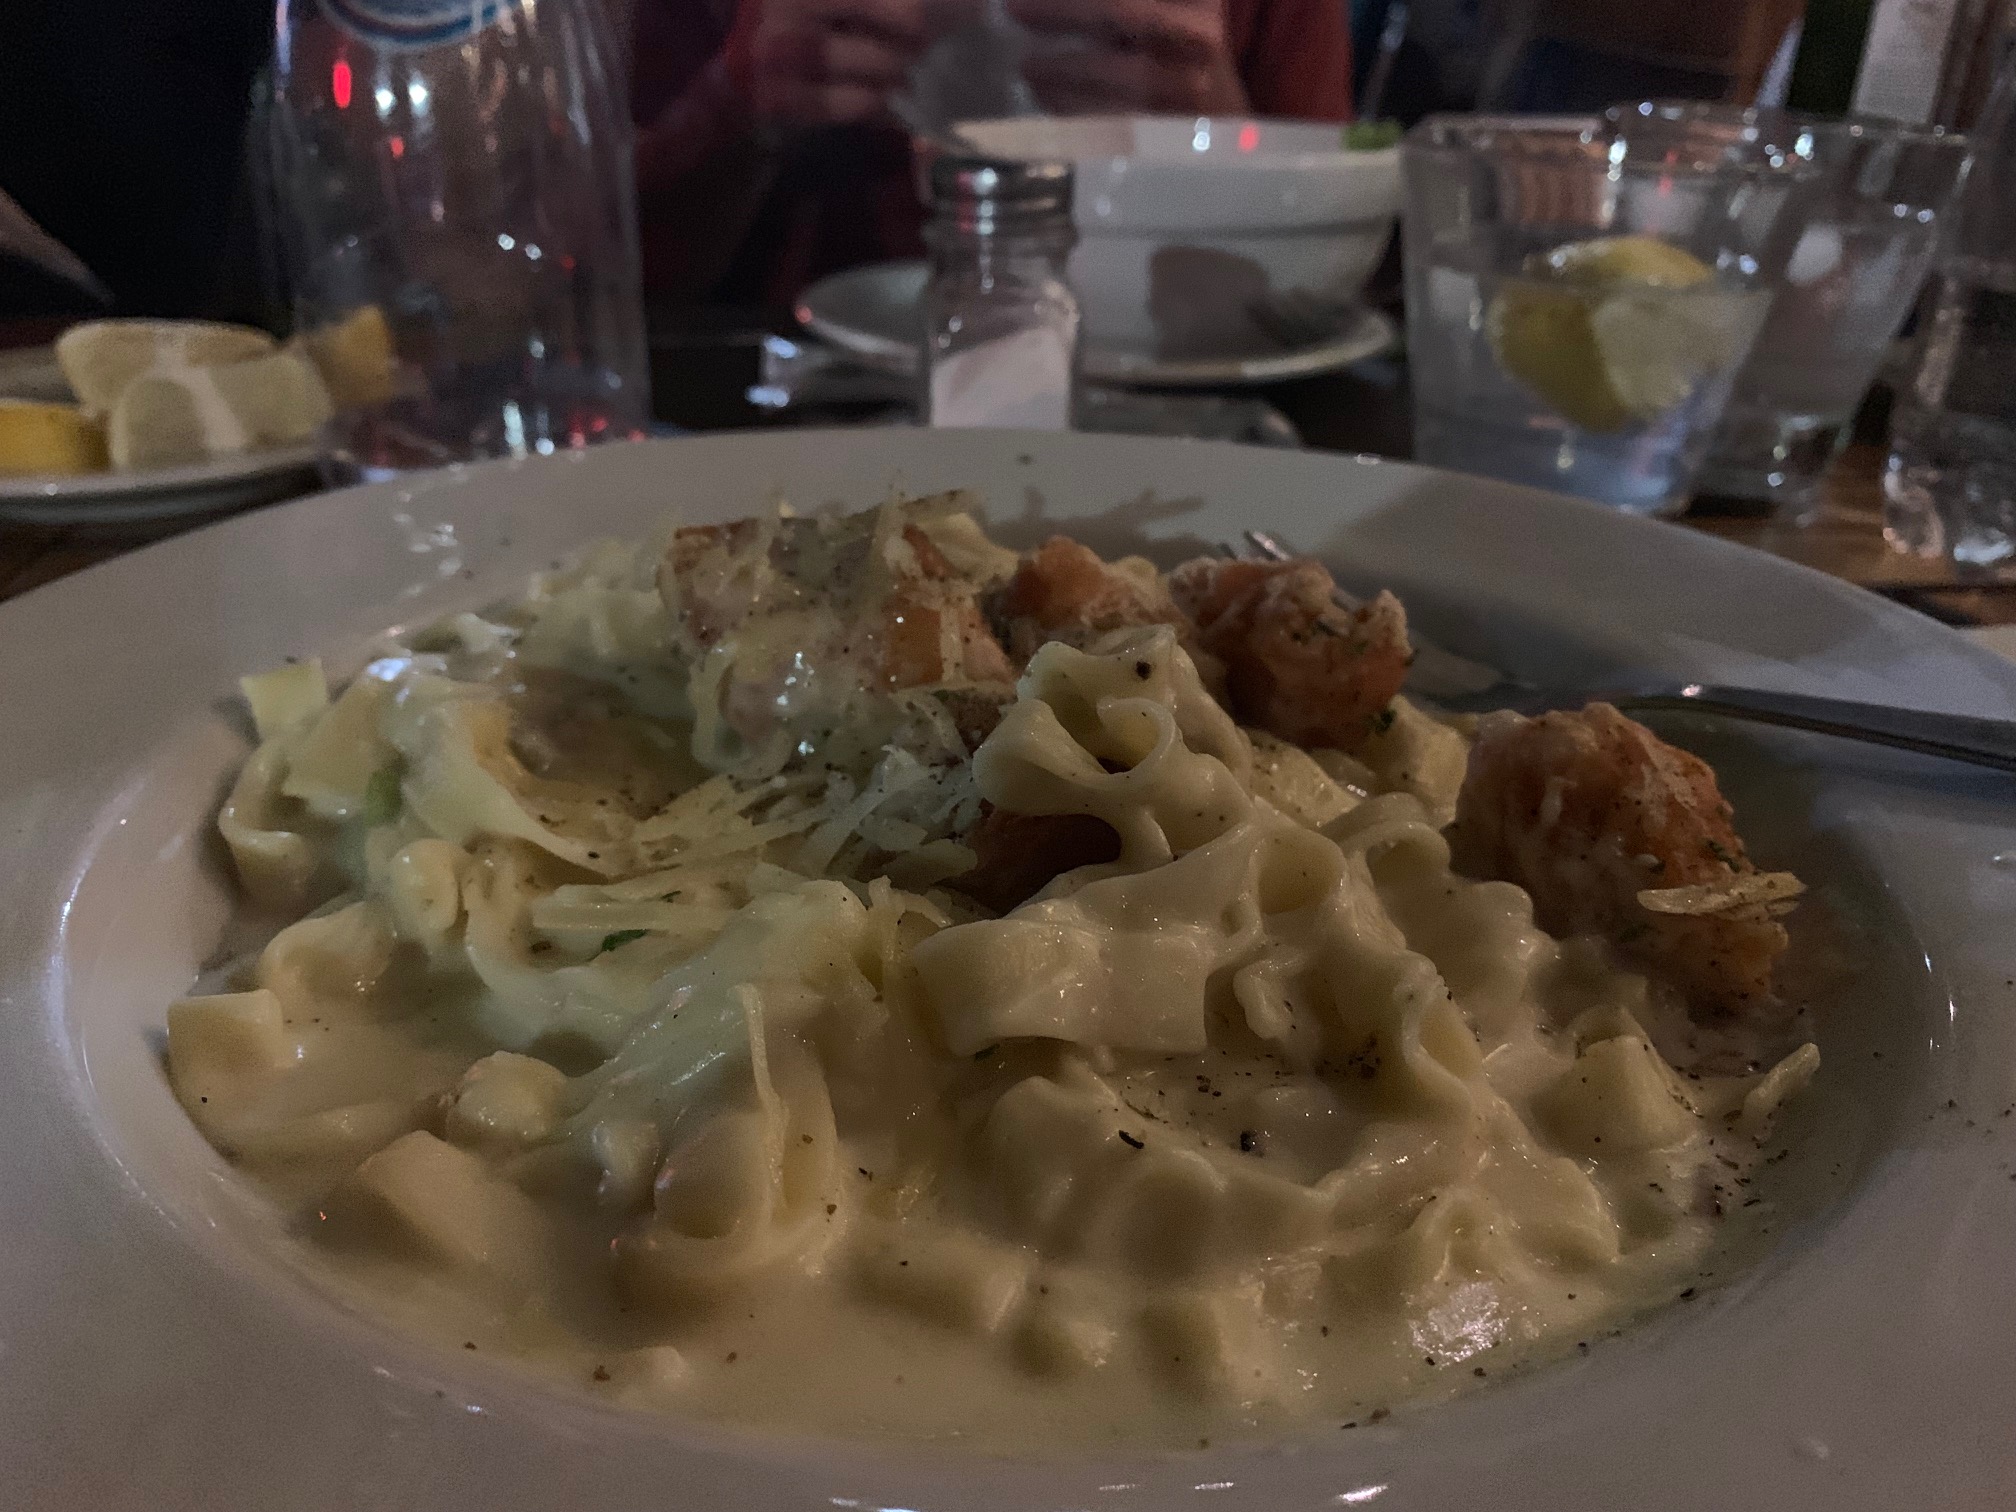
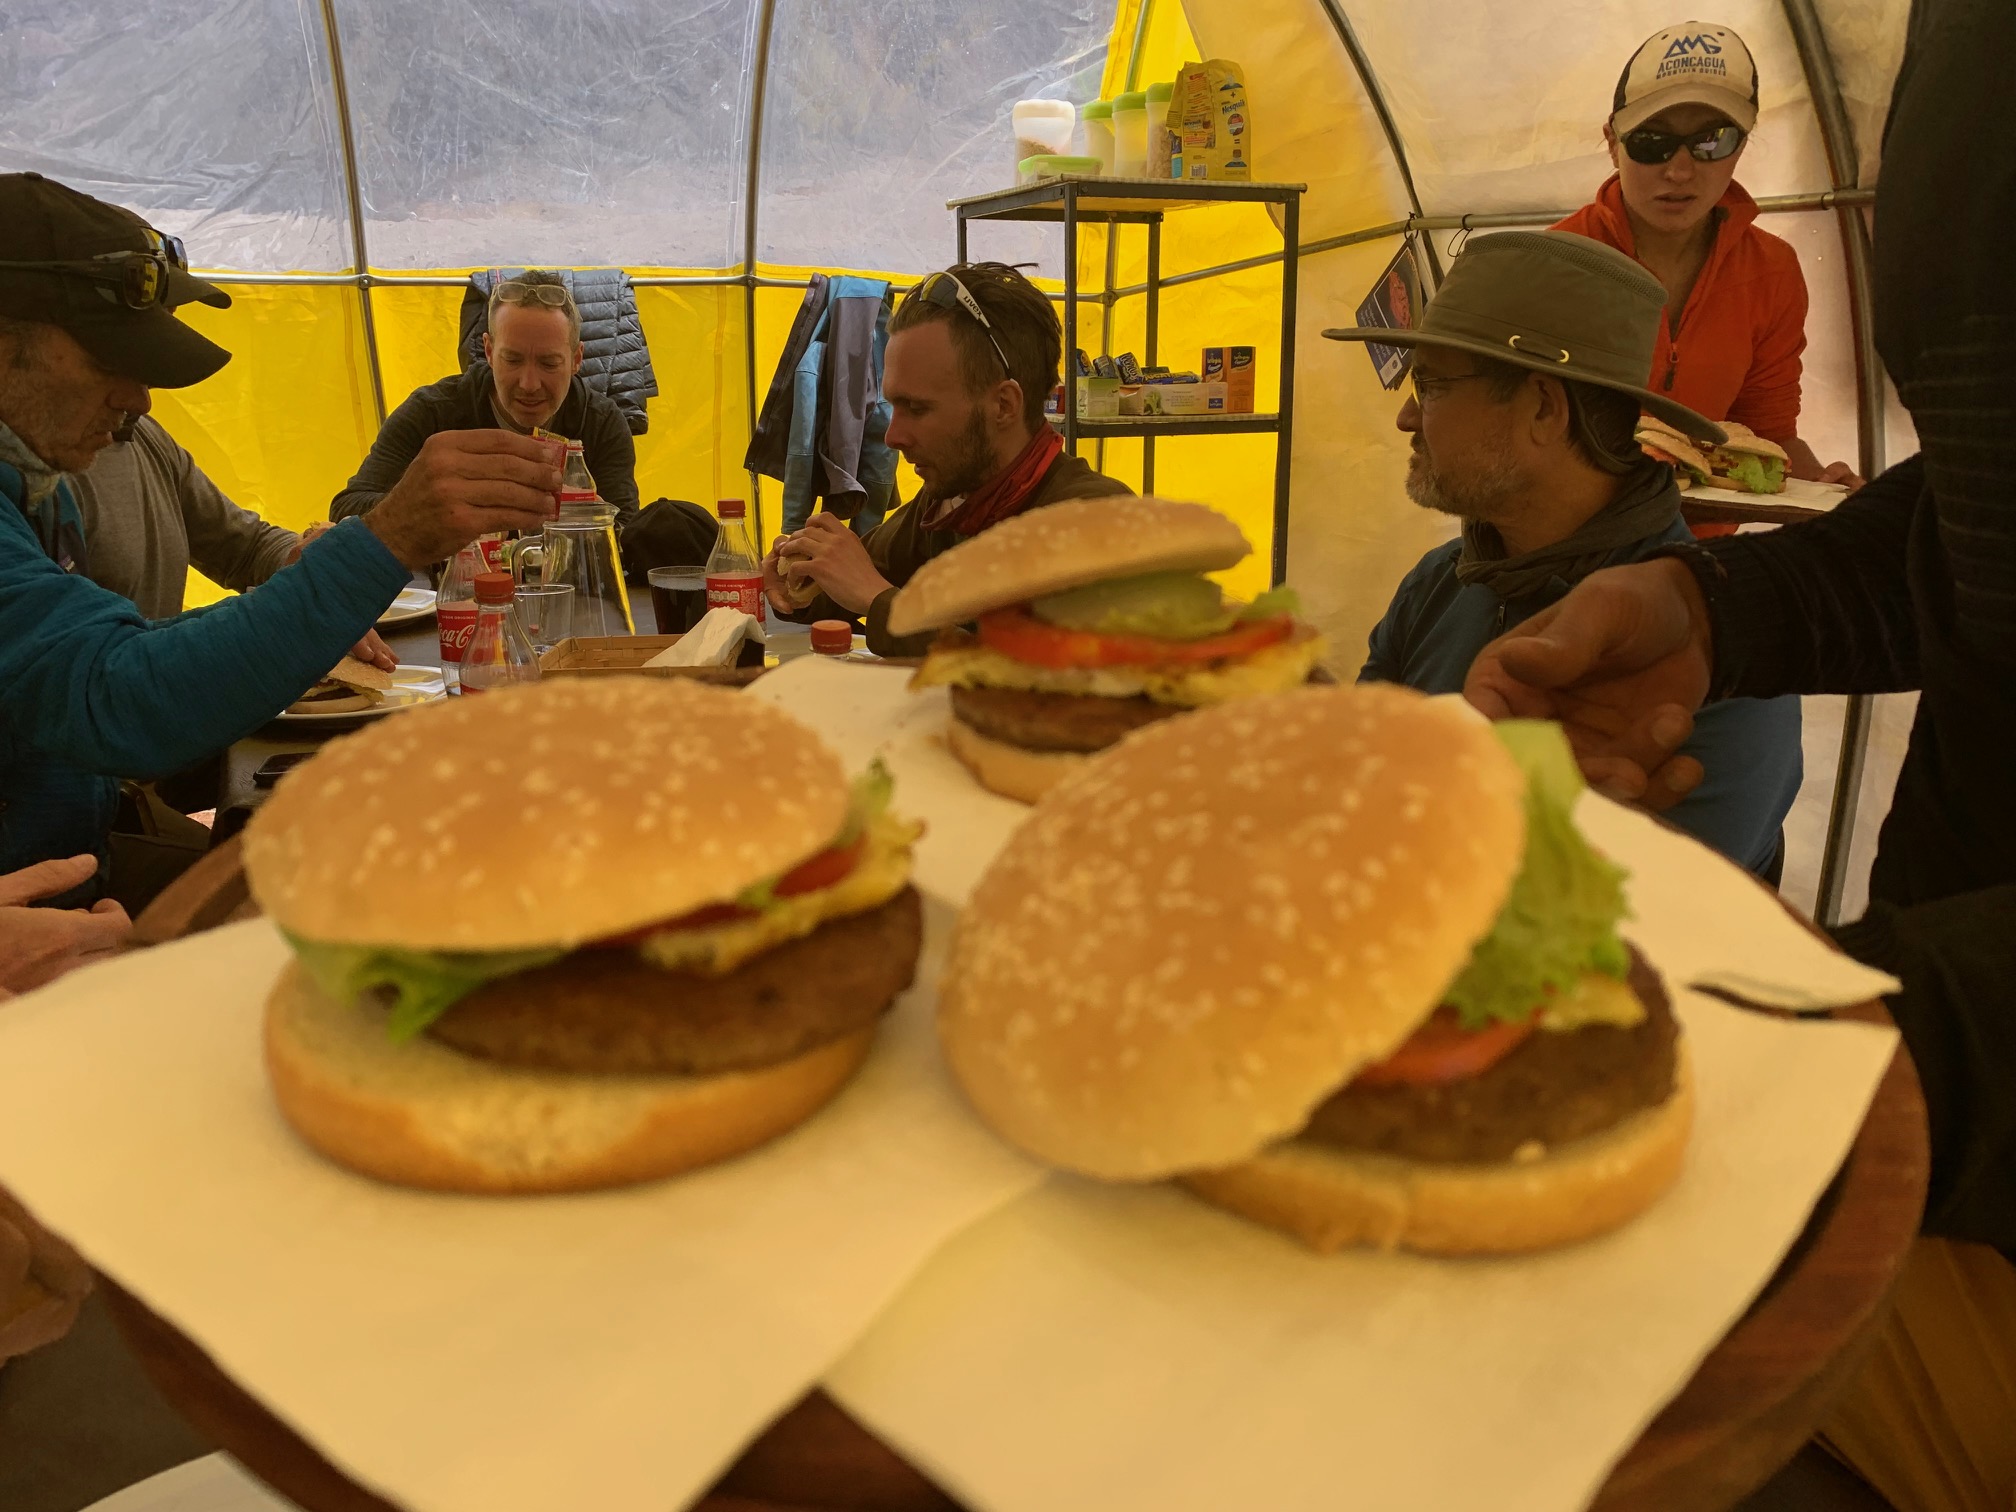
While you are in Aconcagua Base Camp you will be served 3 course meals. We vary the menu with steak, chicken, pasta and vegetables. We serve a balanced diet plan and always thinking about the food served for the level of activity on a given day. When we are taking lunch higher on the mountain we give you a packed lunch with cereals, cookies and sandwich’s. If you like Pies, hamburgers, pasta carbonara, Sausage and mashed potato’s we have it. Quesadillas with cheese and ham, ramen with noodles and rice and vegetables. Finally, we don’t cut corners and give you the best service and experience on your journey to the summit of Aconcagua.
 Quality Run Treks Through Experience

Ian Taylor Trekking have been working on Aconcagua for 12 years now, building the best experience and service possible with local partners. We want you can experience the journey of a lifetime and enjoy every day of your trip. If you want a personal training plan, the best acclimatization and hang out with our amazing staff and team then get in touch today. Sign up and start getting prepared, we have years of Aconcagua experience built into every trip. We are happy to share our knowledge to help you reach the highest point in South America.
Safety on The Trail
Aconcagua can be a very busy place. Learn more. This is why we like to run trips at very specific time. We recommend early December late January and February for climbing Aconcagua. Designing our itinerary, our primary goal is to keep everyone safe. We want people to give themselves the best chance at successfully reaching the summit and having more summit days available in case of bad weather. We have 4 guides for every group of 10 climbers high on the mountain. This will give you a safer and more enjoyable experience on the trail.
Trek with Ian Taylor
We run about 4 planned group trips to Aconcagua along with, 10 private group trips per year. Ian usually leads an Aconcagua trip every two years and booking well in advance is highly recommended. Ian has climbed Everest and Aconcagua 7 times to date. CLICK HERE and check out our up coming trips. Ian is always happy to get on a call and answer any questions you have about climbing Aconcagua.
Aconcagua with Professionals
Read our Top 20 Tips for climbing Aconcagua. We brought hundreds of people to Aconcagua over the past 12 years. We pride ourselves in working with the best staff and having the best food and service on our Aconcagua trips. If you would like to keep reading check out our Aconcagua page or contact us today and we can send you specific information on how you need to start preparing to climb Aconcagua.


Daily Distances
Day 1
Today we will arrive in Mendoza at 760m/ 2,493 feet. We will be waiting for you at the airport and will transfer you to the Hotel. One of our staff members will arrive and collect permit funds in cash and collect your Global Rescue or helicopter evacuation cover information. This will happen at the same time that our guides will do a full team gear check of all your mountain equipment. If you have rented any equipment the guide will accompany you to hire shop to pick up preordered items.
Day 2
Today we will drive to Penitentes at 2,600m/ 8,530 feet. We aim to leave by 10am. Before heading towards Aconcagua, the climbing permit need to be secured. Our team will have someone manage all of this so you do not need to worry. Once we have the permits you will drive to our lunch spot in Uspallata. After a nice lunch we will continue the drive to Penitentes and spend the night in a hotel. In the afternoon, the mules are loaded and prepared for the following day.
Day 3
Hike to Confluencia at 3,300m/ 10,827 feet. The group will be taken to the entrance of the Park in a private van where permits will be presented and you will start with the trek to Confluencia Camp. The equipment will be carried by mules. At arrival, you will set up your tent with your partner and will be able to rest.
Day 4
Trek to Plaza Francia 4,000m/ 13,123 feet, the base of the south face of Mount Aconcagua. Here you will enjoy a delicious lunch and a spectacular view. Then you will return to Confluencia. This trek is considered part of the acclimatization process, fundamental in our expedition.
Day 5
The trek to The Plaza de Mulas Base Camp 4,390m/14,402 feet takes approximately 8 hours and we will complete it today. You will stay in our own base camp with the necessary commodities for you to be as comfortable as possible.
Day 6
Today is a rest day. You will make a short trek in the Plaza de Mulas area, to contemplate the beauty of the mountain. On this day, you will also practice with your crampons, which will be used in the altitude.
Day 7
This is an exciting day as we climb Mt. Bonete, 5,100 m. For many climbers, this will be their first summit over 5,000 m. From the top we have great vistas of Aconcagua and the surrounding mountains. The climb of Mt. Bonete also gives us essential acclimatization necessary to climb Aconcagua. Following our climb, we return to Plaza de Mulas and enjoy a nice evening in Base Camp. Six to seven hours.
Day 8
Acclimatization trek to Camp 1, known as “Camp Canadá.” Team members will carry food, fuel, and other supplies to be used in our camps higher on the mountain. We will begin by walking through a field of Penitentes, with two to five-foot tall pinnacles of ice, and then follow switchbacks that lead us steadily up to Camp Canadá. Once we reach camp, we will cache our gear, have a packed lunch
and then return to Base Camp. Three to four hours.
Day 9
Rest and acclimatization day. Everyone will make sure that their equipment is ready and we are well-rested to make the move to a camp higher up the mountain.
Day 10
This morning we move to Camp Canadá. Team members will carry personal gear and additional
supplies. Porter staff will carry sleeping tents. Once at Canadá, the group will enjoy lunch and set up tents. Three to four hours.
Day 11
Today we move from Camp Canada to our Camp 2 “Nido de Cóndores,” where we spend three nights resting and acclimatizing. On this day, each climber will be responsible for carrying personal equipment only. Porter staff will carry expedition equipment, food, and sleeping tents. After reaching Nido de Cóndores, we set up tents with the guides and move our sleeping gear inside, then
settle down for the night. Guides will serve you dinner in your tents. Three to four hours.
Day 12
Today is a rest day and an opportunity to further acclimatize and enjoy the comfort of our camp. Resting on this day will improve your performance on summit day and greatly increase your chances for successfully reaching the summit. We are one of the only company that offers this rest day instead of moving higher up the mountain.
Day 13
Carry to High Camp, “Camp Cólera.” All climbers will carry expedition food, fuel and some camp equipment that we will need in Cólera and for our summit attempt. This will be a short hike, but we will move slowly to acclimatize and prepare for summit day. Once at Cólera, you will have lunch and then return to Nido de Cóndores. Four hours.
Day 14
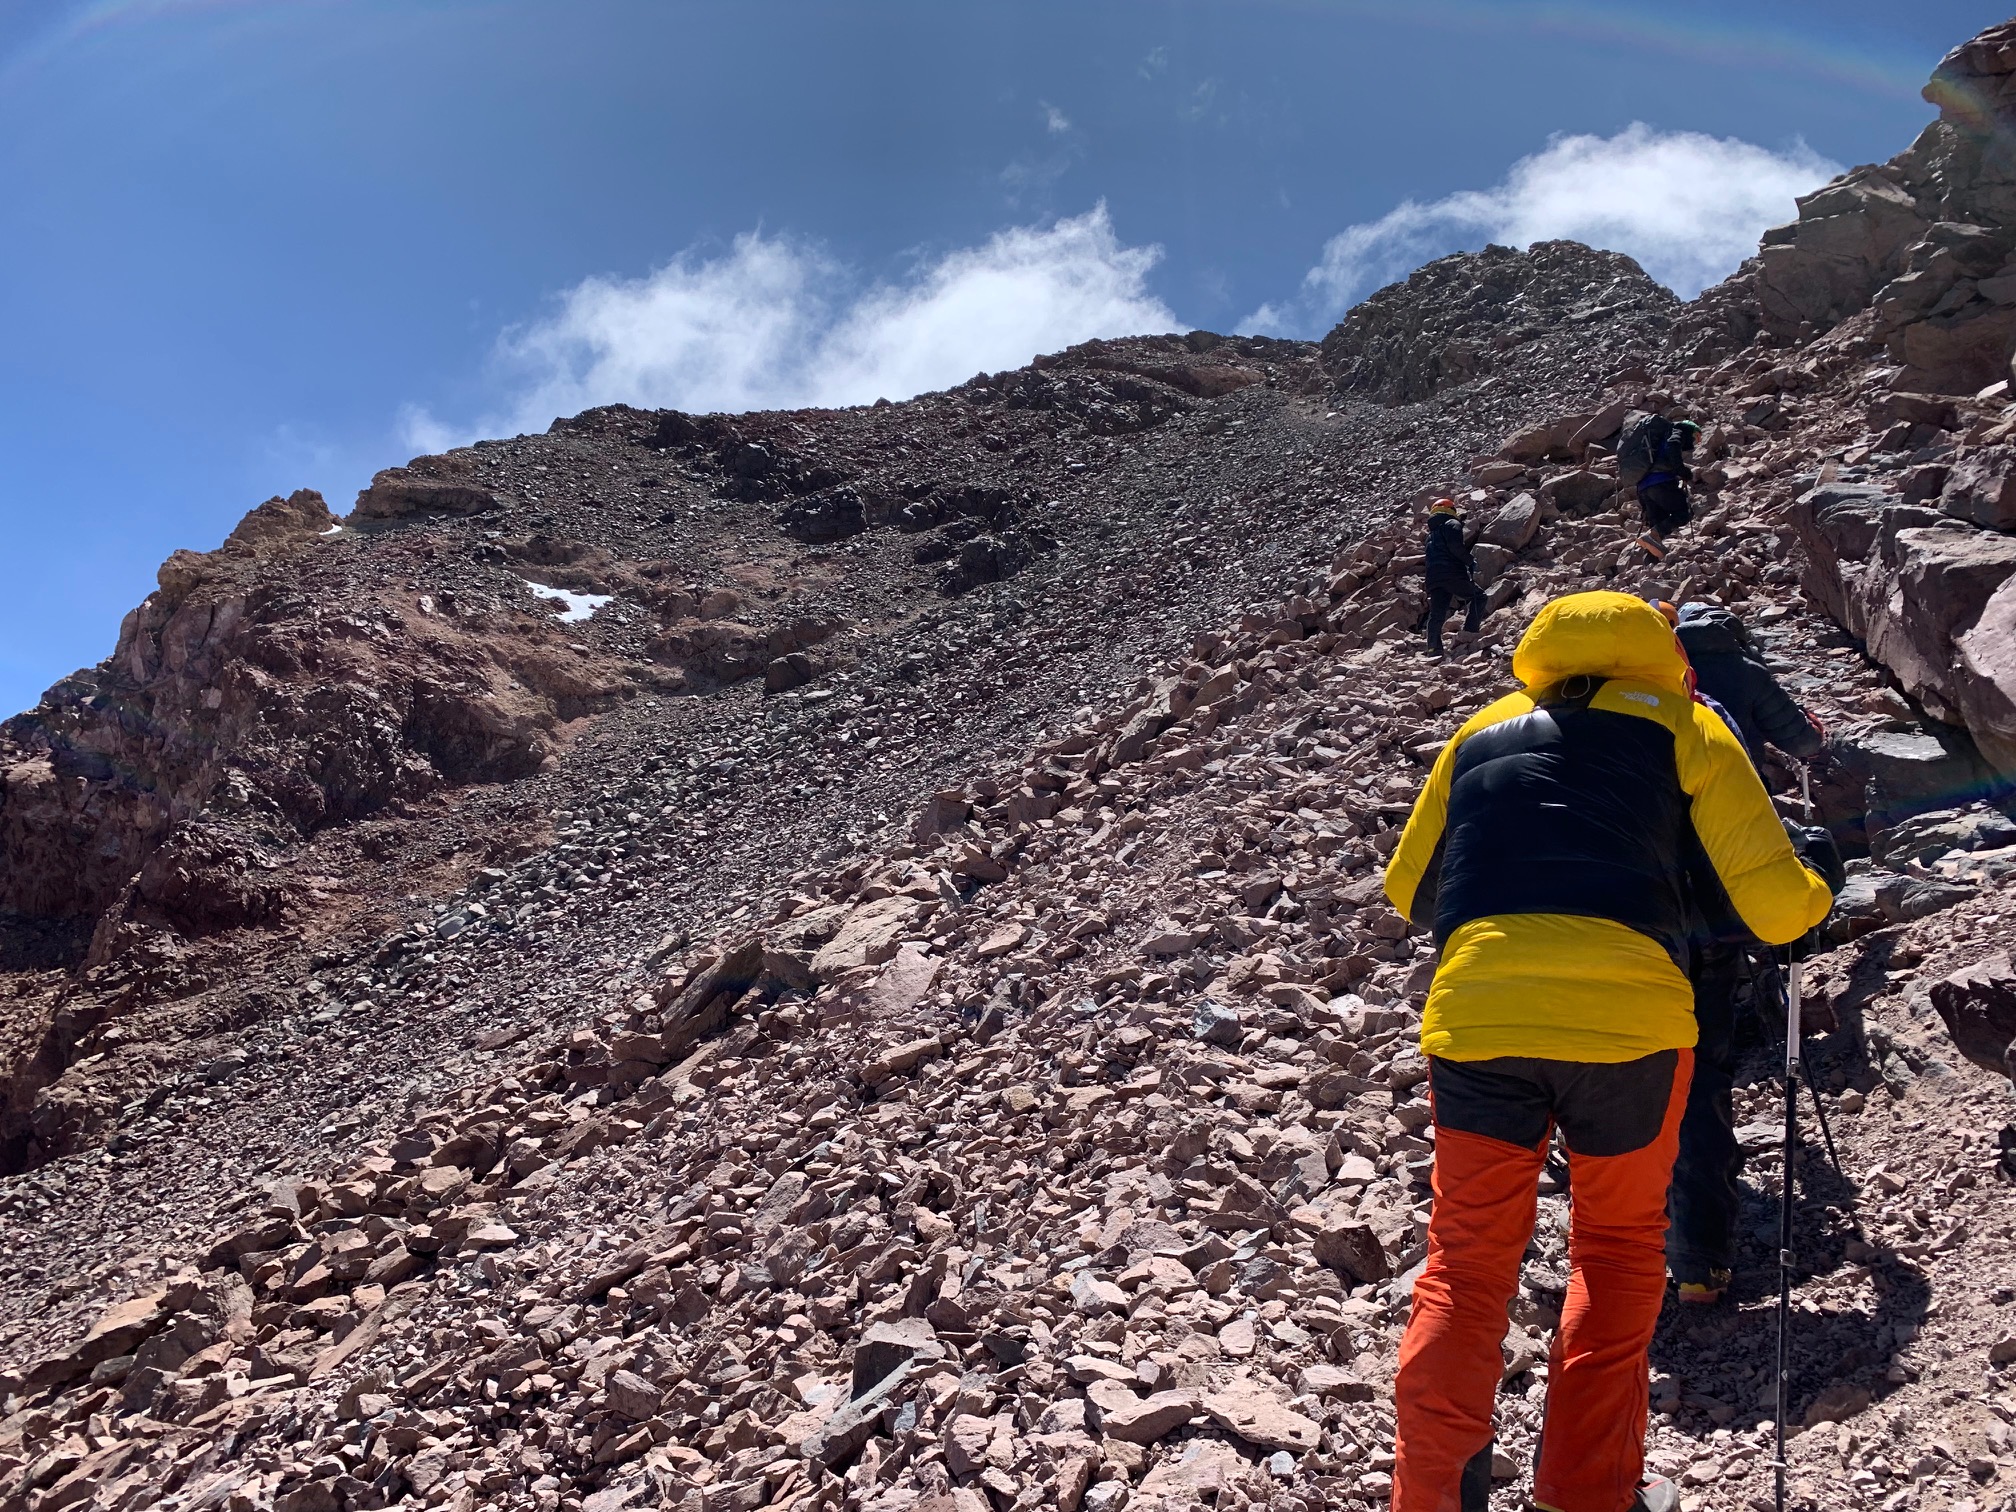
Climb to Camp 3, “Cólera.” We will carry our personal equipment and any extra gear needed for the summit attempt. Porters will carry sleeping tents. At Cólera Camp, staff will strategically position the campsite for protection in case of high winds. While climbers rest, guides will check each team
member’s summit gear for the next day and give an orientation on the summit climb. We will have an early dinner and go to bed to get a good night’s rest for the early morning start the next day. Three hours.
Day 15
Climb from Cólera to the summit and return to Camp 3. The Great Day! We will wake up early in the morning and dress for our summit attempt. Guides will serve hot drinks and a quick breakfast. They will let us know what time to leave our tents so we all rise together and start moving toward the summit. This keeps us warm and moving together as a team. The climb is gradual as we follow
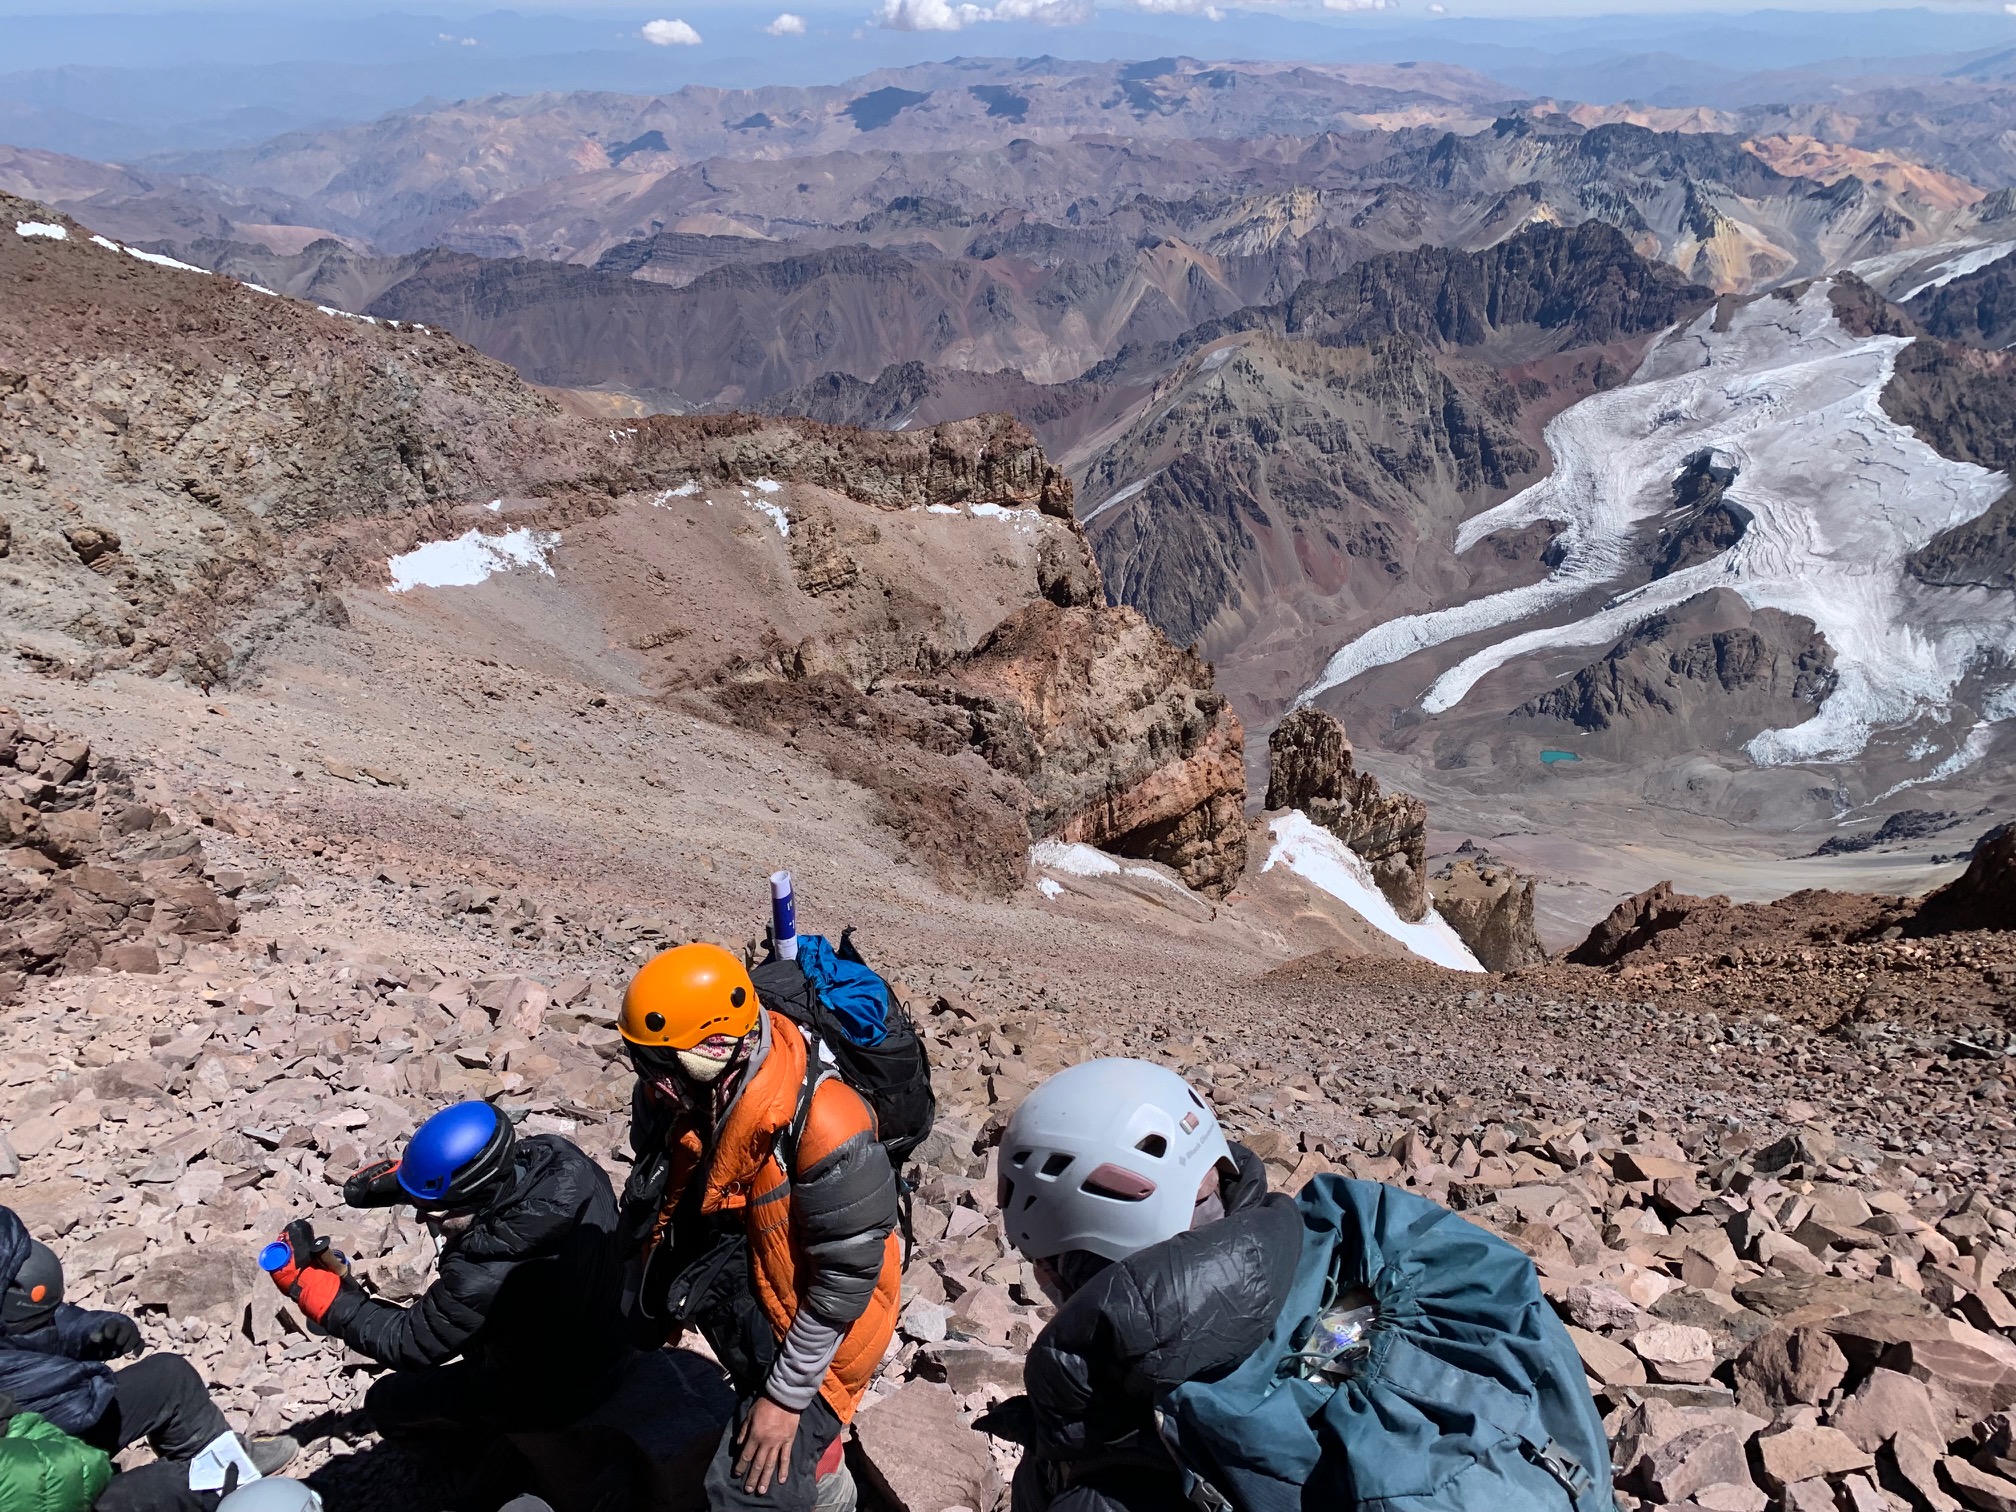
switchbacks for two hours until we reach a small A-frame hut called “Independencia.” From here we will traverse across the North Face of Aconcagua until we reach the Canaleta, a low-angle gully that leads us up towards the summit ridge. As we ascend the Canaleta, we can look down on the surrounding mountains, which begin to drop away from as we go higher. A few hundred meters below the summit, the route traverses east and leads us directly the summit! A cross proudly stands on top to mark the summit. There is plenty of room for everybody to take personal and group photos. It is a time for celebration! Time of day and the weather often determine the amount of time we spend on the summit. After we’ve all taken photos are absorbed the views, we will begin
our descent back to Cólera Camp. Nine to twelve hours.
Day 16
We head down to Plaza de Mulas Base Camp. We will take our time moving downhill with our climbing equipment and personal gear. Porters will carry sleeping tents and human waste. Once in Plaza de Mulas, the group will have the rest of the day free to celebrate our climbing experience and enjoy a great meal. Four hours.
Day 17
We descend to Horcones, the entrance to the Park, on the last trekking day of the expedition. Your belongings will be carried by mules so you will only take a light backpack with a jacket and your packed lunch. Transfer to Mendoza City. Lodge in the hotel. That evening guide and climbers often get together for dinner to celebrate their climb. Six to seven hours. 16m/ 26km.
Day 18
Extra day for contingencies that may prevent the normal development of the program.
Day 19
Extra day for contingencies that may prevent the normal development of the program.
Day 20
You can relax in Mendoza and we will drop you back to the airport for your return flight home.
Equipment
Once you have signed up to one of our Aconcagua Expeditions, we will send you our 40 page trip Dossier. The Dossier includes an itemized kit list, training advice and other relevant information to help you come fully prepared for your Aconcagua climb. Here are 10 reasons to pick us for your trip. Below is our packing video, showing you what you should consider packing for your Aconcagua expedition.
What Should you Considering Packing for Aconcagua
This exhaustive list does not have to be followed word for word. We appreciate that climbers have their own preference regarding clothing, but we hope this list will ensure nothing is overlooked. Read some REVIEWS form our trips and get in touch to gain access to important information. Once you have signed up for our trip, we will send you a complete list, with examples of each item! Check out our TOP 20 TIPS for climbing Aconcagua.
Rucksacks Needed
Trekking Backpack: For the walk into Base Camp and the acclimatization walk. Also useful as cabin baggage.
Expedition Backpack: Suitable for large, bulky loads. This should be lightweight, strong and comfortable (try it on with some weight inside just to be sure) with internal frame but not too heavy or complicated. 80 liters minimum. You do not need this expedition backpack if you hiring a porter to transport all your gear above Base Camp.
Dry Liners and Dry bags: Unfortunately, rucksacks are not waterproof, so you should wrap all clothing and equipment in waterproof plastic bags. Better, and worth the relatively inexpensive cost, are lightweight nylon “dry-bags” such as those made by Exped or Outdoor Designs. You must remain vigilant at all times in order to keep your clothing and equipment as dry as possible. These are useful for dropping gear in the higher camps.
Duffel bag: You will need to have a 120 Liter duffle bag for the mules to carry all your gear and kit to Base Camp at Plaza de Argentina. After seven nights of trekking and acclimatization your duffle bag will be transported to Base Camp on the other side of the mountain. You trekking backpack and duffel bag will be waiting for you in Plaza de Mulas Base Camp after the traverse.
Sleeping Bag and Mattress
Sleeping Bag: A Good quality down bag 4 seasons. This should have at least 800g of 800 Fill Power Down and be rated to at least -22°C/-10F. Pack the bag in a good compression sack to reduce the volume.
Inflatable Sleeping Mat: A full length, light weight inflatable mat (plus repair kit) is ideal– not the ¾ length versions. Best to get a mat that inflates to approximately 2in in thickness.
Closed Cell Foam Mat: Lightweight – To be used in conjunction with the inflatable sleeping mat for extra warmth.
Hydration Is Critical on Aconcagua
Thermos Flask: ½-liter unbreakable, metal flask. (optional, this does add weight).
Water Bottles: 2 Bottles of 1 Liter each. Example: Nalgene Classic bottle in insulating sleeves.
Camel Bak: 2 Liter platypus system is important lower down on the mountain.
Mountaineering Equipment
Crampons: One pair (12 point) that fit boots reliably. Clip-on crampons are recommended. Bring a crampon bag. Grivel G12 new matic.
Helmet: You will need a helmet for certain sections of of the mountain above Base Camp and on the summit night and day.
Trekking Poles: One set, telescopic. Useful for walking on low-angle terrain and reducing strain on muscles and joints. Strongly recommended flick lock poles not twist lock.
Rain Gear
Hard Shell Weatherproof/ Shell Jacket: A light waterproof and windproof outer shell. Make sure the jacket has an adequate “roomy” hood and ventilation (pit) zips. Gore-Tex is recommended.
Weatherproof/ Shell Trousers: Waterproof, windproof trousers and some people prefer them to have suspenders included. Gore-Tex is recommended.
Upper Body
Trekking T-shirts: Merino wool is best x 2/3
Thermals: Merino wool long sleeved thermal tops. Icebreaker 260 Merino x 2.
Mid Layer: RAB Vapour-rise or Patagonia Nano Air Jacket.
Sun Protection Shirt: Long sleeve, UV protection shirt, preferably with hood.
Soft Shell: This is optional but comfortable to trek in and to keep breezes out.
Down Duvet Jacket: Double box wall / baffle construction, not single box! Essential as a final barrier against extreme cold when on the mountain, also to keep warm during evenings in your tent.
Face and Head
Sun Hat: Peaked cap, with neck flap, or wide brimmed hat.
Warm Hat: One heavyweight fleece hat with a windproof membrane. Make sure that any hat can cover the ears and the back of the head and neck and fit under your mountaineering helmet.
Balaclava: Windproof to cover face and nose on summit day or you can use a neoprene facemask.
Buff: Light weight. For sun protection and snow proofing the neck. Silk or cotton. The Buff is a very versatile bit of kit. They are particularly useful on the trail, which can be very dusty. They come in a myriad of colors, have a multitude of uses and you can even get winter fleece-lined versions for higher up the mountain.
Lower Body
Underwear: Merino wool is best x 5/6 (females will want more)
Trekking Trousers: Light weight, be able to transfer into shorts.
Trekking Shorts: Light weight trekking shorts.
Thermals: Merino wool leggings. Icebreaker 260 Merino Leggings x 1.
What Gloves Should are Needed
Mountaineering Mitts: BIG and WARM – Robust with a breathable outer and fleece or fibre pile, non-compressible insulated inner. Please DO NOT compromise by buying lesser, cheaper mitts, even if they seem adequate. At altitude, your extremities will be excessively prone to cold as, due to the lack of oxygen, you will be hypothermic
and hence colder than you would be ordinarily. It is worth buying top-of-the-range, for the added surety that this provides.
Gloves – General/ Trekking: One set of liners for under mitts/ insulated gloves above – so you never have bare hands when removing larger gloves to fiddle with something. Make sure your liners fit comfortably under your gloves and mitts. Make sure you test this set up.
Handwarmers: Self-heating hand warmers are useful to pop inside mitts on summit day – 2 pairs, or more.
Footwear on Aconcagua
Trekking Boots: La Sportiva Tech GTX or similar, reliable for rough trails.
Shoes/ Trainer – Light weight for around camp.
Sandles: Lightweight Crocks for river crossing.
Socks: Merino wool – 2 Thick wool sock with light liner + 4 to 6 pairs of lightweight trekking socks. Make sure you are comfortable walking with Thin and medium trekking socks and trekking boots. Also make sure your feet are comfortable with liner sock and summit socks in your mountaineering boots. Save a freshly-laundered set of socks for summit day. Loop-stitched such as Smartwool Performance Mountaineering Extra Heavy Crew recommended.
The Right Mountaineering Boots
Remember you will be climbing to almost 7,000m/ 23,000 feet. Double mountaineering boot are required. IMPORTANT NOTE: The regulations set by the Aconcagua National Park insist that you use double mountaineering boots for the ascent of Aconcagua. Ian Taylor Trekking fully concurs with this advice as it increases your tolerance of cold temperatures and your chances of getting to the top. Each year, people who ignore this advice find themselves unnecessarily prone to frostbite and have to give up on their chance of reaching the summit.
If you find double boots uncomfortable, especially plastic boots, then you must start walking and climbing in them well in advance of the expedition. With time and effort, you will become suitably accustomed to double boots, and more able to wear them with satisfactory comfort on the mountain. If you have any doubt about which boots to take, please call us to discuss. It could make the difference between getting to the top or not.
Head Gear
Glacier/ Mountaineering Sunglasses: One pair with perhaps a spare lightweight pair in case of loss or damage. Category 4 is essential.
Snow/Ski Goggles: For use in bad weather. They should have vent holes to prevent misting up. Make sure that the vents are covered with thin nylon gauze to prevent spindrift entering. It’s also possible to get OTG (over the glasses) versions.
Head Torch: A combination of high beam and LED’s, for long battery life, is ideal. (Spare batteries).
Health
Sun Screen: Take a high factor (at least 40) and apply it frequently. Several small tubes are easier than one large.
Lip Balm: 1 stick – with regular application you should be able to keep your lips kissable to the end, especially in readiness for the return home.
Water Purification Tablets: Purification tablets as a standby – readily available from chemists or outdoor shops.
Nail Scissors/Clippers: Keep toenails short, so they wont catch inside your boots, be painful during the descent and then fall off.
Hygiene
Pee Bottle: Makes life easier at night. Nalgene 1L bottle, with wide neck, for men. Plastic measuring jug or Tupperware box recommended for women. (Make it a different color from your regular drinking bottles. Wrapping duct tape around the bottle a few times, is always a good idea. Grip, warmth and aids identifying which bottle is which in the dark. The duct tape can also be used for running repairs.
Foot Powder: Important for keeping feet in good condition.
Toiletries/ Wash bag: As required. Small mirror useful or just use your phone.
Toilet Roll/ Tissues: One roll to carry in your day sack for those unexpected moments. Small packs of tissues are useful too. Toilet roll is supplied on trek and in base camp for each day’s main event.
Wet Wipes: Useful for keeping clean when soap and water is not readily available.
Towel: A lightweight quick drying towel, that packs up small. Life systems make a range comprising many sizes. You will use this on the trail and for showers in Base Camp.
Eating and Drinking Utensils: One ½ litre unbreakable plastic mug with wide base and handle. One strong plastic / titanium spoon, durable knife and lightweight bowl.
Cleaning Supplies
“Dry” Soap Handwash: Brilliant for making sure your hands are kept clean, no matter how urgent things become, and bugs are killed and not spread around the team. Life systems Dry Wash can be bought from most camping shops. Hand Sanitizer.
Travel Wash: Enables you to launder some clothes while in Base Camp and ready for use higher on the mountain.
Soap and Nail Brush: Dry soap is well and good, but to keep really clean, you need soap, water and a nail brush. These are the best things to keep you free from tummy upsets – use determinedly after toilet visits and before meals.
Personal First Aid Kit
1). Headaches require Ibuprofen, 200mg tablets, for Inflammation, sleeping and headaches.
2). Antibiotics: Two courses as prescribed by your own GP. One for chest and
upper respiratory tract infections and one for abdominal, bowel infections.
3). Cough Lozenges: Lockets and Strepsils are good.
4). Wound Dressing: One.
5). Triangular Bandage: One.
6). Melonin Dressings: (10cm x 10cm) four.
7). Plasters: Assorted.
8). Steri-Strips: For cuts too big for plasters.
9). Rehydration Powder: Dioralyte, Gastrolite or similar. Nuun and or hyper hydration.
10). Antiseptic Cream: One small tube.
11). Diarrhoea Treatment: Imodium, Arret or Lomotil.
12). Diamox: For altitude.
General Travel and Miscellaneous
1). Passport, Make sure you have 6 months remaining on your passport.
2). Credit Cards/ Cash.
3). Camera/ Lenses/ Memory Cards: Protective w/proof bag essential. Spare batteries / charger/ solar panel.
4). Energy Foods: Some high energy snacks for use on the mountain, in particular summit day.
5). Repair Kit for air mattress and tools.
6). Knife: Swiss Army knife with scissors. Toe nail clippers and or Leatherman Multi tool.
7). Spare parts and adjusting tools for your crampons.
8). Sewing Kit, needles, nylon thread, canvas and rip stop patches, etc.
Gear Rental
If there is any gear that you would prefer to rent for the trip, items can be rented in Mendoza. This would need to pre ordered. We have further information for you on signing up. However, we do not recommend renting key items needed for the trip.
Chat With the Experts
We are your best resource for getting the right gear and clothing for your Aconcagua climb. We will be available to you 5 days a week to assist you. Therefore, if you want to have the best experience on the best route, then GET IN TOUCH today. Please feel free to contact us anytime to set up a time to discuss your gear. We would love to hear from you and talk everything Aconcagua.
There are many great trekking boots on the market these days. And of course, we have not had personal experience with all of them. However, we have compiled a list of six of our favorite trekking boots.
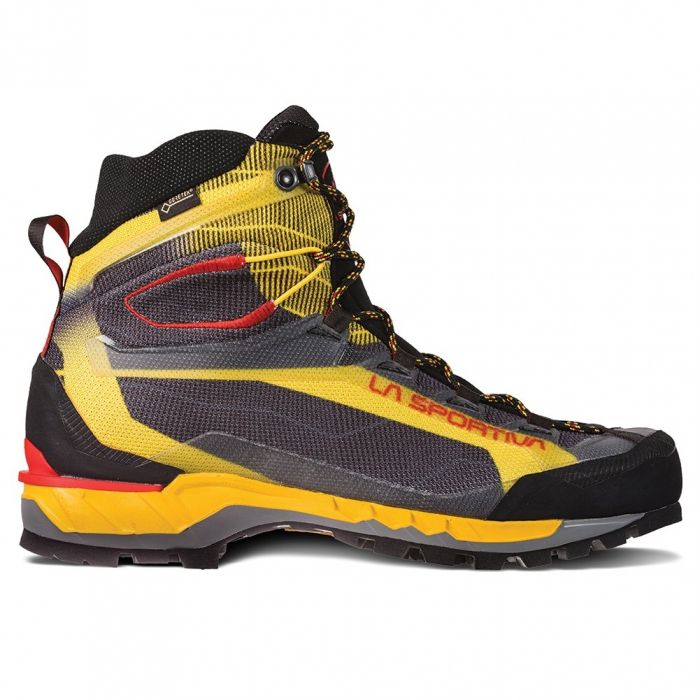
1). La Sportiva Trango Tech GTX
In our opinion, La Sportiva have great footwear options at the moment. Finding a boot that will last a long time, be comfortable, waterproof and have good support, is always our goal. This option is both a great trekking boot as well as a light mountaineering boot for alpine climbs. They are crampon compatible, however still a lightweight option good for a Kilimanjaro climb. Having the slightly more rigid sole helps keep your foot sturdy and protected on the trails on Kilimanjaro. They will also be a warm option for the cold night spent going up to the summit! These boots would be a great option for the trekking portions on Mount Elbrus or Aconcagua as well.
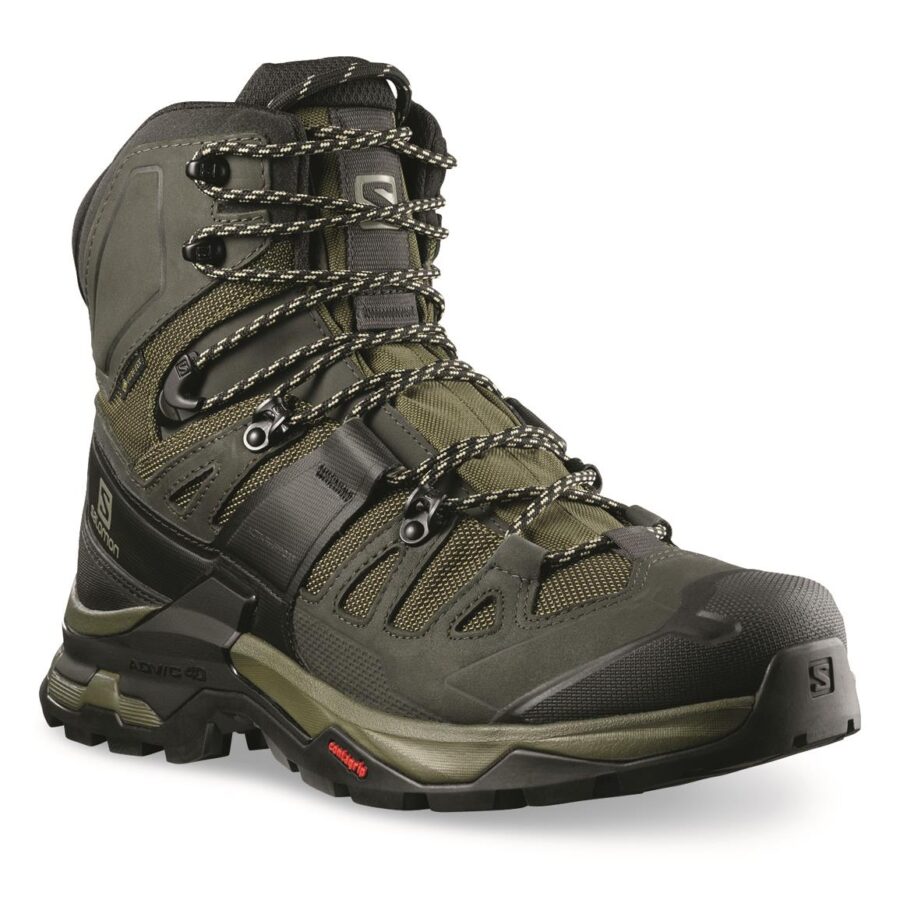
2). Salomon Quest 4 GTX
Another great option is the Salomon Quest 4 GTX Trekking boots. More and more people are using these trekking boots on a wide range of our trekking adventures in Nepal and around the world. They are comfortable, sturdy, waterproof and a very resilient trekking boot. They will give you the warmth you need on the cold night walking to the summit as well! We would recommend these boots for Everest Base Camp, Aconcagua, Mount Elbrus, and a range of other treks.
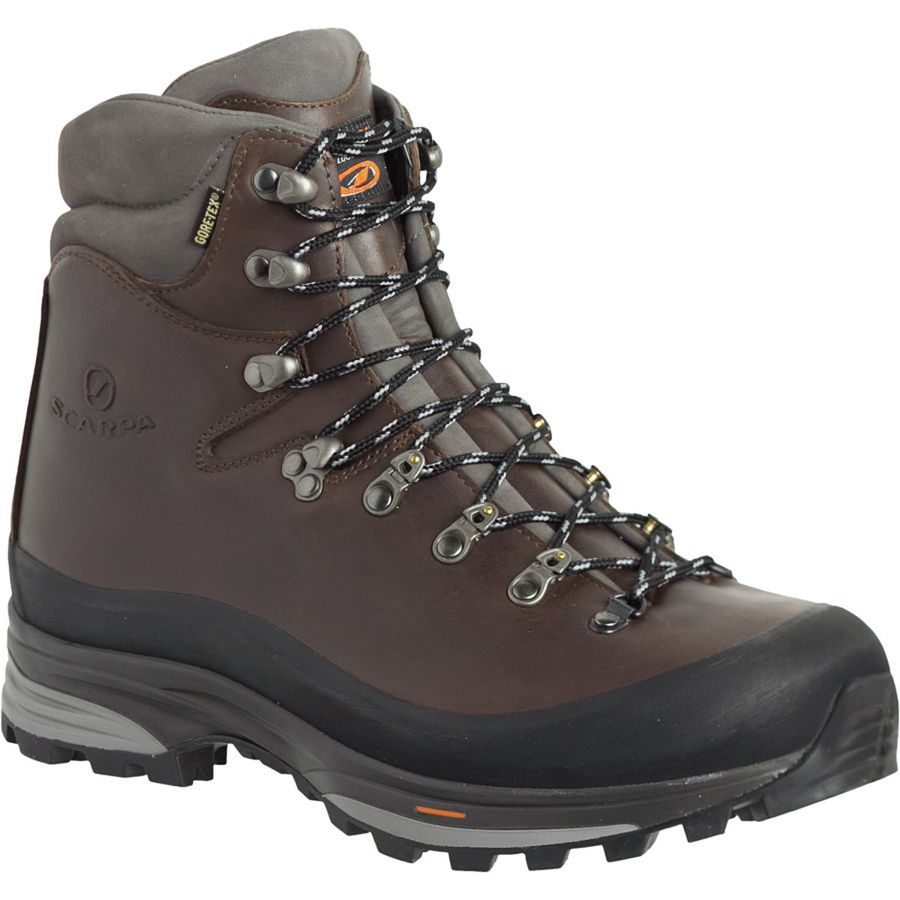
3). Scarpa Kenesis
Ian has used the Scarpa Kenesis pro GTX trekking boots for a few years. They are a little heavier than other trekking boots but a great boot for Kilimanjaro. If you maintain them well, you will have them for years. Scarpa are always re-inventing trekking boots and if they fit your foot correctly, then they may be the right boot for you. They work great and last a long time.
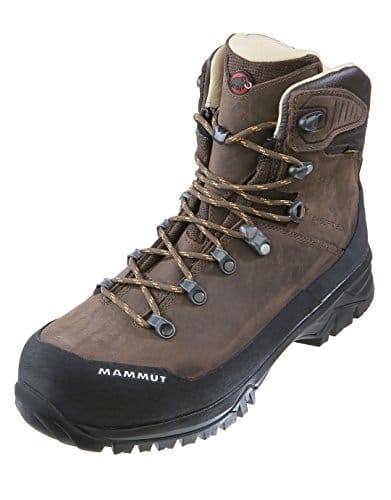
4). Mammut Trovat
Ian has also used a range of Mammut trekking boots over the years. He really likes the Mammut Trovat guide High trekking boots. They are really durable, reliable and will last a long time. The high ankle support is great for the rocky terrains you will encounter and all around a great boot for Kilimanjaro. All these boots will last a long time if you look after them well.
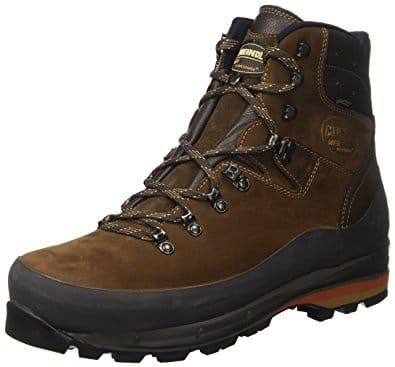
5). Meindl Vakuum
You could also consider using the Meindl Vakuum trekking boots for your Kilimanjaro climb. These are also a good option a wide range of trekking peaks and multi-day trekking adventures. These are a very popular boot and we see a lot of clients arriving to Tanzania in this option. They are an excellent choice for mixed rocky terrain and long distance hiking. These boots will be with you for many miles as they are an extremely durable boot. Also, this could be a good option for you if you feel the cold in your feet as they will be a warmer option.
Some of the Boots we Recommend
These are just some of the boots we have used and recommend. Just so you know all of these boots will work on every trekking trip we offer. They are great for Everest Base Camp Treks and walking into Mera peak, Island peak, Elbrus, Aconcagua or any trekking trip that we offer. All of these boots also come in Men’s or Women’s styles. Therefore, they should work for anyone coming on one of our Kilimanjaro trips!
Read some REVIEWS. Have questions, please GET IN TOUCH today for more information.
I have been lucky enough to climb Mount Everest and Aconcagua 5 times. Over the past 20 years we have used a range of mountaineering boots and here are some of my favorite boots. The options that I have mentioned below can be used on a range of different mountaineering trips around the world. However, none of the below boots would work on an 8,000m/ 26,250 foot peaks.
Think About Future Trips
This list below is an outline of mountaineering boots needed for the range of trips we manage. Consider future trips when selecting the right boots. When you finished on this page check out our recommendations for the best trekking boots that you can use for the approach to your chosen mountain. Or, you can just CONTACT US and chat about the best gear for your chosen adventure.
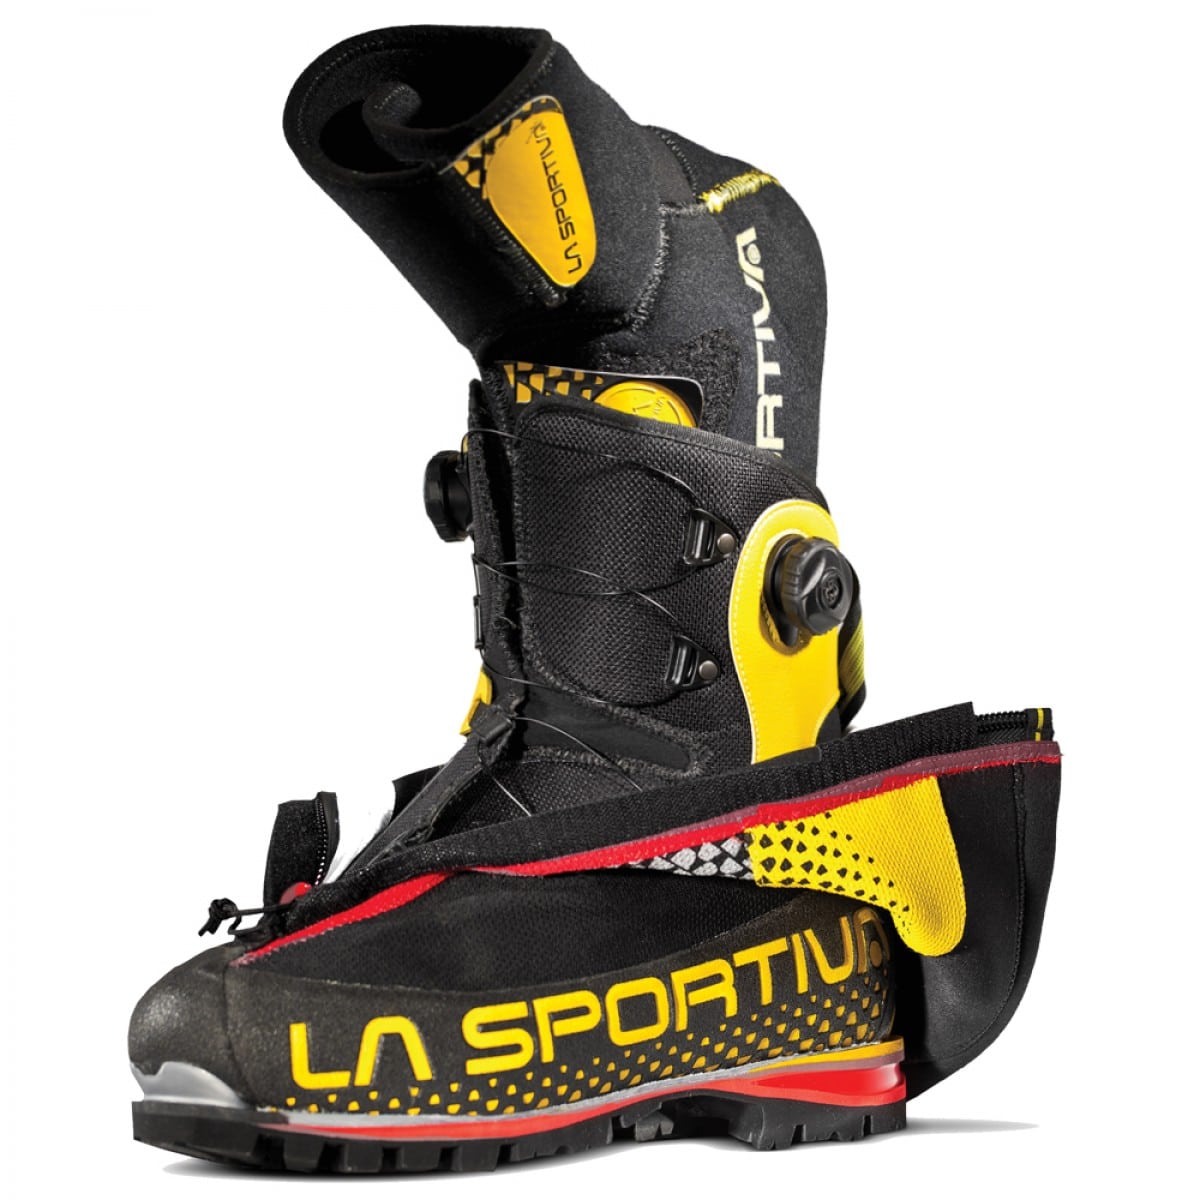
La Sportiva G2SM
1). My favorite mountaineering boots at the moment are the La Sportiva G2SM mountaineering boots. Super light and really warm. I always prefer the inner boot system and these boots can be used on 90% of the mountaineering trips I am currently undertaking. I use these boots on Island Peak, Mera Peak, Aconcagua, Mount Elbrus They are versatile for climbing in a wide range of conditions and terrain.
La Sportiva Baruntse
2). I really like the La Sportiva Baruntse mountaineering boots. A lot of our clients and guides have chosen to use these boots. They are great boots for Island peak, Mont Blanc and other Alpine climbs. They are a little bulky and heavier than the La Sportiva G2SM. They have the inner boots which I really like and they are warm and great option for your high altitude mountaineering adventures.

Scarpa Phantom 6000
3). We have a lot of clients using the Scarpa Phantom 6000 mountaineering boots these days. They seem to work very well in a wide range of conditions and are a versatile mountaineering boot that can be used in a wide range of environments. I have however seen some people have issues with the fit of this boot. You really need to make sure you use your boots in your training and break them in. Scarpa can be a narrow fit for a lot of people so make sure you have tried and tested your boots before going on the mountain.

Mammut Norwand
4). We have a lot of people using the Mammut Norwand Mountaineering boots on our Island and Mera peak climbs. These are also a popular boot with clients on our Elbrus and Aconcagua climbs. Although I have not personally used these boots, I have never seen or heard of any have any issues with these mountaineering boots.

What Boot is Best for You
So there is never a one sized fits all when it comes to footwear. For some people, La Sportiva boots fit me perfectly, however for others, they do not! It is always best to try on as many pairs of mountaineering boots you can before making a decision. You also need to think about future climbs, trips and adventures when buying your mountaineering boots. You want one boot that will last a lifetime. These boots are expensive so you want to take your time and make the right decision. CONTACT US and we can help you make the best decision.
Ready to go?
Take the next step towards achieving your goal of climbing Aconcagua. Get in touch today and we will help you start planning your trip.
We pride ourselves on making sure that our clients have every opportunity to succeed on the mountains, including professional training advice, gear lists and video links on how to pack your bag, and much more. We are always available to answer any questions you may have by email, phone or skype, so contact us today!
