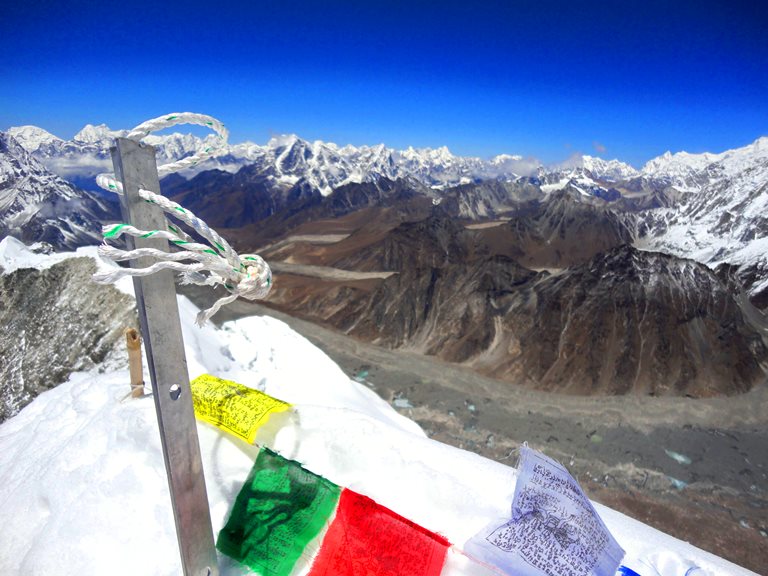
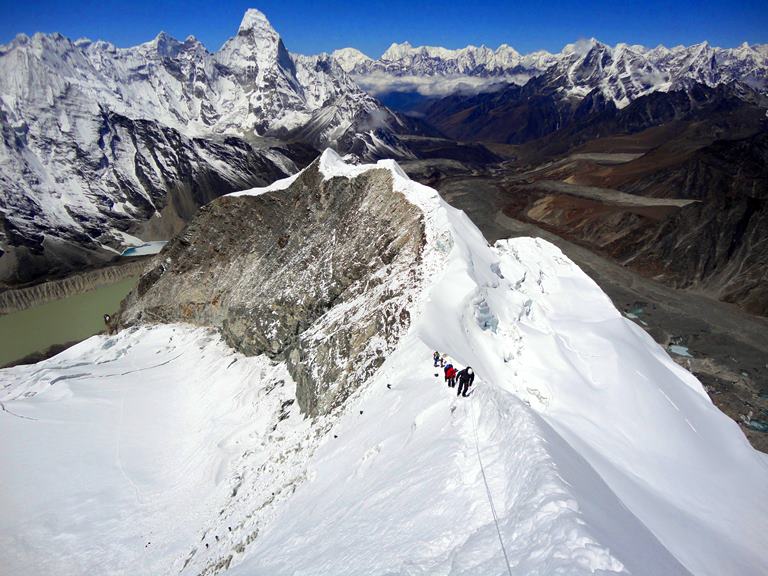
Island Peak
Tips and Advice
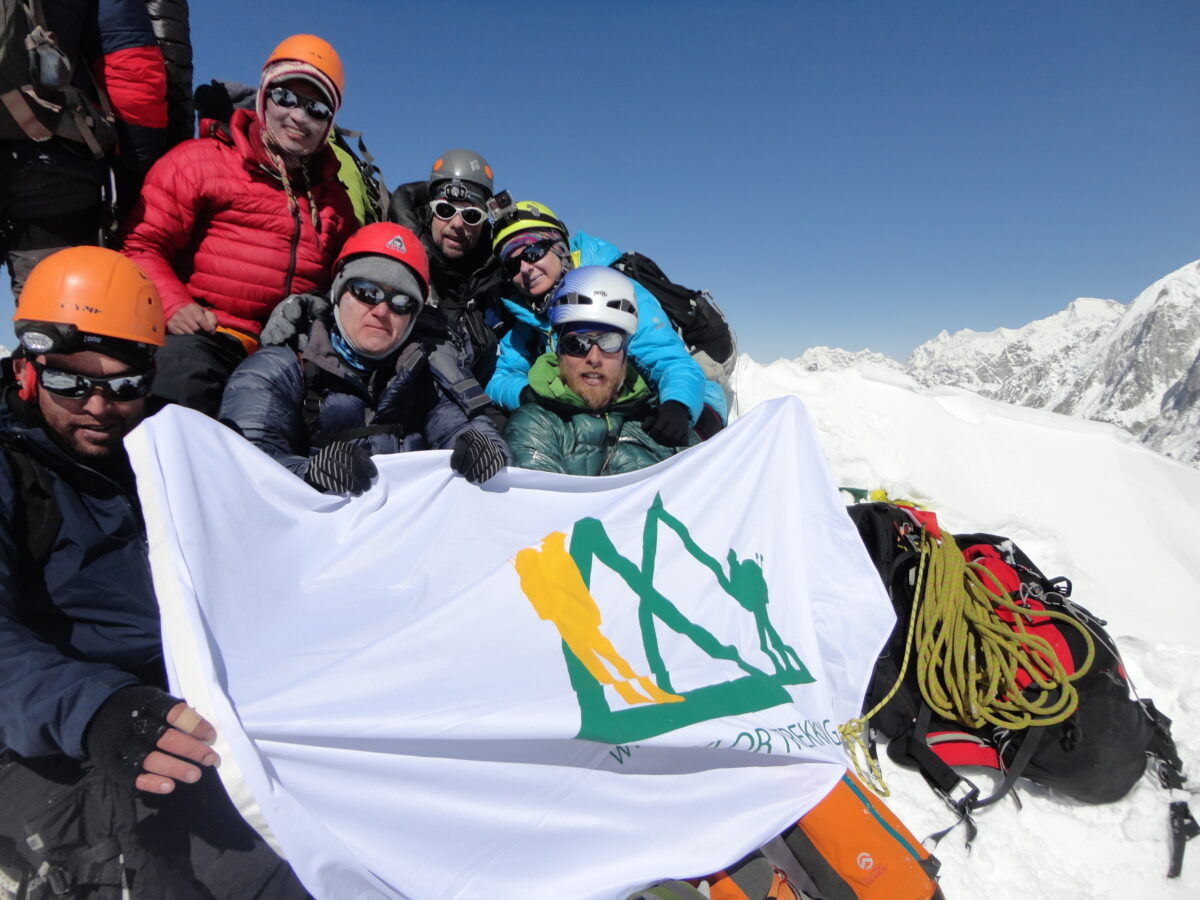
We have led hundreds of people to the summit of Island Peak at 20,305 feet. These twenty reasons will show you why you should choose Ian Taylor Trekking to make this exciting journey to Everest Base Camp and Island Peak. We are selling out of our Island Peak climbs 12 months in advance because we have our own full-time staff and more acclimatization. We have success rates second to none.
Fixing our own Ropes
All our trips have three nights in Namche on the way up the trail, along with side trip to Everest Base Camp and Kala Patthar. Our itineraries also have two nights in Island Peak Base Camp, we use Island Peak High Camp and fix our own ropes high on the mountain. Our team are available to our clients, giving them all the information they need before this challenging adventure. Read some Reviews from our trips.
1). Our Team
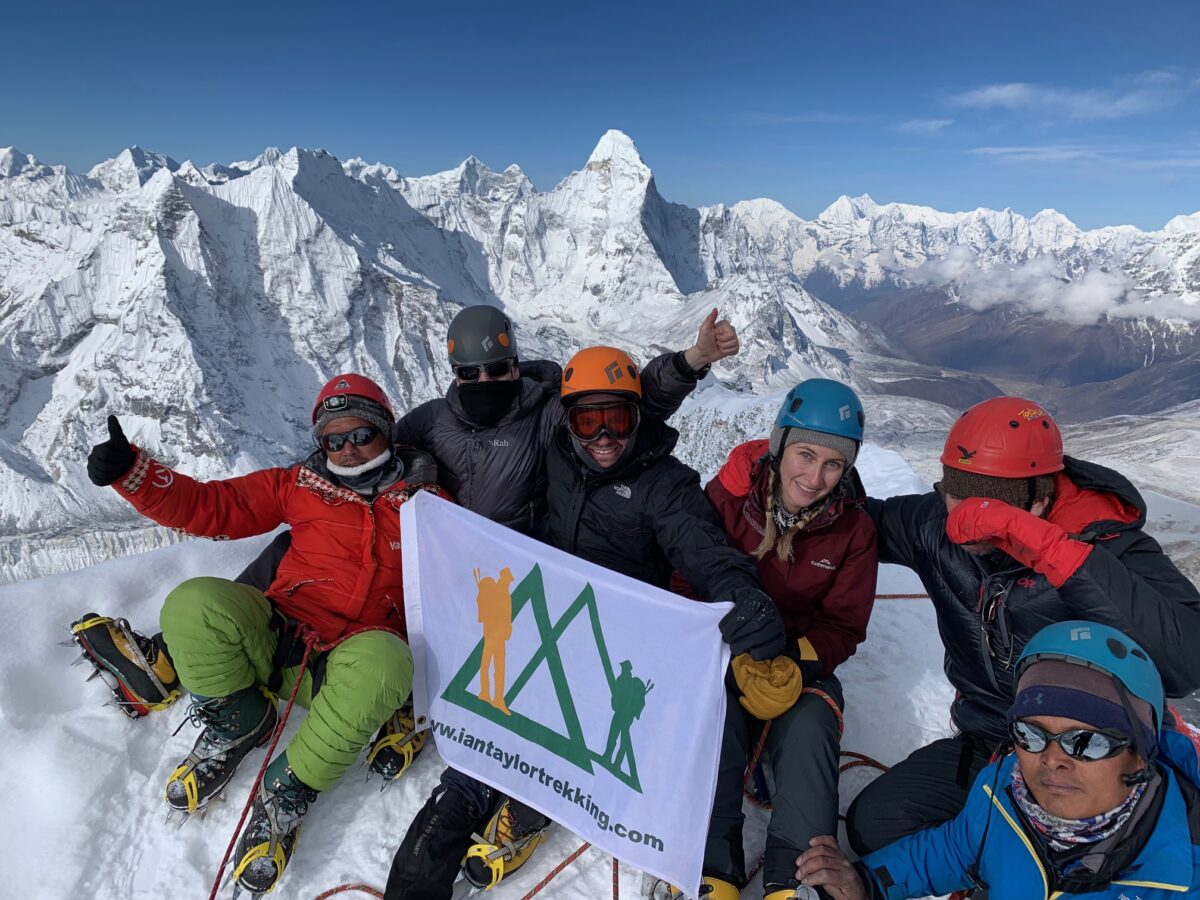
Ian Taylor Trekking have 3 guides for every group of 8 climbers. We have a maximum of 8 climbers per team along with our support team so we can carry ropes and mountaineering equipment high on the mountain. Safety is our priority on Island Peak. We want to make sure all of our teams have the best chance at safely reaching their goal. With more staff on the trail with your team, they will be able to more efficiently manage your safety on the trail and mountain and also give you a better experience along the way.
We do not outsource any of our trips in Nepal and we have our own office in Kathmandu and our own staff who manage all of our trips. Therefore, this gives us far more consistency in our service on the ground. We have world class climbing Sherpa’s working with us and therefore, this helps us offer you quality trips to Island Peak.
2). Supporting the Community
We continue to support the local community and have helped to establish the Goli Village Trust in Nepal. This was put into place after the earthquake in 2015, when the Village where many of our staff have come from was devastated. We have built two schools in the Goli region and we have placed stoves in over 60 homes. We do need donations and help, therefore if you would like to donate, set up a trek to the village, give funds, clothes or school items, then get in touch. Please let us know and we can help you figure out how you can best help!
3). Quality Run Trips
We run only run quality treks with more staff, better lodges and better food. Read some REVIEWS from our trips. You can also watch our Food and Accommodation video for further information. A lot of times people are only given the same food each day for every meal, and we don’t do this. You are allowed to pick what you eat for each meal to make sure that your dietary needs are met.
We pay our staff correctly and do not over load them with weight. Also, we use Yaks to carry all the loads up to Island Peak High Camp and we do not cut corners on any aspects of our treks or climbs. There will be a maximum of 8 climbers per group on our trips and we have 3 guides and support staff for 8 climbers on Island Peak.
4). Expert Training Advice
We offer personal service with training advice for our clients, 5 days a week. A lot of people underestimate Island Peak. We do not want to see this happen with our clients. Therefore, we want to make sure that you have the best information on how to complete this trek and climb safely and successfully. Learn more. The summit night and day alone can be 14 hours with some technical challenges. We run courses in Colorado and Scotland in support of our Island Peak climbs.
There are some long 8+ hour days, covering over 20km with over 700m/ 2,296 feet of up and down hill on steps or stairs while on the trail. We have professional training advice available to you 5 days a week. All you have to do is e-mail us and we can schedule calls with you as often as needed once you sign up to our trips.
5). More Acclimatization
We have learned after years of experience that people need more time to acclimatize to the lower levels of oxygen, in order to have a safe and successful trip to 20,305 feet. Therefore, we now include three nights in Namche Bazaar at 3,500m/ 11,500 feet. Trek to Everest and Kala Patthar at 5,645m/ 18,520 feet prior to reaching Island Peak Base Camp. We include two nights at Island Peak Base Camp 5,100m/ 16,732 feet and we use Island Peak High Camp 5,500m/ 18,044 feet.
This will help to give your body the time it needs to acclimatize correctly. Most companies are not doing this and we have seen over the years that it is a main factor in why more people on our trips are making it safely to the summit of Island Peak! We also include two nights in Dingbouche at 4,350m/ 14,271 feet, giving you the best chance of success!
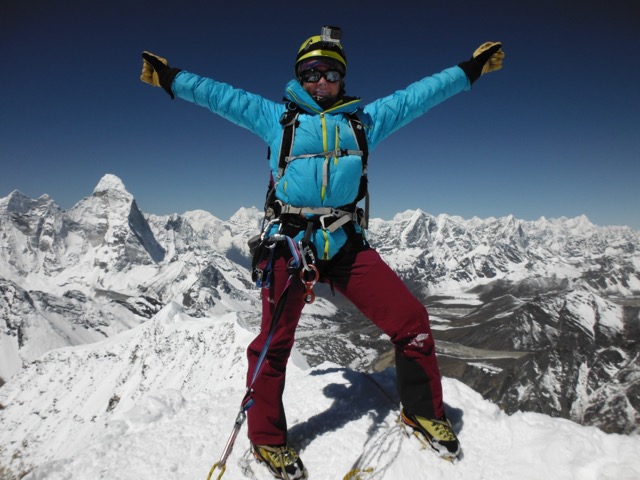
6). Climb with an Everest Summiteer
Why not sign up to one of the trips that Ian personally leads? You can walk through the region with someone who not only has trekked to Everest Base Camp over 35 times, but also has reached the top of Mount Everest! Ian usually leads two Everest Base Camp and Island Peak climbs a year. Ian has personally led 19 Island Peak Expeditions with 17 climbs on the summit. If you book far enough in advance, you could join him on our unique itinerary Sign up and get access today. READ MORE.
7). 25 Years Experience
We have years of experience managing teams on the ground in Nepal. Our head Climbing guide Ang Kami Sherpa has climbed Island Peak over 200 times and climbed Mount Everest numerous times, Aconcagua and many other peaks. He is from Goli village and helped built the first school we built in the region. His uncle is Dawa Sherpa and Dawa heads up our office in Kathmandu. Both are very passionate about Sherpa culture, experience and preserving these traditions. Anyone who has trekked with Dawa or Ang Kami Sherpa will never forget it!
8). Fully Trained Staff
All of our guides hold current Wilderness First Aid Certificates and mountaineering guiding qualifications. Also, our guides will carry satellite and local phones with them .in case of an emergency. All our guide have led many trips on Island peak, Mera Peak, Lobuche, Tent Peak, Everest North Col, Cho Oyu, Ama Dablam and Mount Everest and so many more. Read some Reviews from our Island Peak trips and get in touch for further information.
9). Quality Equipment and Gear
On our Island Peak climbs, we use quality, North Face Tents. We use these tents on all our trekking and mountaineering itineraries in Nepal. There is an option for a single tent for your nights sleeping at Island Peak Base Camp and High Camp. All our mountaineering gear is stored in Lukla and we bring new ropes for every season of climbing on Island peak. Our own cook Dilip or Karma will trek with the team to Island peak. Our Yaks and support staff carry all equipment up to Island Peak High Camp along with our support staff carry mountaineering equipment and ropes to crampon point. If conditions permit, our staff will bring your trekking boots up to crampon point for an easier descent back to Island Peak High Camp.
10). Four Star Hotel in Kathmandu
We include two nights in a four star hotel in Kathmandu. One night before your trip and one night after the trip. All of our trips are on a shared basis, but if you prefer a single room, this can be offered at an additional cost. We use the Buddy hotel and Spa in Thamel, which is the main tourist district of the city. You can also upgrade to 5 star hotel option if you like, just ask us for further information.
11). Better Lodges
There is a wide range of accommodations in the Everest Region. Some of these are of a very poor quality/standard and we stay away from those! We use the better accommodations when available. All of the tea houses we use come with a pillow and comforter on your bed. You still need to have your own sleeping bag with you, but these better tea houses will provide a cleaner and more comfortable option along the way. We use Hotel Namche for the four nights we spend in Namche Bazaar. Three nights on the way up and one night on the way down the trail. Sleeping is a very important part of the acclimatization process and therefore getting to bed early and getting as much rest as possible is very important.
12). 6 Scheduled Island Peak Climbs per year
Ian Taylor Trekking have the experience and expertise to run over 30 treks a year to Base Camp. We do limit the amount to Island Peak trips we run, so that safety is at a premium. Our team run back to back trips with the same staff and guides so consistency and your experience is paramount. Ian Taylor Trekking are a well known and respected company in the region. Because of this, we get preferential treatment with everything from flights in/out of Kathmandu, to helicopters and room availability in the tea houses.
Many companies without this experience bring you into the region and don’t even have tea houses booked beforehand. This could ultimately leave you stuck without a place to stay during busy times. We would never put our clients in this predicament… we are always booked beforehand to offer you a no-stress experience!
13). Three Meals a Day
Food in the Everest Region has become increasingly more and more expensive. All of our trips include three, two course meals each day on the trail. Therefore, you do not have to worry about bringing extra funds for your food. READ MORE information about our food service on the trek. We can guarantee quality food throughout the trek because we use the better lodges available and they provide a higher standard of meals. Making sure you get enough food on the trail is very important. Therefore, we provide all your meals as part of your trip.
14). How Difficult is Island Peak
Island Peak is a stunning peak in the Nepalese Himalayas. However, there are many things to consider when you are deciding on a climb in the Himalayas. Firstly, you must know that Island Peak is NOT a trekking Peak. You need to come with proficient mountaineering skills to take on this climb. Secondly, you need to make sure that you choose the right itinerary, that gives you adequate acclimatization to the low levels of oxygen. And finally, you need to come with excellent physical preparation to tackle this mountain. If you are an amateur mountaineer and well versed in Himalayan mountaineering techniques then Island Peak shouldn’t present a major challenge. If you are not a mountaineer then you need to get the basic right. We can help you.
15). Animals not Porters
We use animals instead of people to carry your duffel bag on the way to and from Everest Base Camp and Island Peak. The Yaks will carry up to 15kg/33 pounds of your personal gear on the trail. We will send you our 40 page dossier covering all aspects of the trip. This will also include an itemized kit list for you to review. We are available to speak with you on the phone or Skype get the right gear for your trek. Watch our PACKING VIDEO and do let us know if you have any questions.
16). Celebration Meal
We like to treat all of our teams to a celebratory meal at the end of your trek in Kathmandu! Ian’s favorite restaurant to enjoy after he is in the mountains is Fire and Ice Pizza Restaurant. Most of our teams will have the meal there as you can enjoy some delicious pizza after the trek (maybe even have a delicious mojito). This meal is included in the trip. You will be presented with your Everest Base Camp and Island Peak certificates of achievement and we will enjoy a beautiful meal before heading back to the hotel or a night out on the town.
17). Different Itinerary Options
We have multiple options for itineraries to Island Peak. You can join our regular itinerary that included Everest Base Camp and Kala Patthar. You can skip Everest Base Camp and acclimatize around Chuckung and Chuckung Ri which have stunning views of Ama Dablam, Lhotse and surrounding areas. We rarely trek via Gokyo Lakes and onto Island Peak but this is possible. We can also tailor your trip to suit your needs for a private group. Therefore, if you have 8 climbers joining a trip, we can develop a private itinerary for you and your group.
18). The Best Sherpa Team
If you want learn about the Sherpa people, then you have to hang out with Sherpa people. Our team of Sherpa guides and assistant guides are happy and proud to talk to you about the Sherpa people, culture and way of life! We have been working with our teams in Nepal for over 10 years now. They are some of the most wonderful and knowledgeable people you will meet in the region. Most of our teams also take the time in Namche Bazaar to visit Kanchha Sherpa, the only remaining Sherpa from the first Everest expedition. Giving you a chance to hear from him and ask questions of what it was like on Mount Everest in the 1950’s.
19). Small Group Sizes
We only work with small group sizes. The maximum number of people per team trekking to Everest Base Camp will be 10 people. We have a maximum number of 8 climbers for our Island Peak trips. Some of our groups are even less people with only 6 or 8 team members. This will therefore give you are more personalized experience on the trail to Everest Base Camp and Island Peak. You can move as a team and experience more of this world class trail in a smaller groups.
20). Private Groups
We have an amazing opportunity for private groups of 8/10 to climb Island Peak with our award winning team. Therefore, if you are a part of a hiking group, walking club or mountaineering group that all want to go to Base Camp and Island peak, gather 10 other paying climbers to go with you and we will give one space for free!
Island peak is highly underestimated by so many people. Ian Taylor Trekking use the High Camp on the mountain and have two additional nights in Island Peak Base Camp. Most importantly, we FIX OUR OWN ROPES on the mountain, giving you the best possible safety and chance of making it to the summit of Island Peak. CHECK OUT our Island peak itinerary. Our Award Winning team are available 5 days a week to help you get the right information.
1). Make Sure you Have the Right Training
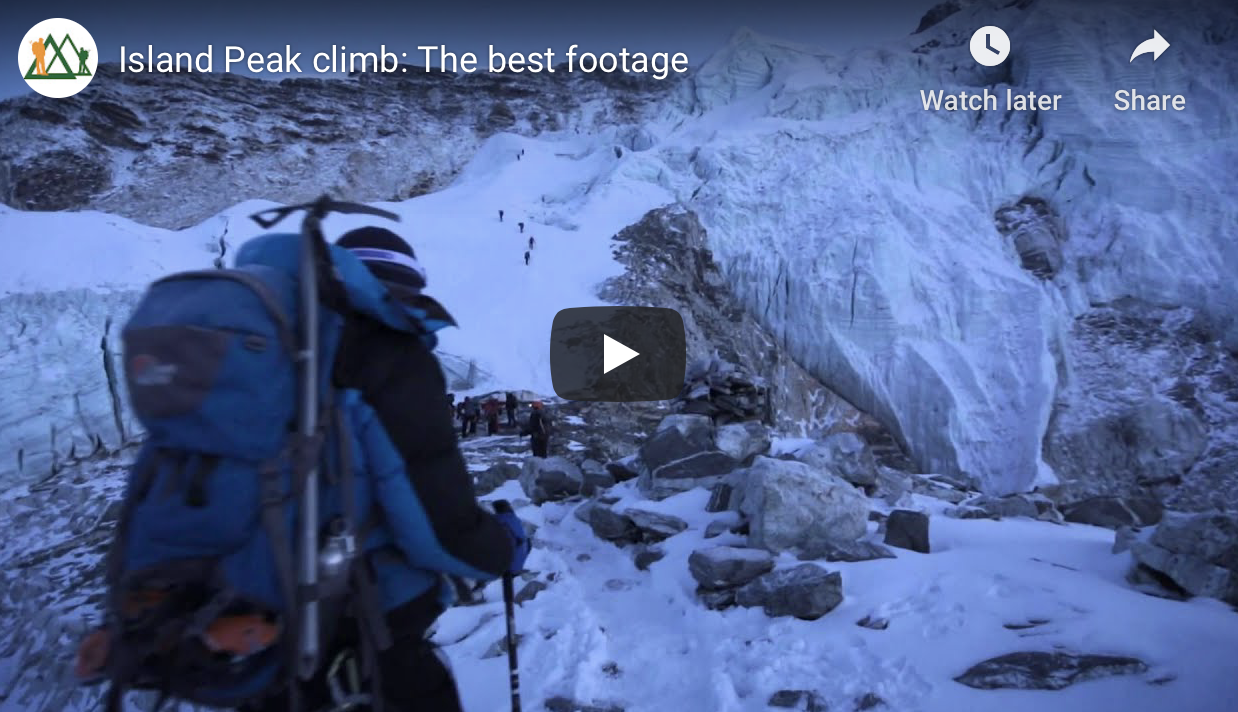
Island peak is a steep hike and climb from 5,100m/ 16,732 feet up to 6,189m/ 20,305 feet. The route has mixed scrambling, steep rocky scree, a glacier crossing with ladders and a steep Head-Wall all the way the summit. It is a very strenuous ascent, and that is after you have just walked for 12 days to the base of the mountain, which is also strenuous. We can help you formulate a training program if you join our team!
Multi-day hiking, building from 3 – 6 hours, with weighted backpack, along with training 4 to 5 times a week in the gym is essential. Using a machine like a stair master with your weighted backpack on and building your endurance is key to success. You also need to be competent in abseiling using a figure of 8 . You need to be able to abseil using a figure of 8 device, moving between fixed lines on a 60 to 70 degree angle. This is really important. The video above will give you an idea of how difficult the terrain and gradient is on Island Peak and show you that you will need a proper training plan and acclimatization schedule to match. CLICK HERE for our top 10 tips in preparation for the trekking section to Everest base camp. READ SOME REVIEWS.
2). Buy your own Mountaineering Boots Early
If you have ever worn mountaineering boots before, then you will understand what I mean here! Mountaineering boots are extremely rigid and heavier than your normal trekking boots, making them a lot more difficult to walk in. It is essential that you have worn-in your boots before you go, and also that you pick the correct boots. Your feet are so very important to your success on Island Peak, and you need to look after your feet at all times in the Himalaya’s.
Island peak base camp is 80 miles from a road, you are in a wilderness area and need to be fully prepared with the right boots. This is not the place for you to test out your mountaineering boots. Likewise, we strongly advice against renting mountaineering boots. Having the wrong boots or renting boots could ruin your feet and your trip.
3). Complete our Winter Mountaineering Courses
We highly recommend taking a specific technical training course. We run specific training courses for Island Peak in Colorado and Scotland. It is a very important part of your training before leaving for Island Peak. Being able to abseil/ rappel using a figure of 8, using crampons, a jumar (ascender) and being comfortable in a harness and using ropes can make all the difference in feeling confident in your Island Peak ascent and descent. We also recommend crossing ladders with crampons in your training.
Check out our winter courses in Scotland and get in touch for further information for our courses in Colorado. We can help you fully prepare for your climb on Island Peak. VERY IMPORTANT: You need to come proficient in crossing ladders, using a harness, figure of 8, using a Jumar device and abseiling.
4). Have the Right Clothing and Gear.
With temperature ranging from + 20c to – 15c (68F to 5F), you need to come prepared. Once you arrive in Island Peak Base Camp, there are no lodges, therefore you will be sleeping in tents, out in the elements. Having the right gear can be the difference in a successful and unsuccessful trip. One of the essential pieces of gear will be a high quality down coat. You will need to wear this down coat in the mornings and evenings as well as during your summit attempt.
Wearing high quality base layers is another way to ensure you are managing your body temperature. We like to recommend Merino Wool as a great option for base layers, however they can be quite expensive, so if you are not looking to spend that much on your layers, you could also look at synthetic pieces. You should stay away from anything cotton against your skin. Cotton will be very difficult to dry and it will also not help with regulating your body temperatures.
The most important items for Island Peak will be your mountaineering boots and gloves. Keeping your hands and feet warm is extremely important. CLICK HERE and watch our Island Peak packing video. If you sign up to one of our trips we send you a 40 page dossier with itemized kit list.
5). Manage your Safety Throughout the Trip
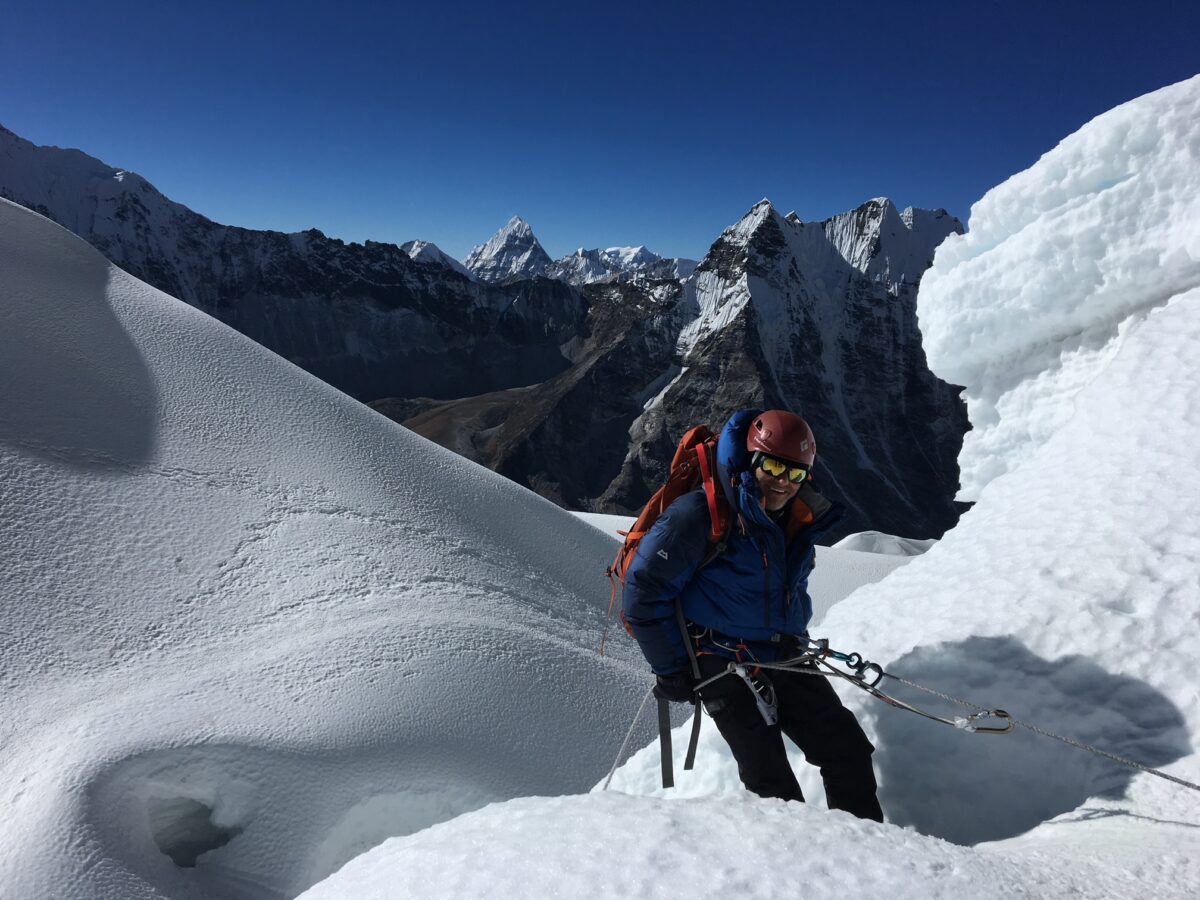
The trail to Island Peak comes with some hazards. You need to be aware of these prior to making this journey. Our guides will lead you safely through the trail but always be aware of landslide regions, drop offs, people, yaks, and mules. Always stay on the mountain side of the trail when passing or being passed, and constantly be aware of your surroundings. CLICK HERE for our top tips while you are on the Everest trail towards Island Peak. Always wear a helmet above high camp as there is potential rock fall. You need to take personal responsibility for your own safety and be mindful of your surroundings.
6). Have Qualified Climbing Guides
Unfortunately, there are a lot of local guiding companies out there that offer Island Peak climbs who are not qualified to do so. Many companies out there will promise you the world, however they outsource their services to guides in Dingbouche and Chuckung. These guides have limited climbing experience and will not have the ability to fix ropes or manage clients at high altitude. You need to make sure you have done your research on the company you will be using. You should have a professional climbing Sherpa who can fix ropes, manage training in Chuckung and Island Peak Base Camp, bringing you safely up and down Island Peak.
We bring our own ropes up the mountain and fix them each trip for your safety. Therefore, we do not use the ropes that are already fixed to the mountain. These ropes that are already there are used by too many people. They are not checked regularly enough to be safe in our opinion. We also use a high camp at 5,500m/ 18,045 feet, which gives you the best possible chance at a safe and successful climb to the summit of Island Peak. READ MORE about safety and what you need to climb Island peak.
7). Have the Right Acclimatization Schedule
When you are going above the danger zone and lower realm of the death zone at 5,500m/ 18,044 feet to 6,189m/ 20,305 feet, you need the right acclimatization schedule. We have 3 nights acclimatizing in Namche Bazaar at 3,440m/ 11,300 feet, 2 nights in Dingbouche at 4,350m/ 14,271 feet, an additional 2 nights at Island Peak Base Camp at 5,080m/ 16,666 feet. Additionally, we also have one night at Island Peak High Camp at 5,500m/ 18,044 feet.
Altitude sickness is real, and going to altitude needs to be respected and not forced. Take your time and acclimatize well. This will help you to achieve your goal of climbing Island Peak. Also, you will enjoy a safer and more enjoyable experience. CONTACT IAN for more information.
8). Have Previous Altitude Experience
There is a massive investment that you have made to do Island Peak. You have spent the money, time, and preparation to go all the way to Nepal and climb. Everyone acclimatizes differently, therefore, knowing how you adapt at altitude helps you in your understanding and preparation for this climb. Having made numerous treks and possible climbs at altitude will help you in your preparation for Island Peak. How do you know what it is going to be like at 5,000m/ 16,404 feet and above, with 50% less oxygen, if you have never been at this elevation before? Be responsible and take the right path to 6,000m/ 20,000 feet peaks.
9). Know Your Knots
When you are climbing Island Peak, you will need to know how to tie different climbing knots. The figure of eight, overhand knot, Alpine butterfly and Italian Hitch knots will be used in the training and preparation for Island Peak. Therefore, it is best if you know these and have practiced these knots prior to joining an Island Peak climb. We will have rope with us on the trek in, and we will help you become more proficient on the route to Island Peak.
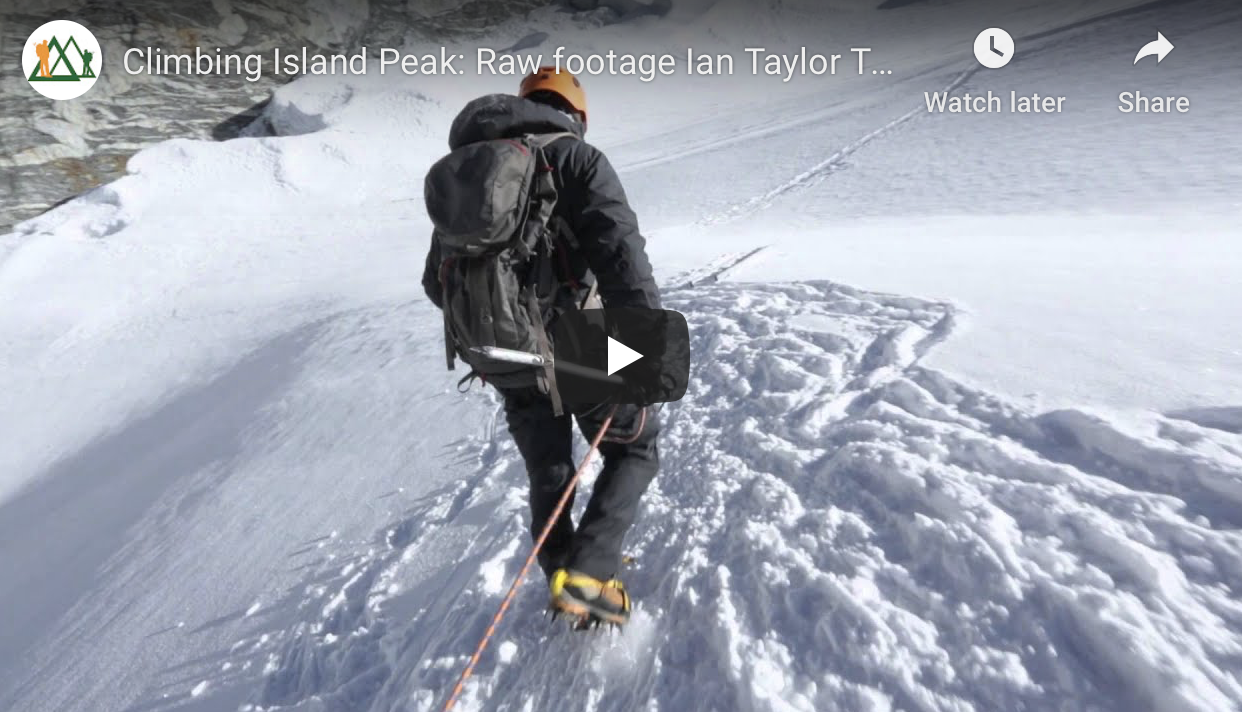
10). Be Proficient in Rappelling with a Figure of 8
As you will see in the video above, you have to abseil down the Head-Wall of Island Peak. You will be in control of the rope as you abseil down. Therefore, being comfortable with abseiling prior to the start of the trip will be essential. We recommend doing an outdoor course before the trip. This should include learning how to move from one rope to another on steep terrain, using a figure of 8 device. You should also be comfortable with exposure. Therefore, finding a local climbing wall and practice using a harness and abseiling from high, which will help build confidence and experience for when you need it high on Island Peak.
Get in Touch Today
We hope you enjoyed reading our Top 10 tips for climbing Island Peak. The next step should be to CONTACT IAN and get the best information available. Ian has climbed Island peak 20+ times over the past decade and has been journeying to Island Peak since 2008. He has a wealth of experience on this mountain and has climbed Mount Everest to the Top, Kilimanjaro over 40+ times and led over 35+ treks to Everest Base Camp and other treks throughout the Everest Region.
Any peak that requires months of preparation, should require months of research. Our trips may not be for you. We are aiming at people who want to learn more about mountaineering, give themselves more safety, more staff with better support and acclimatization. Check out our unique itinerary.
Becoming More Self-Sufficient
Firstly, our goal is to educate, develop and ensure the highest safety and give the best chance at the summit. Secondly, we have a maximize group size of 8 climbers with western guide and highly experienced Sherpa Team running back-to-back trips managing our consistency and safety. After trekking to Everest Base Camp and Kala Patthar 18,520 feet the team will return to Chuckung 15,419 and start preparation for Island Peak. Finally, we will conduct ladder training and refresh your knowledge on jumaring, rappelling using a figure of 8 and managing yourself on fixed lines. Read some reviews from our trips.
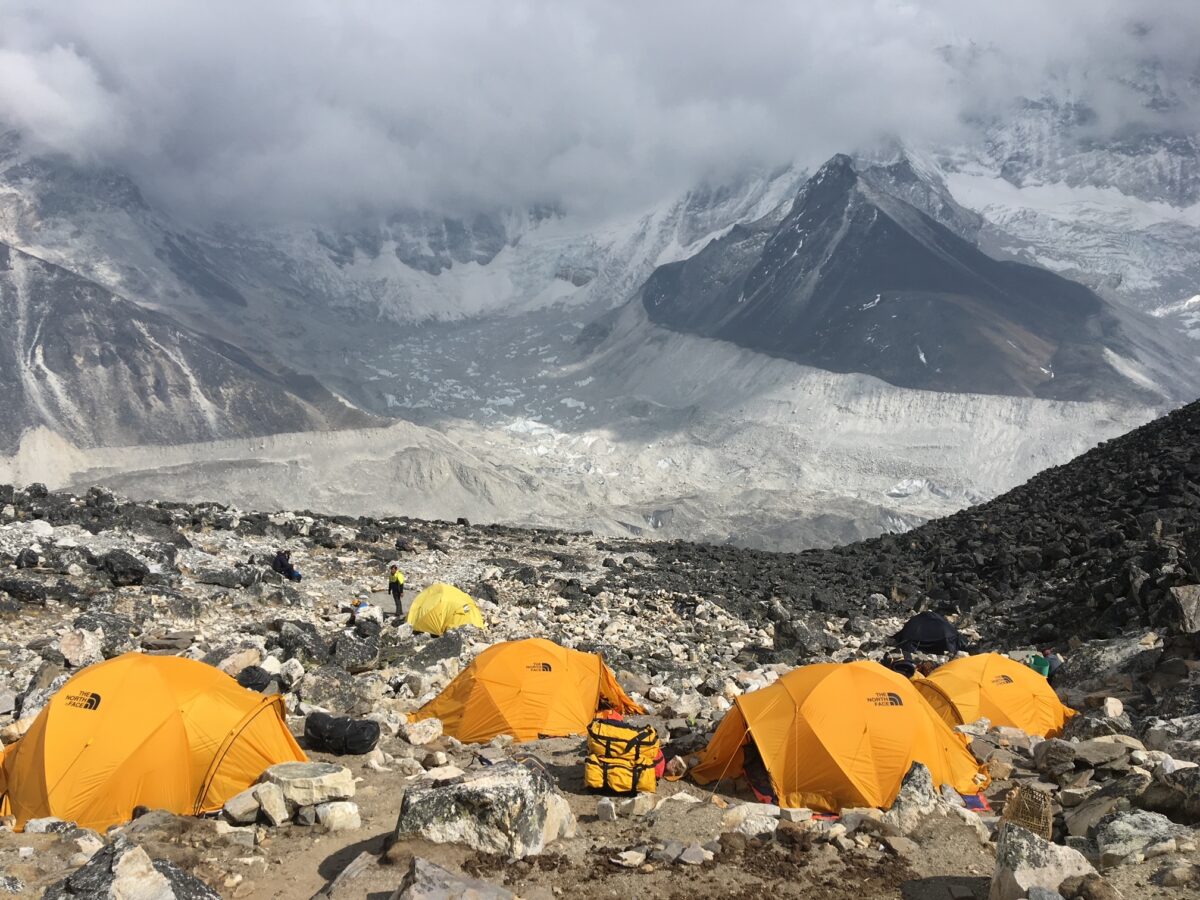
Island Peak Base Camp
Time to move to Island Peak Base Camp for two nights. We will aim to do an much training as possible and as much as needed. There is a chance to make sure all your gear is working correctly. Practice putting on your crampons 20 times and practice with your gloves on. The more relaxed and comfortable you are with all the mountaineering equipment the better. Follow us on Instagram.
Island Peak High Camp
From here we move to Island Peak High Camp 5,500m/ 18,044 feet for our summit attempts. We also have highly qualified guides and western guides on all these trips. We fix our own ropes on the head wall and have cooks and support staff carry gear to crampon point to give the best safety on our trips. You will hear people tell you there is no water at high camp. This is not true, right over the ridge is plenty of water coming off the glacier. The challenge is you need a team of support staff to go get it. Our goal is to reach High Camp around 2pm. Twelve hours before we take off on our summit night.
Gearing up for Summit Night
I will wear different layers depending on the month I am climbing. March will be colder than May. November will be colder than September. If you need to consider which month you plan on climbing and adjust your gear accordingly. Watch our packing video. I always use my double mountaineering boots on with my thicker mountaineering sock on Island Peak. 260 merino base layer with Gore-Tex shell in colder months. Sometimes I use an insulted layer or trekking pants. Work with 4 layers on top with Gore-Tex shell, you can mix and mash layers as needed. We recommend having liner gloves, bigger gloves, and work gloves for the headwall and rope work. Make surre you have a light hat that fits under my helmet, with polar buff to cover my mouth. We send you itemized kit list on signing up.
We will wake up at 12:30am and start drinking water. I usually like to drink a couple of liters before I leave. At 1am our staff will bring a light breakfast with tea or coffee. Around 1:30am or just before we leave our staff will help with filling up your Nalgene bottle or bottles with boiling water. I always carry 2 liters of water with me on the summit night. The route is steep out of camp as we move across mixed rocky terrain in bulky mountaineering boots.
The Scramble
The guides will lead the way in the dark and it takes about 30 minutes of walking before we start zig zagging starts and the route gets steeper. There are several sections where you need to scramble, and you will need to use your hands to climb. There are lots of steep step ups, and steep rocky terrain as you make your way up through the gullies on Island Peak. We will hike for an hour, then take and break. We will continue in this format all the way to the glacier and crampon point.
The Grey Rock
After we have made our way through the gullies, we cross some exposed sections although hard to see in the dark. You need to maintain your balance and maintain 3 points of contact in some places. We move across Island Peak to the climbers right and start a steep ascent all the way up to the traverse to crampon point. This section needs mental focus as move across steep terrain for about 45 minutes. You just need to get your breathing right and take one step at a time.
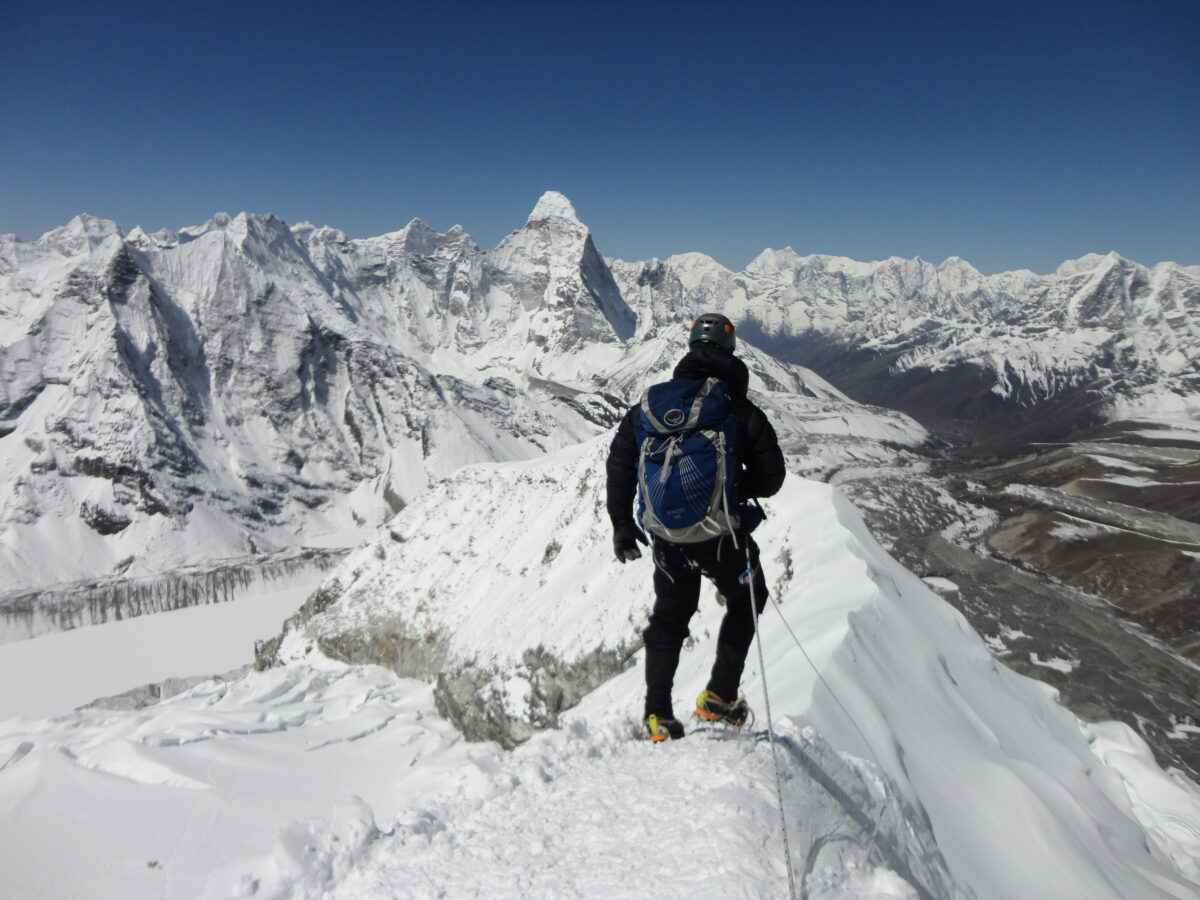
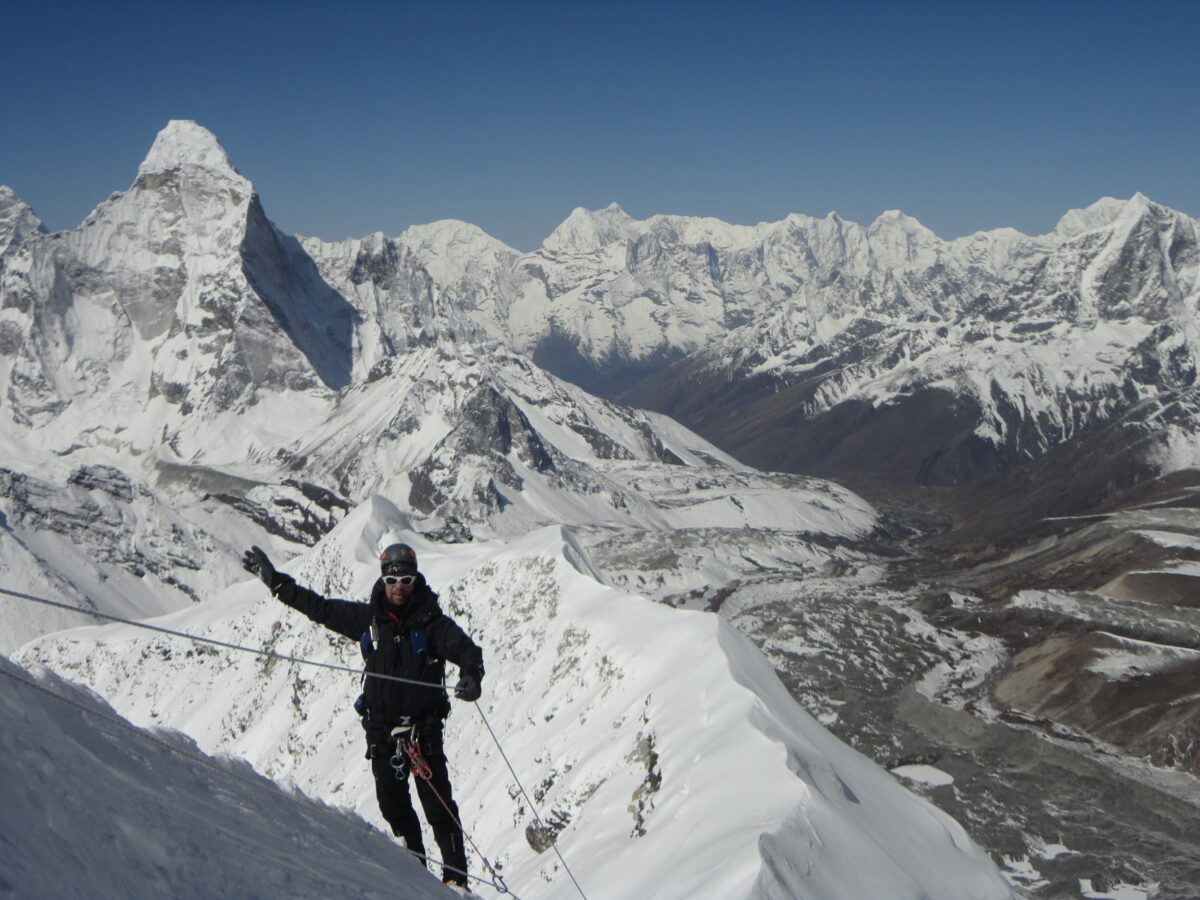
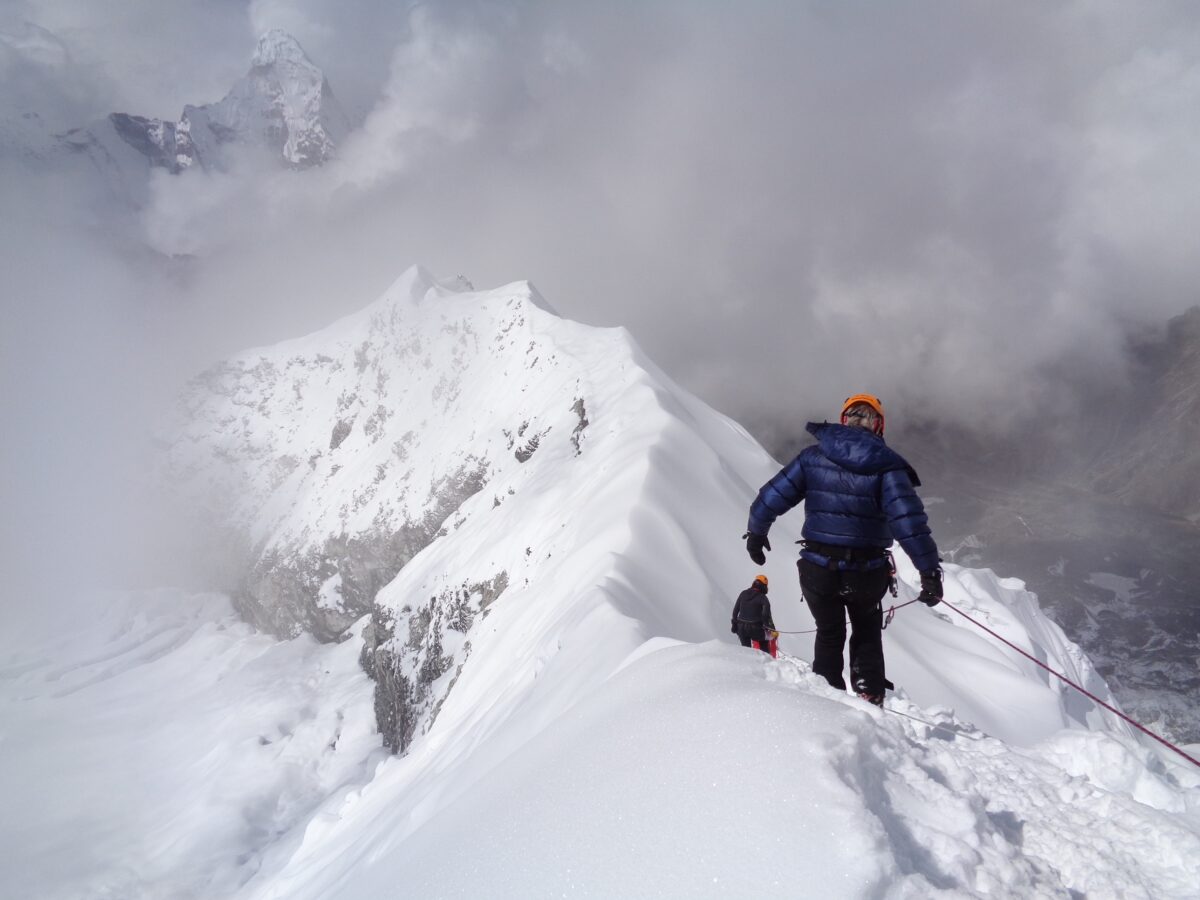
The Traverse
The traverse to crampon point is a short, exposed rocky ridge with some fixed lines in place. I will usually have my harness; on I can clip into the fixed line for added safety. You need to make sure you have good foot placement, holding onto the rocks as you move across this ridge. You should stay on the left side of the ridge on the way up to crampon point.
Crampon Point
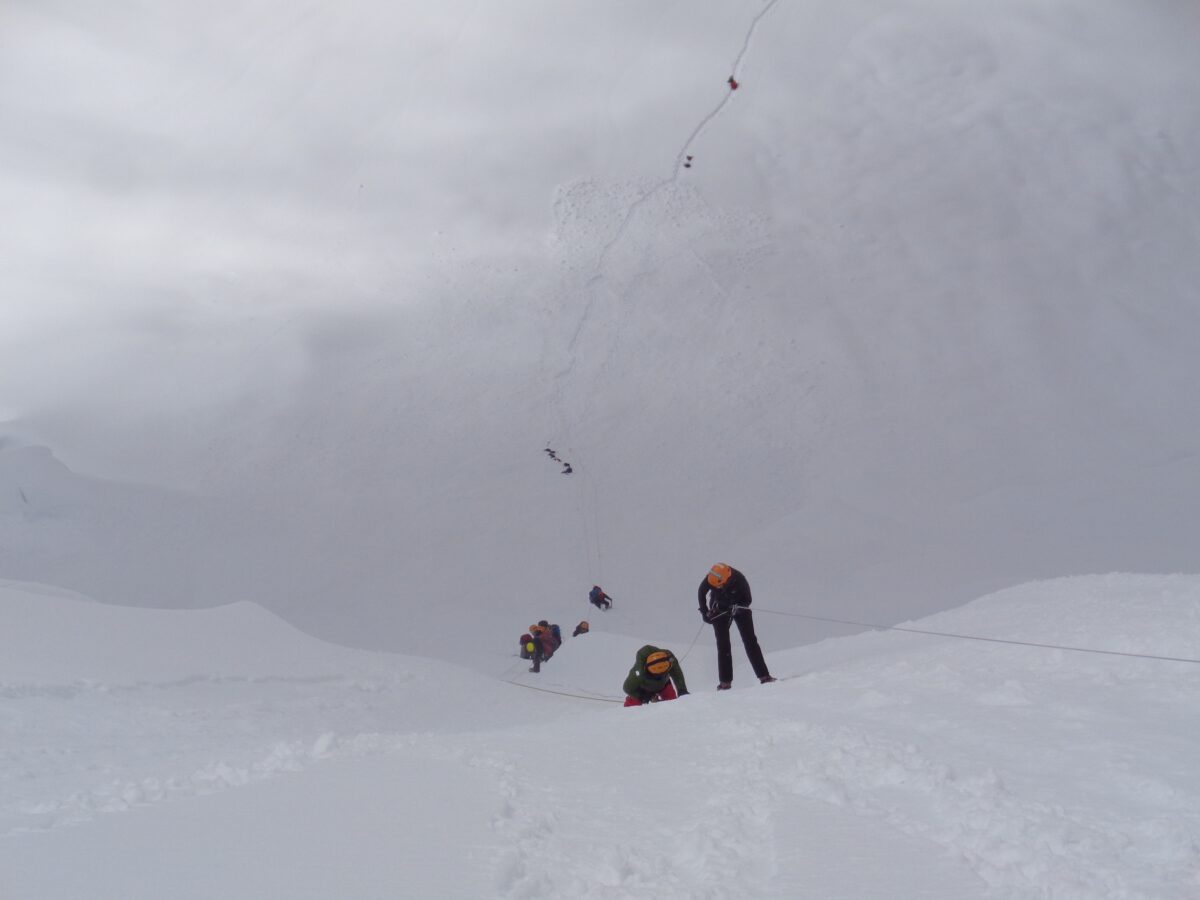
After about 2 and a half to 3 hours of hiking you will reach crampon point. The speed will depend on the itinerary and acclimatization. Once you are crampon point is may be cold, so being efficient with your time is important. Make sure your harness is tied correctly, get your crampons on as quickly as possible and stay warm. You will also need your ice axe for the next section of the climb. The guides will get ropes out and start getting each team member roped up.
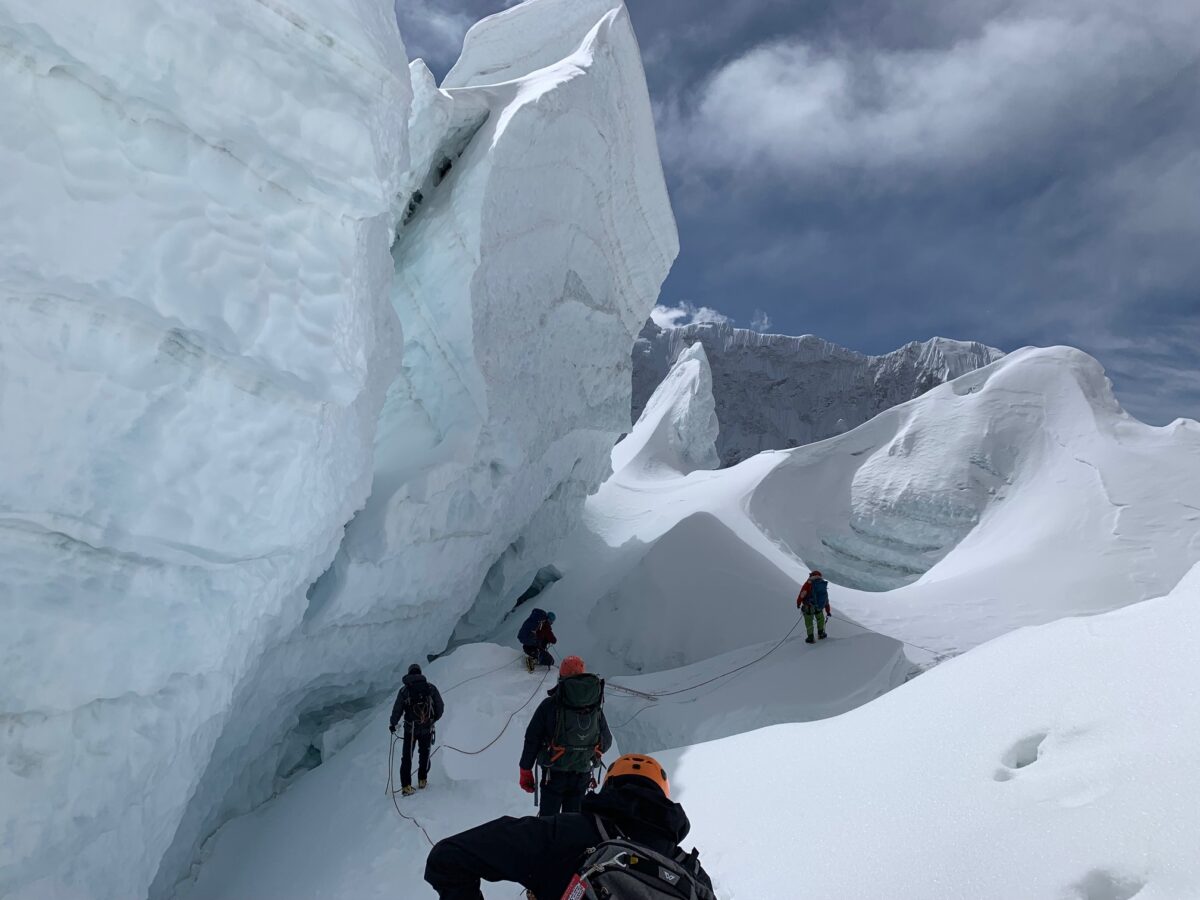
Moving onto the Glacier
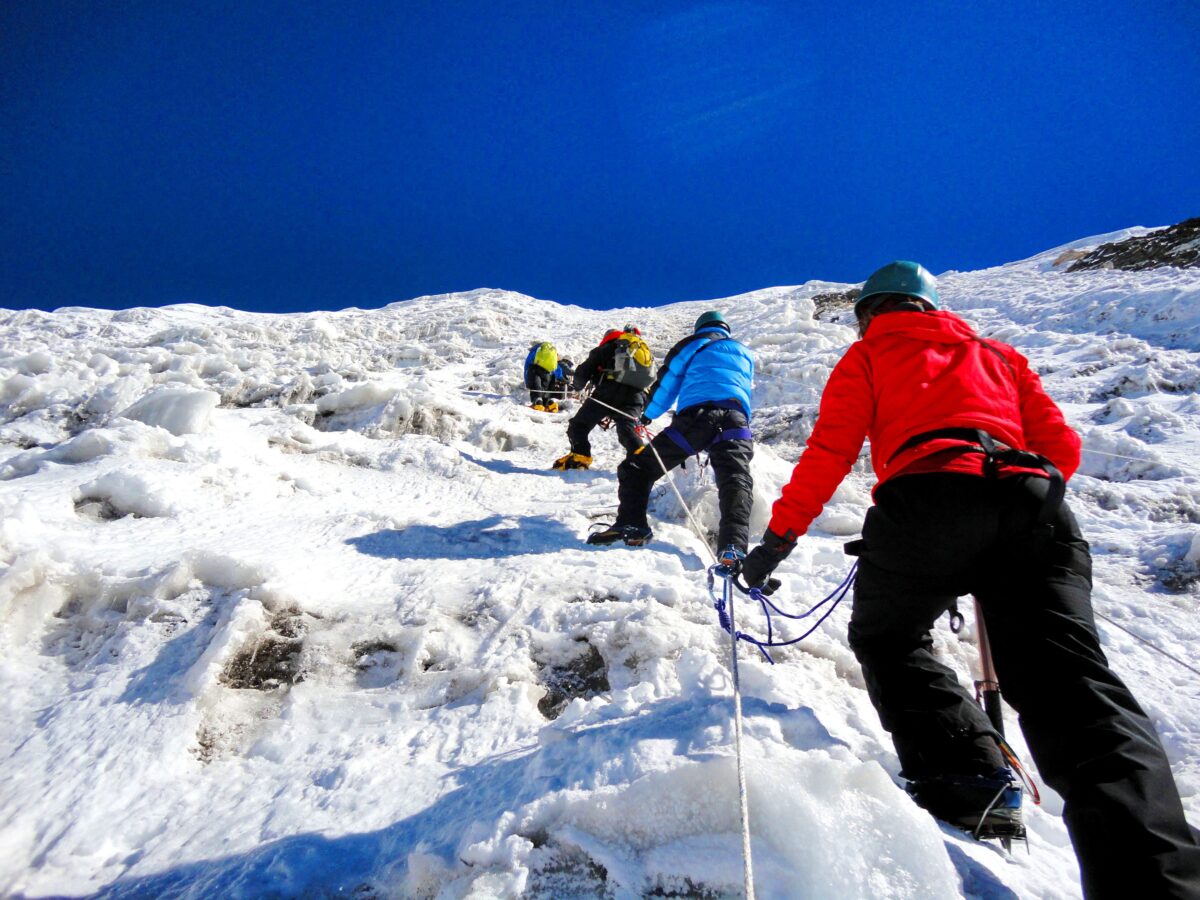
We will move onto the glacier in small groups. There may be a need to come off the rope and used fixed lines and this will be managed at the time. We will use fixed lines and additional safety line for ladder crossings. Once we move through the undulating glacier on Island Peak, it becomes more gradual as we cross the football field to the base of the head wall. The terrain gradually gets steeper and steeper. We will move to the base of the fixed lines and take a 15/20 minute break. This is weather dependent. We will eat and drink water and prepare our gear for the final section to the summit.
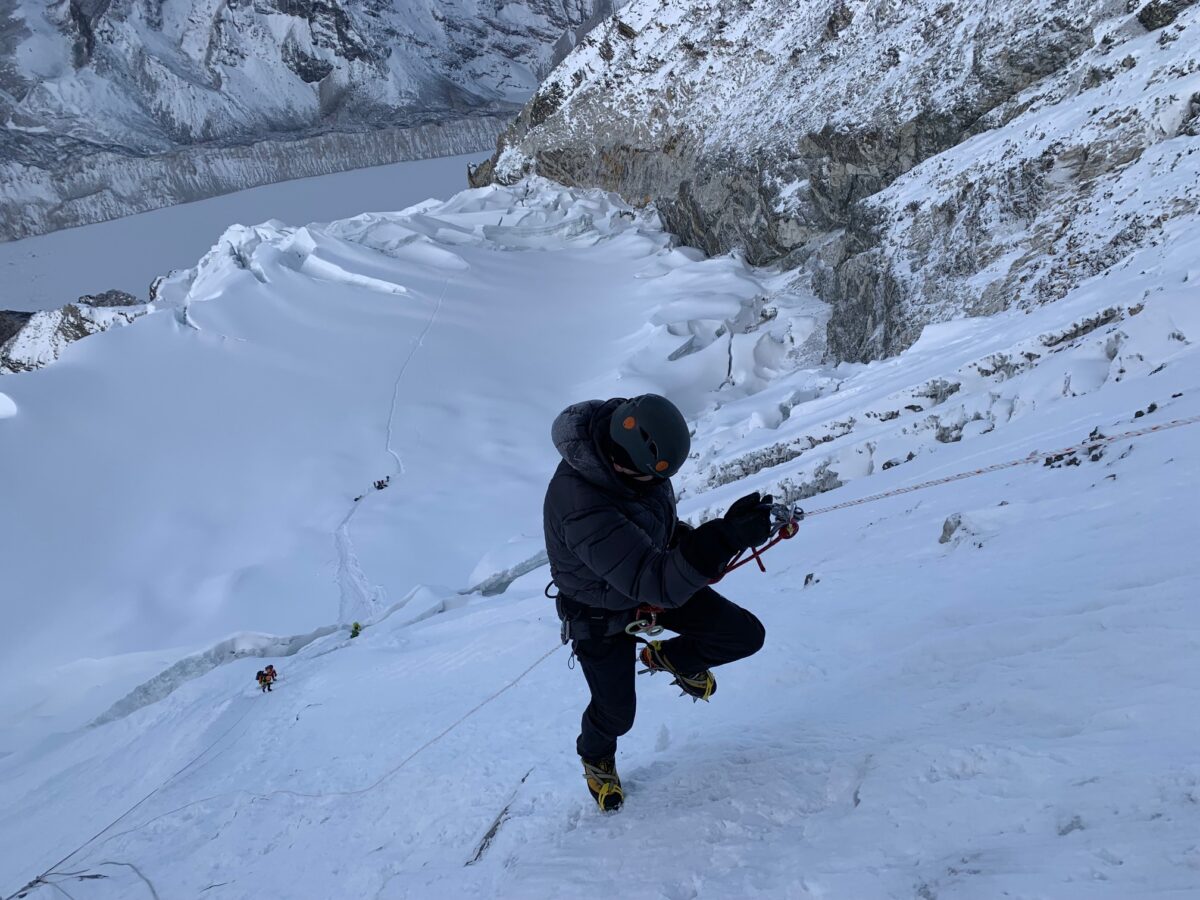
The Headwall
The Sherpa guides will be moving ahead fixing our own ropes. We may fix our own route to the summit. This will depend on the amount of people on the mountain. We will need to be fast getting back down so having our own rope helps us move more efficiently on the head wall. This process can take time, after a short break we will start moving up the fixed lines.
You will clip into our rope with your safety line and place your Jumar below the carabiner. As the terrain gets steeper, I recommend 3 movements and then stop for recovery. You need to be in control of your breathing and movement all the way to the summit. You will come up on some anchor points and it is important to move your safely line with carabiner first. Leave your jumar in place while to keep your balance.
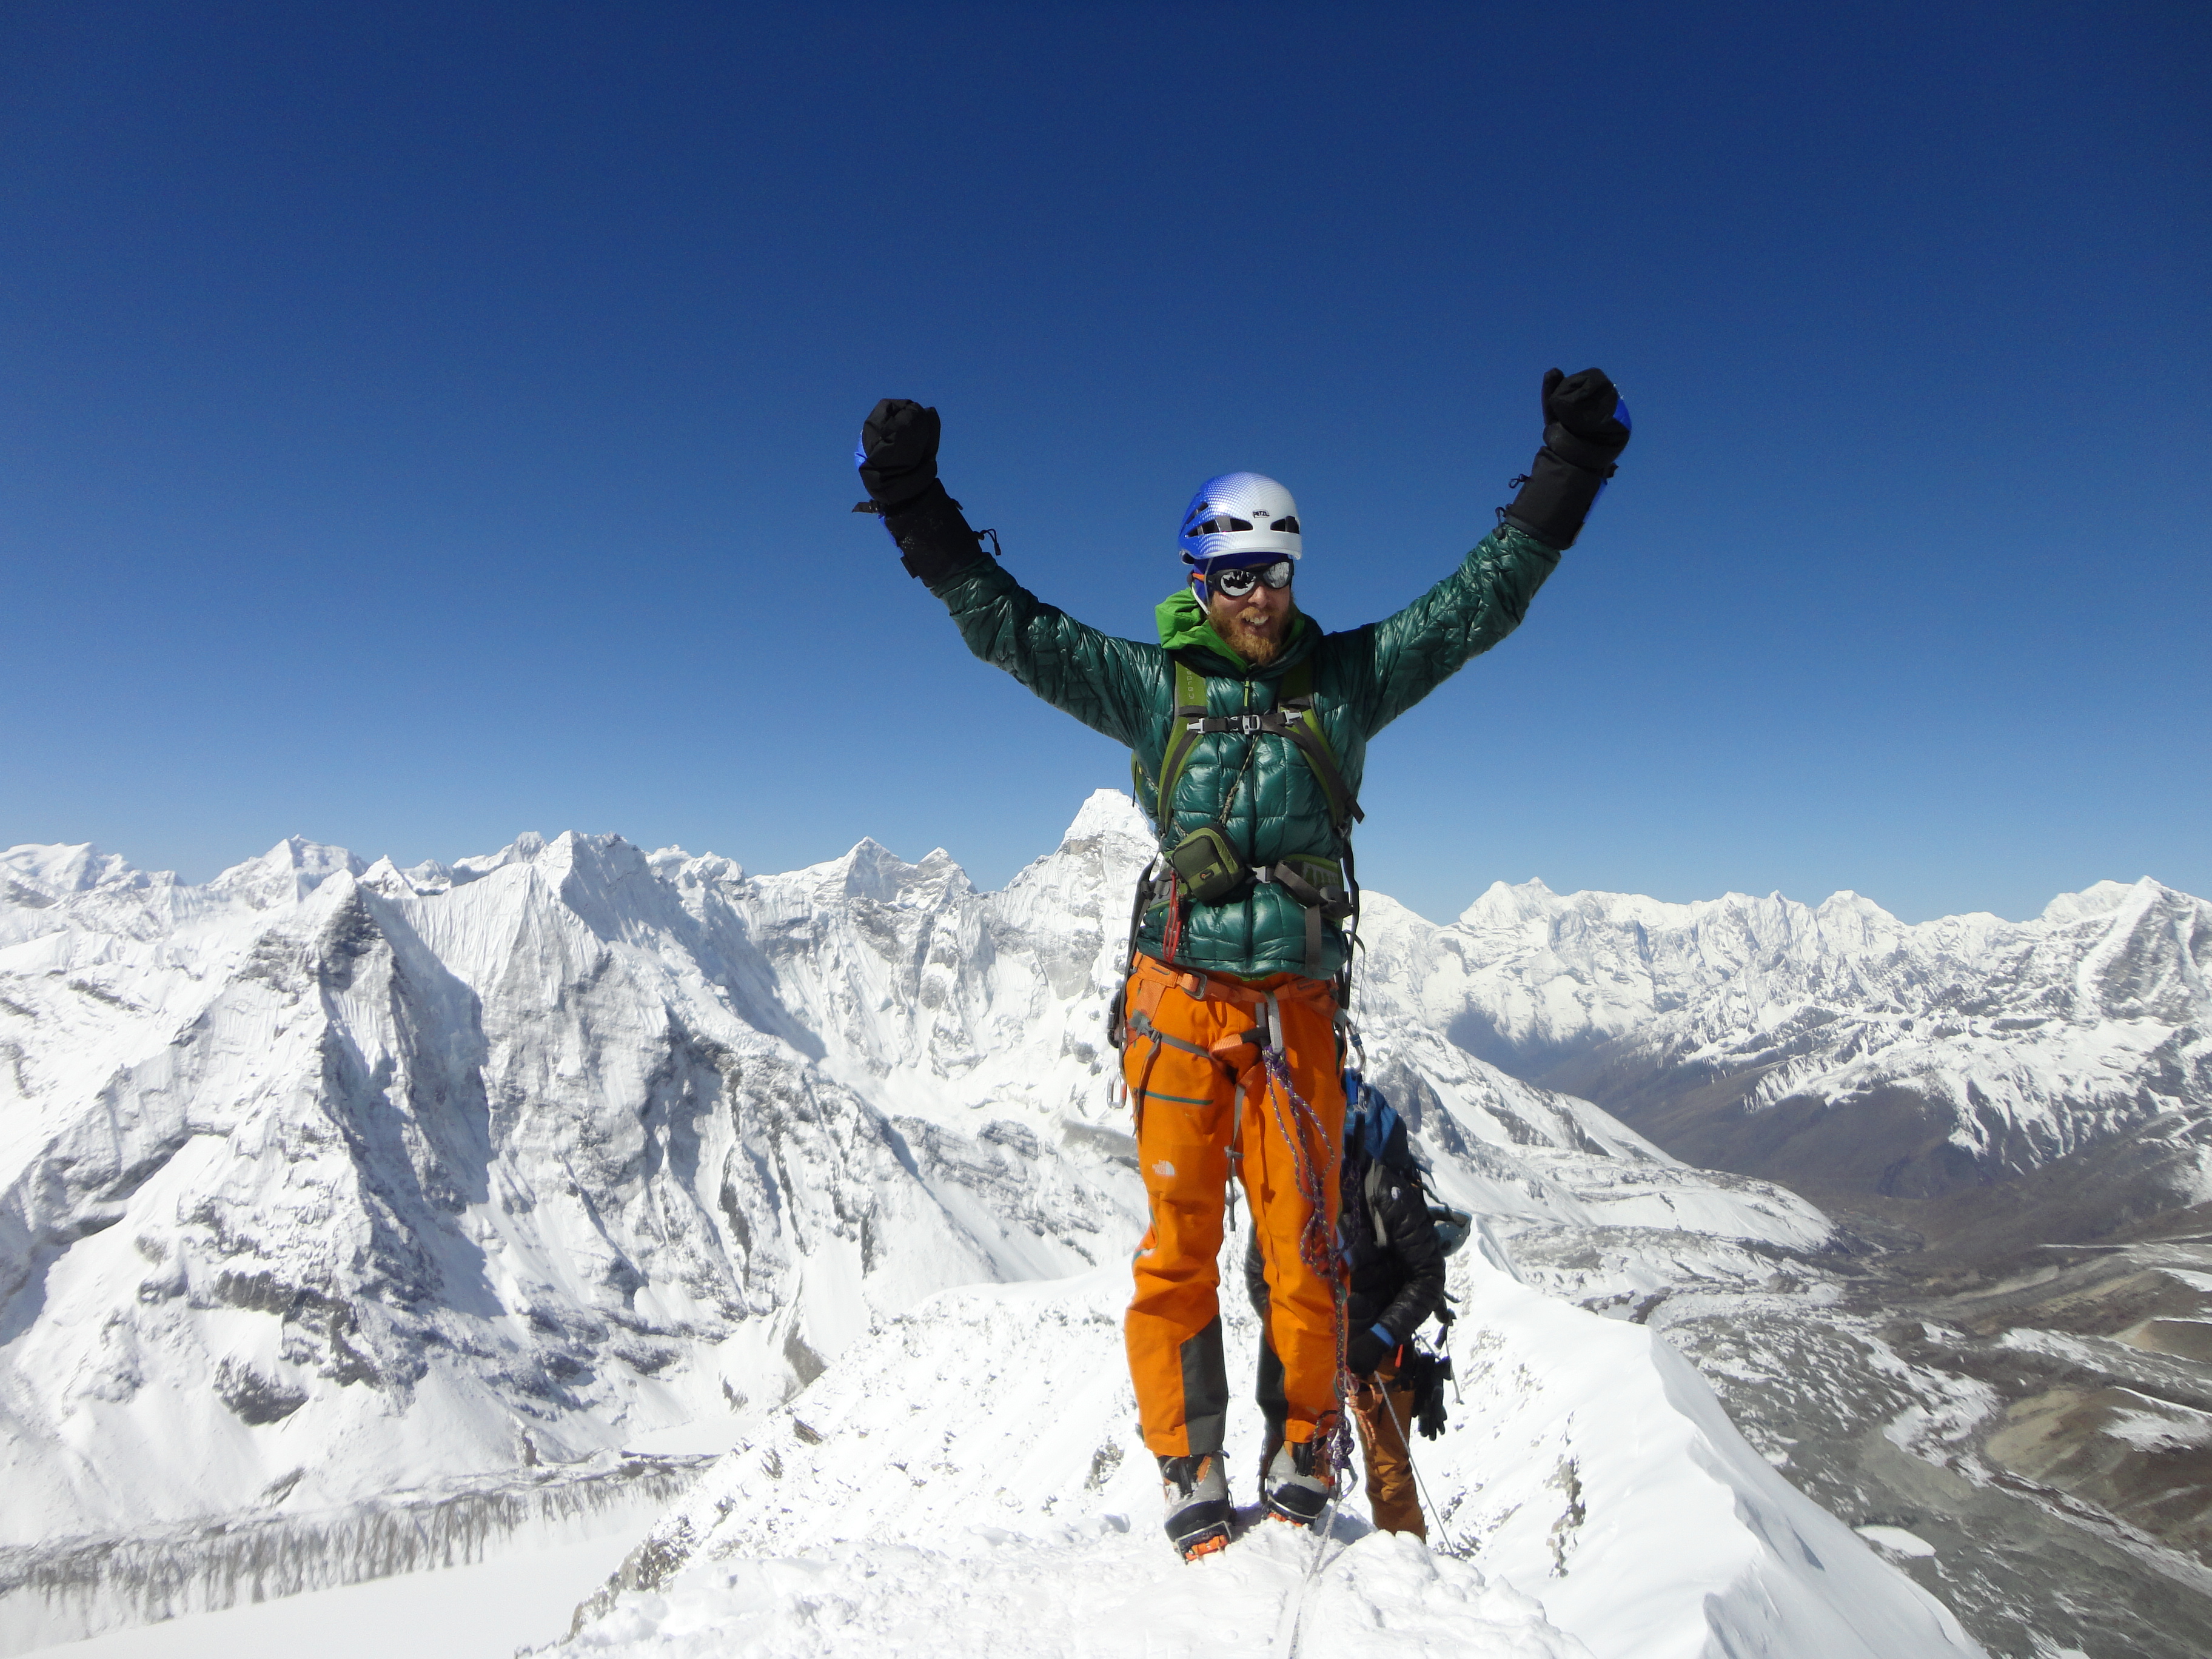
Only when you have the safety line safely above the anchor can you remove your jumar and place It above the anchor point. Keep moving upward to the next section of rope. It can take an hour to one hour thirty minutes to reach the summit from the base of the headwall. You need patience for this part of the climb. You need to be fully aware of your surroundings as move slowly towards the summit.
Getting Back Down
Getting to the summit is only halfway. Most accidents happen on the way back down. It is time to focus on getting back down quickly and safely. We will abseil or rappel each section of the headwall and then wait at the bottom of the head wall in a safe place. Rappelling using a figure of 8 is straight forward but lots of practice is needed to be efficient so all our team members can get back down in a timely manner.
Retracing Your Steps
The other benefit of high camp is that we have an established camp with backup staff and resources if needed. Once we return to high camp, we usually pack up our gear and move to Chuckung. If we are late in the day, we have the option of returning to Island Peak Base Camp for the night. It takes one hour to make our way back down to Island Peak Base Camp and further 2 hours to hike back to Chuckung.
Your Body Needs Water
Facts About the Importance of Water
1). Water increases the efficiency of red blood cells in collecting oxygen in the lungs. In other words, we need it for breathing. So personally, I run out of breath at altitude far before my legs give out.
2). Cells use water to energize and top off their reserves. Then, it leaves the body, carrying along with it the toxic waste of the cells. This is done through urination, sweat, bowel movements, and even our breath.
3). Water is the main solvent for all foods, vitamins, and minerals. In order to metabolize and assimilate nutrients, water is used to breakdown food into smaller particles.
4). Water is essential for our body’s cooling (sweat) and heating systems. Believe me, I know this from personal experience! If I am not well hydrated, and it is hot outside, and I am working hard carrying my loaded pack up a steep ravine (or even on a slightly upward path) my energy level drops dramatically. It has been said that you can lose as much as 25% of your strength if you get down just a pint of water when working hard doing any physical activity!
5). Water is even used in the spinal discs to make them shock-absorbing water cushions and is the main lubricant in the joint spaces. Water helps prevent arthritis and back pain. Not much to say here. Now there are many reasons why our joints break down, but knowing this fact should encourage us to keep hydrated so we can do all we can to help keep our back and joints in the best working condition as possible. Painful knees and back can interfere with our mountaineering pleasure.
Factors That Influence Water Needs
Did you know that temperature, activity level, humidity, how much you sweat, breathing, urine, bowel movements, your physical condition, and even your gender (just to name a few), all come into play when it comes to how much water you are going to lose on any given outing? Now lets discuss some other variables that you may encounter out there while hiking, climbing and mountaineering.
Altitude
High elevation affects the hiker/climber in three ways when it comes to hydration and remember that it takes the body a long time to acclimatize to high altitude. You want to make sure you are choosing the right itinerary for your trek to Everest Base Camp or Kilimanjaro
1). Loss of water due to dryer air. As you go higher, the temperature drops, and cold air holds less moisture then warm air.
2). Loss of water due to more frequent urination. As the body acclimates to higher altitude (for most this means an altitude greater then 8,200 feet), one urinates more often as the body works to avoid respiratory alkalosis (elevated blood PH) by your kidneys excretion of bicarbonate. In time, the body adjusts and alkalosis is no longer a problem once the hiker/climber becomes acclimated. Also, in very cold temperatures, the body wants to eliminate fluid by urination so it does not have to expend energy heating it. So we are more likely to lose fluid through urination in cold weather.
3). Loss of water through rapid breathing (and increased heart rate). This is due to lower oxygen concentration at higher altitudes. The body tries to compensate by taking in oxygen more frequently by breathing rapidly. Over time as the red blood cell density increases, breathing and heart rates return to normal.
Climate
Hot or humid weather can make you sweat more. Sweat can not evaporate and cool you as quickly as it normally does when the air is humid. This can result in higher body temperature and the need for more fluids. Conversely in cold climates there is less moisture in the air requiring additional intake of fluid to replace fluid loss.
Level of Activity
Speed of activity, grade, difficulty of terrain, and the amount of weight carried, all have an influence on how much water you will need. It is pretty obvious that the pace of the activity and the amount of weight carried has a direct impact on the energy and water needed for the outing. However, not always so obvious, is how much extra work it is to ascend even a slight hill in comparison to traveling on level terrain.
I learned this principle years ago when doing a lot of cycling, and it proves to be true for hiking too. The difficulty of the terrain also has a profound influence on how much you should drink. If you get into rocky terrain and have to use your hands or upper body for balance, you will need more water. The rule of thumb is, the more muscle groups that you use, the more energy and thus more water you will need. So the bottom line is that you will need extra water if you are traveling fast, or in steep and/or difficult terrain.
So How Much Water do I Need to Drink a Day
I hear it all the time; “just drink 8 ounces of water 8 times a day, and you’ll be fine.” Right? Well that all depends on all the water loss factors we talked about earlier.
Lets Start with Some Basic Facts:
1). Women require 9 eight oz cups of water/day on average
2). Men require 13 eight oz cups of water/ day on average.
However, remember that individuals sweat and breath at different rates. Therefore, there is no way to have a hard and fast rule for everyone. (the above is the findings of the Institute of Medicine)
How Much Water Should You Drink
If you engage in any activity that makes you sweat, you will need to drink extra water to compensate for the fluid loss. An extra 1.5 to 2.5 cups of water should suffice for short bouts of exertion. If the level of activity becomes intense, lasting more than an hour (such as hiking on a sustained uphill grade), then this will require more fluid intake. How much additional fluid you need will depend on water loss during the outing.
If you start your outdoor activity well hydrated, then it is recommended to drink 8 ounces every half hour of sustained activity. Followed by 8-16 ounces of water after the outing. When we are hiking long distances, it is preferred to constantly sip water, instead of ‘chugging’ large gulps of water at once. If you think of a hospital drip, it is constantly drip-feeding the patient with fluids. They are not pouring them in all at once.
Hydration for a Safe and Successful Journey
One rule of thumb to remember is that the longer you exercise, the more difficult it is to stay hydrated. For those of you who are going out for a period of a few days, your fluid debt increases with time; be mindful that you need to replace the fluid you lose on a daily basis, as dehydration is cumulative.
All of our Island Peak Pages in one Place
1). Pick the best acclimatization itinerary for your Island Peak climb
2). Get training and learn the best way to prepare for climbing Island Peak
3). Specific training needed for climbing Island Peak
4). Get FREE constant advice from our professional team
5). Understand the daily distance on the way up and down the trek in
6). Have the right clothing and gear for your Island Peak climb
7). Pacing each day on the trail is critical to success on Island Peak
8). Why hydration is critical at high altitude and in low oxygen environments
9). What sort of food will I get on the trek and Island Peak climb
10). Read our Top 10 Tips for a successful Island Peak climb.
11). Read our Top 11 Tips for when you are on the Everest Base Camp Trek.
12). What vaccinations should you consider for your Island Peak climb
13). What type of trekking boots should you have for your Island peak approach
14). What type of mountaineering boots should you consider for climbing Island Peak
15). Where do I get helicopter evacuation cover for my Island Peak climb
16). How does summit night on Island Peak play out
17). The diary of a pretend mountaineer
18). Climbing Island Peak in Adverse Conditions
19). Climbing Island Peak. A mid life crisis
20). You need to train hard so you can climb easy
21). 20 reasons to pick Ian Taylor Trekking for your Island Peak trip
22). Learn more about training for downhill hiking
23). How difficult is it to climb Island Peak
You need Specific Mountaineering Training
One of the most important elements of your preparation will be in gaining mountaineering skills. You do need to be competent in abseiling/ repelling using a figure of 8 and practicing moving on fixed lines. We have courses in Scotland and Colorado. You also need to consider crossing ladders in crampons, as in some seasons you will have to cross crevasses on ladders. We do some training prior to going into Island Peak Base Camp but the more experience you have the better.
Island Peak Requires More Acclimatization
The first thing you need to do is pick the right itinerary. There is no one size fits all and you need to have as much acclimatization in the critical points of the trek and climb. Therefore, you need 3 nights acclimatization in Namche Bazaar on the way up the trail. This is vital to a safe, enjoyable and successful experience in a low oxygen environment. You also need a full training day in Chuckung, in order to do ladder training.
You also need 2 nights in Island Peak Base Camp at 5,100m/ 16,732 feet and an additional night at Island Peak High Camp at 5,500m/ 18,044 feet. Our teams carry up water, tents and all equipment and food needed for the climb. If you attempt Island Peak from Base Camp, you are increasing your level of fatigue when you need the energy to climb safely high on the mountain.
Preparation and Training
Climbing a Himalayan peak like Island Peak is going to require specific and strenuous training. We have been leading trips on Island Peak for over 10 years and have developed an itinerary and trip that gives you the best chance of a safe and successful climb. Don’t underestimate the climb. Island Peak is not a trekking peak, it is a technical climb, and you need to come prepared.
Island Peak is a Mountaineering Peak
The first thing to remember is that Island Peak is constantly changing. The route, terrain and the glacier changes from one season to the next. Specific technical training is needed for climbing Island Peak and we do require it from all of our clients. There have been a number of deaths in recent years so having the correct itinerary, acclimatization and professionals around you will make all the difference.
Be Ready for Anything
Ian has been on 19 Island Peak Expeditions, and each one of those has been totally different than the last. The route up the Head-Wall changes each season, and sometimes it is more difficult than others. Over the years, the route has become more challenging. Years ago, the route was a lot more straight forward, however as the ice is melting on the Head-Wall, the route to the summit has become more direct.
The climb can be very challenging if there is a lot of snow, if there has been no snow and higher temperatures, then you will find less ice on the head wall, and undulating ice climb, which can make it an easier or harder climb to the summit. Because you never know what the conditions will be, you must not show up under prepared!
Be Physically Ready for Island Peak
When it comes to mountaineering, you want to be training harder than you think. You could encounter an ice wall with no rest for your calves. You could encounter deep snow and you need to be fully prepared for the hard slog. The conditions could be such that you could have over a twelve hour summit day before getting back to Base Camp or Chuckung. Likewise, we have had teams have 19 hour summit days! When it comes to any mountaineering trip, you need to be in excellent physical shape so that you can be ready for whatever is thrown at you.
Island Peak is not trekking. You need to be fully trained and prepared and always in control. Watch more videos There is specific training needed for a safe and successful Island Peak climb. As you can see in our videos, the steep challenges of Island peak require respect and specific physical conditioning and mountaineering skills. If you are signed up to one of our climbs we are available to help you get the best and current information on this climb.
Can you Walk Across a Ladder with Crampons
Sometimes climbing seasons you have to cross ladders on Island Peak. Therefore, you should come with that level of preparation. Do some ladder training at home with crampons on and get a feel for what it is like when crossing ladders. The more comfortable you are the better and safer you will be high on Island peak.
Specific Mountaineering Training for Island Peak
When it comes to preparing for going up the head wall, you need to find 60 to 70 degree angle terrain. Have a guide set up ropes with 4 to 5 different anchor points. You will have a jumar on a sling or cows tail, attached to your harness. You should also have a sling (safety line) with a carabiner on the end of the sling. The carabiner should be able to go above the Jumar on the fixed line. You do not want the Jumar going higher than your nose when fully tight.
The key mountaineering training should be for going down the head wall. You will want your safety line with carabiner on the fixed line. The safety should be kept above the figure of 8 (descending device) as you abseil down. You need to be comfortable abseiling using a figure of 8 and learning to flip the figure of 8 over once you reach each anchor point. Making sure your safety line is tight as you find the next abseil. Once you have found the rope and you are safe with the figure of 8 to abseil, then and only then, do you take the safety line from above the anchor point and place on the rope you are abseiling on. This training is important for your safety!!
You will have to abseil or rappel down the head wall using a figure of 8 at 6,150m/ 20,177 feet. You will need to have the leg strength to get you up and down steep terrain. Importantly, you will need to be very comfortable using ropes, Jumar (ascender) and abseiling using a figure of 8 device on fixed lines. This is extremely important for your safety and the safety of the team and our guides.
Specific Training for Island Peak
Fitness is important, but being lean, lighter, stronger and fast is really important when climbing these big mountains. Do not under estimate this Island Peak challenge. Read some REVIEWS from our trips. We recommend physical training 5/6 days a week. Focus on two main elements of building strength and endurance. We can help you map out a training plan that will suit your needs.
Build up Your Training Over Time
Our recommendation is to be training 6 days a week. One day should be dedicated to long hikes up and down hills with a weighted backpack. Train on a stair master and/or incline treadmill 4 – 5 days a week, starting with minimal weight in your backpack 5kg/ 11lbs. Then, we recommend slowly building up to carrying 15kg/ 33lbs. You need to train to specific heart rates, therefore doing a fitness test is a very good idea prior to developing a training plan. You should be doing most of your training in the endurance zone. Building from 1 to 1 hour 30 minutes per day for four or five sessions a week.
Also, you need a longer endurance session, once per week. This longer endurance session is best completed up and down hills with weight in your backpack. However, if you do not have access to hills, it can be done on a bike doing a long ride or in the gym mixing up the machines you use. We can help you figure this one out to suit your specific situation.
You should be looking at building from 6 to 12+ hours of training per week. Each month you should be trying to increase the weight you carry and the time spent doing the activity. After 2 months, you should start adding in some weight training, developing your quads, calves, and core. In the last 2 months, you should consider adding in interval training, all while you are still doing the endurance training building up the weight you are carrying.
Strength and Endurance Training
Your Island peak summit day could be 12 – 16+ hours, depending on conditions. Therefore, you need to have the strength and endurance to be able to manage this long day after walking 13 days to get to this point. Also, remember that you will then still have to walk 50+km back to Lukla. If you are signing up to one of our Island peak climbs, then we will work with you to make sure you are getting the experience needed for this exciting and challenging climb. CONTACT US today for further information.
Your journey to Island Peak starts when you arrive to the bustling city of Kathmandu at 1,400m/ 4,593 feet. You will be met by our Award winning team. Most people will arrive a day or two before you fly into Lukla Airstrip. You may choose to spend your time there relaxing, exploring the Kathmandu Valley, rafting, sightseeing, or just walking around the busy district of Thamel. All of our trips include one night at the beginning of the trek and one night at the end of the trek at a four star hotel in Thamel.
The Start of the Trek
Once you leave Kathmandu, you fly into the Everest Region of Nepal. The start of the trek is in the town of Lukla at 2,850m/ 9,350 feet. On the trek, you will be walking for 13 to 15 days, depending on your chosen itinerary. All of our Itineraries have 3 nights in Namche Bazaar at the critical acclimatization point of the trek. This gives you the best chance at making it safely to Everest Base Camp and Island Peak.
Day 1). Arriving into Lukla Airport
Ideally, you will arrive in Lukla between 7 – 9 am, however this is weather dependent. Once you arrive, you can have breakfast, fill up on water and start walking mostly down hill for a relaxed walk on your first day. The total hike should take 3 – 5 hours, depending on if you will travel to Phakding or Monjo. Our goal is to always make it to Monjo however. If you go are going to Phakding 2,650m/ 8,694 feet it will be about 3 hours walking and if you are going to Monjo 2,850m/ 9,350 feet it will take approximately 5/6 hours.
If we are going to Monjo, we will have lunch in Phakding and then continue onto Monjo, arriving in the afternoon. When you arrive, you will check into your room and spend the rest of the afternoon relaxing and starting the acclimatization process. Make sure you keep well hydrated, drinking 4 to 5 liters of water a day is essential all the way through the trek. 9km/ 5.6 miles to Phakding or Monjo will be 13km/ 8.8 miles
Day 2). Trek to Namche
For the first couple of hours on the second day you will get to cross some of the famous suspension bridges in the region. You will gradually move up-hill towards the entrance to the Sagarmatha National Park, the official entrance to the Everest Region. You continue down hill on for a short time before it levels out to flat ground on mixed rocky terrain. The trail then follows the river to the final high suspension bridge. After crossing the bridge, you will begin the hike up ‘Namche Hill’, which can take 2 hours, to reach the Sherpa village of Namche Bazaar.
Our itinerary has you based in Namche Bazaar for 3 nights at 3,340m/ 11,286 feet. Today’s trek is usually 6 hours from Phakding or 4 hours from Monjo. We hike slowly so we can adjust to the lower levels of oxygen. We also have plenty of breaks and rest along the way. There are many exposed parts on the trail so be aware of your surroundings and stay on the mountain side.Check out our Top 11 Tips while you are on the Everest Base Camp trail. From Monjo to Namche is 8km/ 5 miles
Day 3). Acclimatization Above Namche
All our treks have an extra day in Namche Bazaar. After doing a lot of altitude research, we have found having three nights at this point is critical to success on the Everest Trek. Today, we will trek up to the Sherpa Museum, which holds a stunning view of Mount Everest and surrounding peaks. It takes about 40 minutes to hike up around the Monastery to this viewing point. Once we arrive at the museum, then we can learn about Sagarmatha National Park, the Sherpa culture and the surrounding mountain region. The rest of the day will be spent relaxing, hydrating and enjoying the unique Sherpa capital of Namche Bazaar at 3,450m/ 11,320 feet. Here are 5 things you need to do in Namche Bazaar. We will move up to 3,600m/ 11,811 feet and back to the lodge for lunch1km/ .6 of a mile
Day 4). Another Acclimatization Day in Namche
Today is one of our acclimatization trek days. We hike up past the monastery on the western side of Namche Bazaar. This gives great views of Thamsurku, Kongde Ri and Kusum Kangguru. As you trek up behind Namche Bazaar, the trail is quite steep and you will be walking on a steep stair case. You feel the lack of oxygen while you ascend 460m/ 1,509 feet to Shangbouche Airport. Then, we will cross the runway and head another 100m/ 328 feet up to Shangbouche Hill at 3,900m/ 12,795 feet. We will enjoy the stunning views and relax for 45 minutes before returning back to Namche. There is an option to head into Khumjung to visit the local monastery. This trek is an essential part of the acclimatization process and usually takes approximately 4 or 5 hours. 3km/ 1.8 miles
Day 5). Trek to Tengbouche
Today you will hike towards Tengbouche at 3,900m/ 12,795 feet. After ascending out of Namche, the first 2 hours are relaxed walking, traversing the left hand side of the valley, high above the valley floor. The trail then descends steeply down hill toward the river for our lunch stop. From here it will take 2 hours to hike up the long hill 700m/ 2,296 feet to the town of Tengbouche and the famous monastery. This is a gradual but long ascent and the total time will be6 hours of hiking today. This will include breaks on the way. 12km/ 7.5 miles
Day 6). Trek to Dingbouche
From Tengbouche, we will travel to Dingbouche, at 4,350m/ 14,271 feet. The trail starts down-hill and continues very gradually up and down hills before crossing the river and gradually heading up hill towards Pangbouche. We will take a tea break here and then continue to Shomare for Lunch. Pangbouche was one of the villages on the trail that suffered most from the recent earthquakes. It will take 2 hours to reach Pangbouche and another 1 hour to reach Shomare. It takes another 3 hours to reach Dingbouche. After lunch it is a gradual up-hill trek towards the Imja Valley looking towards Island peak. The trail passes some landslide areas on your left, and then, 40 minutes later, you will arrive in Dingbouche. Our lodge is at the top of the town. The total trekking time today will be5 to 6 hours. 12km/ 7.5 miles
Day 7). Acclimatization Above Dingbouche
Today, we spend another night in Dingbouche to further the acclimatization process. From here we will aim to reach the height of 4,900m/ 16,076 feet, gaining 550m/ 1,804 feet. This acclimatization hike which should take approximately 2 hours to reach this elevation. Then, you will rest and enjoy the amazing views of Ama Dablam, Island Peak, Lhotse and the surrounding mountains. We will enjoy the views and rest for about 30-45 minutes, depending on the weather. It is important to spend some time at this elevation to push the acclimatization process in preparation for moving higher on the trail to Mount Everest. After resting, we will drop back down for lunch and an afternoon of relaxing and re-hydrating. 3km/ 1.86 miles and 550m/ 1,804 feet of ascent and descent.
Day 8). Trek to Lobuche
From Dingbouche, we will head to Lobuche at 4,920m/ 16,141 feet. The trail heads back towards the Khumbu Valley and continues on a long and slow trek across a beautiful elevated route towards Tukla 4,620m/ 15,157 feet. This stretch usually takes 2 hours to 2 hours 30 minutes and we will take our time. We will stop in Tukla and have soup and lunch and rest for an hour. After lunch, we will slowly make our way from Tukla to Lobuche.
The first hurdle is the Tukla pass. This is all up hill for approximately 1 hour to reach the top of the pass. Once you reach the top you will enter the Everest Memorial, where we will rest and explore for 10 or 15 minutes. This area is the end of the Khumbu glacier and end of Mount Everest. From the memorial it takes about 1 hour to reach Lobuche. We will be trekking for a total of 5 to 6 hours today including breaks. 12km/ 7.5 miles
Day 9). Trek to Everest Base Camp
Today we travel from Lobuche to Gorak Shep at 5,180m/ 16,995 feet and on to Everest Base Camp. If you are on one of our sleeping at Everest Base Camp itineraries you will follow a different plan. Today’s trek is very beautiful and unique, crossing a lot of loose rock, boulder fields and Glacial moraine. The up and down trail into Gorak Shep takes approximately 3 hours. We will have an early lunch here before continuing an additional 2 hours to reach Everest Base Camp.
Once you reach Base Camp, you will spend some time enjoying the Base Camp of the World’s highest mountain and maybe hiking around the glacier if it is safe. The hike back to Gorak Shep is a another 2 hours with breaks, bringing this long day to end after a total of 7 or 8 hours of hiking. Today is very challenging day for most people. 10km/ 6.2 miles
Day 10). Hike up Kala Patthar – Pheriche
After a good nights rest in Gorak Shep, those who feel ready and able, will wake up very early and hike up Kala Patthar, to see the sun rise over Mount Everest. Without a doubt, this is one of the highlights of trekking to Mount Everest. You need to be at the top before the sun comes over Mount Everest. We always see people coming up too late and they miss the best mountain viewing. The goal should be to leave at 4am. This is a difficult 2 hour up-hill hike which is very hard work for most people.
After this amazing experience we will return back to Gorak Shep for breakfast. You will change out of your cold weather gear and back into trekking clothes and pack up your duffel bag so gear can be loaded onto the Yaks. You will have breakfast and start the return hike all the way to Pheriche at 4,250m/ 13,943 feet which can take 5 hours from Gorak Shep. The total amount of time trekking is 7 hours today maybe longer. 18km/ 11.2 miles
Day 11). Trek to Chuckung
We start the day with a steep uphill section, this is followed by more gradual terrain towards Dingbouche. We will by pass Dingbouche on the upper trail and hike gradually up to Chuckung. Once we reach Chuckung we will get settled and then have some lunch. After lunch we will commence our ladder and mountaineering training. This is a 3 hour 30 minute hike over 4.8km/ 3 miles.
Day 12). Hike to Island Peak Base Camp
We have some flexibility today. Depending on weather and other factors we may hike in early to Island Peak Base Camp. If the weather looks like it will hold we will have an early lunch and then make the 3 hour hike into Island Peak Base Camp. This is a 6.6km/ 4.1 mile hike into Island Peak Base Camp.
Day 13). Training in Island Peak Base Camp
We stay pretty close to the camp today. We will be doing some fixed line mountaineering training in the morning and afternoon. Depending weather reports we may make our way up to Island Peak High Camp.
Day 14). Island Peak High Camp
Depending on the weather and plans we have breakfast once the sun comes up. We will do some additional training in the morning as needed. Pack our bags and make adjustments to our mountaineer gear. We will aim for an early lunch before making the 1 mile hike up to Island Peak High Camp. This is a 400m/ 1,312 feet steep ascent up to High Camp. This usually takes about 1 hour and 45 minutes to 2 hours. We take our time in a nice relaxed pace as we want to make sure we converse energy for the summit attempt.
Day 15). Summit Island Peak Back to Chunkung
This can be a long day depending on conditions. We aim to leave at 2am. A strong team can reach Crampon point in 2 hours 30 minutes and then it usually take another 2 to 3 hours to reach the summit. This will depend on conditions under foot, fixed ropes on the headwall and challenges on the glacier. The route through the glacier changes each season and some seasons are easier than others. The total distance today us 7.2 miles/ 11.6 km. You will hike and climb up 2,261 feet to the summit from High Camp and then descent almost 5,000 feet back to Chuckung. Depending on how things play out we may stay at Island Peak Base Camp for another night.
Day 16). Trek to Tengbouche
After a great night sleep we will be back at it again. We will retrace our steps down to DIngbouche, past Shomare, Pangbouche before that final 20 minute hike up hill into Tengbouche for the night. This is a 9.2 mile/ 14.8km hike. This is usually a 6 or 7 hour hike.
Day 17). Trek Back to Namche
Today we will hike back to Namche Bazaar. Today is a shorter day and will take 4 hours. We start with a one hour hike down to the riverside, followed by an uphill hike through the forest for another hour and 30 minutes to reach the Ama Dablam view lodge. We can enjoy some tea before finishing the hike back to Namche. From here you will traverse back around the mountainside and drop down into Namche Bazaar.
As you are heading down-hill, to lower levels of altitude, and you can cover the ground quicker than on the way out. When you get back to Namche you will get to enjoy the delights at the Namche Bakery, shower or play a few rounds of pool at Cafe Danfe before you rest up for the long walk back to Lukla tomorrow. 9.3km/ 5.8 miles
Day 18). Trek to Lukla
We finish the trip with a long but rewarding hike back to Lukla. For some people this can be the hardest day as your body is tired after a lot of multi day hiking on challenging terrain. You start the day hiking back down the Namche Hill, then cross the Hillary bridge and then the long stretch of of up and down hiking all the way back to Lukla. You will exit the Sagarmartha National Park, pass through Monjo and Phakding before starting the last up hill section into Lukla. We will have one final night sleeping in the mountains! Today’s trek can take 8 to 9 hours. 19.2 km/ 12 miles
Day 19). Fly back to Kathmandu
Today your legs get a break as you only have to walk to the Lukla Airport and fly back to Kathmandu, which is only about 10 minutes walking! We always book the first rounds of flights, so weather permitting you will arrive back in Kathmandu by 8am and back in the hotel by 9am. This is all dependent on the weather however. Once you arrive back in Kathmandu, we will transfer you back to the hotel for a well deserved shower and rest!
The Best way to Train for Downhill
Not everyone will have access to hills, but this is the best way to train your body and legs for down hill hiking. Depending on your chosen adventure you do need to assess the level of downhill. We have elevation gains available for all of our key trips. I encourage you to review the daily elevation drops and what type of terrain you will be walking on.
For example, on our Inca trail treks you will be drop 700m/ 2,296 feet to 1,000m/ 3,280 feet on different days all on steep rocky stairs. On Kilimanjaro you will drop 2,800m/ 9,186 feet in one day on scree and rock and this is very challenging on your legs and joints.
You have just walked for days on end you have reached your goal but not you have to retrace your steps, often in a quicker time frame. Hiking downhill will take its toll on your joints. Fore sure, the downhill hike will take more wear and tear on your joints and muscles than the uphill.
You do need to use effective training techniques to minimize the impact on your body. Descending using good technique means that you move faster and feel lighter. Remember, 80% of accidents happen on the way down.
Keeping Knees Healthy
We live in Eagle-vail Colorado with amazing access to altitude and a wide range of mountain terrain to train on. In Colorado we can train all year round on hilly terrain preparing for Kilimanjaro, Himalayan trekking and mountaineering trips. I know most of you are joining our trips from sea level and with minimal access to hill training. I encourage you to get out to Colorado doing some multi-day hiking in preparation for your chosen adventure.
If you do not have access to hills and mountains, you must figure out other ways to prepare your knee joints to handle downhill stress. From a knee perspective, downhill hiking means eccentric loading and typically thousands of repetitions of it. Eccentric loading (the lengthening phase of a contraction) is especially challenging to what is called the patellofemoral joint of the knee. This is where the knee cap, meets the femur. Inadequate strength, poor mechanics and lack of exposure to this type of loading can turn downhill forces into injury producing stress. Prior to your trekking trip you need to start implementing sport specific training into our general preparedness programming.
Hiking Uphill and Downhill
Hiking uphill is all concentric muscle action (muscle active while shortening) at the knee joint without any eccentric loading (loading while muscle is lengthening). Concentric only exercises tend to cause less mechanical stress, load and pain to joints and tendons than do exercises that have eccentric phases. What goes up must come down.
You must prepare our body and specifically your knees to handle downhill hiking. Depending on the trip, you really need 6 months of some sport specific training into our general preparedness programming.
The strength movements below are similar but slightly different in specific ways. We purposely only hit each one once per week because too much volume of these exercises could quickly lead to an over training injury, so be careful. I would recommend adding in additional hip flexor and quadriceps mobility work at the end of your training sessions as well to maintain good length tension relationships and to protect your spine.
The Point of These Exercises
Increase vertical loading volume of the knees with a sight posterior to anterior (back to front) force vector. Get exposed and accustomed to decelerating the vertical and forward forces using primarily a knee strategy. Transition from doing most lunges and squats with a 3 points of contact foot position to a more heel elevated position where we contact and press through the forefoot.
The 3 points of contact foot position is the most stable position for the foot and encourages a balance of hip and thigh musculature – great for general preparedness training. Transitioning to a heels elevated position where the forces are applied through the forefoot places most of the stress on the quadriceps and knees – optimal for downhill hiking training.
Exercises for Downhill Hiking
You should consider adding these movements into your weekly training 2 times per week. Add 3-5 sets of 10-15 repetitions (per leg)
1). Heels Elevated Goblet Squat
2). Forward Alternating Lunge with Farmers Carry Loading
3). Forward Alternating Drop from Box Lunges
4). Banded Posterior to Anterior (PA) Forward Lunges
Carrying Weight
One of the best ways of mitigating the risk of musculoskeletal issues is by carrying a light pack. Then build up the weight you carry over time. An overly heavy backpack is not recommended in the early stages of your training.
Extract its biggest toll on your body during steep and/or long downhill sections, so a hiker should always aim to travel as lightly as the dictates of their skillset and the environment into which they are venturing allow.
If you are carrying weight on longer hike you should slowly build up the weight you carry. You should also consider carry water uphill and dump as much water/ weight as possible for your downhill. Always assess the weight you are carrying for each hike and always build up slowly over time. You do not want to get injured.
Tips for Hiking Downhill
1). Do not have your trekking boots too tight on the way uphill. Most certainly keep your boots tight for the downhill portions of your hike/ trek. Not so tight that they restrict blood flow.
2). Tighten your hip belt and shoulder straps – on steep and uneven descents this will assist in minimizing pack movement, which can impede your balance if left unchecked.
3). If you’re carrying trekking poles, lengthen them accordingly. Poles that are too low will have you reaching unnecessarily forward, thereby disrupting your center of gravity.
4). On big downhill’s like Kilimanjaro, Don’t forget to trim those toenails.
5). Don’t lean forward, don’t lean back – while descending a mountain your center of gravity should be low and over your legs.
Learning from High Altitude Guides
I have trekked to Everest Base Camp over 40 times, Kilimanjaro 40 plus times and have watched some local guides move very efficiently downhill. They effortlessly make their way along rugged, steep and rocky trails. They keep a low center of gravity, the way they bend their knees, they shortened their stride. Taking baby steps, they flow rather than hike down the mountains trails.
Minimize Weight Bearing Impact While Descending
Gravity is not your friend when it comes to downhill hiking. Hiking downhill takes significantly more toll on our bodies than other types of walking. Increased moment and knee flexion angle yield a 3 to 4 times bigger femoropatellar joint compressive force for downhill walking compared to level walking,
You can start by always keeping your downhill leg slightly bent on impact. This will help minimize stress on the knees, as the muscles rather than the joints take the brunt of the strain. Slowing down for steep steps, turn your body sideways and lower your weight down steep terrain is also using on steep steps and steep terrain.
Use Trekking Poles
Poles can help by redistributing some of the load to your arms and shoulders, thereby reducing strain on the lower body. As a bonus, poles can also assist with balance and stability by providing two extra points of contact with the trail; particularly helpful for folks that aren’t especially surefooted and/or have pre-existing leg issues. Trekking poles are great on the Inca trail stairs, Everest trail, Aconcagua and pretty much every steep downhill.
When the gradient is steep like on Kilimanjaro, taking smaller steps will help to keep your center of gravity over your legs, thereby promoting greater balance and control.
Pay extra attention to where you are placing your feet. Most accidents, slips and falls occur on downhill stretches that immediately follow long ascents. After the exertion of the climb, it is extremely important to remain focused on the descent.
Build up to Longer Hikes Carrying More Weight
The reason to carry weight in your backpack is to stress test your overall strength and conditioning for multi-day trekking. Building strength in the appropriate muscles for hiking up and down hill. By diligently practicing good technique, over time the speed and confidence with which you descend will increase and allow you to physically be able to carry more weight which will build your overall strength for trekking.
Be Careful Descending Snow Slopes
How you descend on a glacier or snowy terrain is dependent upon the condition of the snow and the gradient of the slope. A commonly used technique is the plunge step. Landing heel first, let the weight of your body drive your foot into the snow.
The harder the snow, the more aggressive the effort needs to be. Keep your knees slightly bent to avoid hyperextension. When descending steep snow slopes, reduce the gradient by zigzagging across the terrain. Make sure all of your gear is stored inside your backpack or safely secured.
Patience is your friend. If the snow is simply too solid you need to revert to side stepping and taking smaller steps as you manage your moving downhill.
Descending Scree Slopes
Take your time, Monitor your momentum and be careful of big rocks underneath the surface. This is a big deal descending Kilimanjaro, care is needed when descending on scree and loose rock. Take short, controlled steps. Keep your center of gravity over your legs at all times.
If there is someone below you, be sure to give them plenty of space, in case you accidentally trip, dislodge a largish rock or can not control your balance. Once you have the necessary techniques down pat, stay as loose as possible. Think flow. Move with the terrain, rather than against it.
Our Unique Itinerary
Day 1 - Arrive in Kathmandu – 1,400m/ 4,500 feet
Arrive in Kathmandu International Airport as early as possible on this day. We will provide your airport transfer to the hotel we include for the night. All accommodations on the trek are on a shared basis. If you want to arrive in early, that is not a problem, we are happy to book additional nights in the hotel for you. We will have a group briefing this evening to go over the schedule for the coming days and answer any additional questions you may have.
Day 2 - Fly to Lukla – Trek to Monjo – 2,850m/ 9,350 feet
Fly from Kathmandu to Lukla. We will make an early morning start for the Twin Otter flight to Lukla (2,840m/9,317ft), the gateway to the Khumbu Region. This is an exciting flight, which should give a glimpse of Everest in the distance. In Lukla, we will meet the rest of our trek staff and set off straight away for our first night in the mountain village of Monjo. Depending on what time the flight arrives in Lukla, we may have to stop in the town of Phakding (2,600m/ 8,530 feet) for the night. Hopefully, the team will make it all the way to Monjo. Both villages are situated on the banks of the Dudh Kosi, which drains the whole of the Khumbu Region, and is the main trade route for the entire region. This can be the busiest part of the trail. Today we will walk for 3 hours to Phakding and a total of 5 hours to Monjo. The total distance is 8.8 miles/ 13 km to Monjo from Lukla.
Day 3 - Namche Bazaar – 3,440m/ 11,286 feet
Today we will continue up the banks of the Dudh Kosi River, towards Namche Bazaar. Just past Monjo, we will officially enter the Sagarmatha National Park before following the trail through small villages. We will take a tea break along the way. After tea, the trail then crosses the confluence of the Dudh Kosi and the Bhote Kosi, on a high suspension bridge. The trail then climbs steeply uphill for about two hours to reach Namche Bazaar (3,440m/11,286 feet). This is a prosperous trading town and the capital of the Khumbu Region. Just across the valley to the east stand the peaks of Thamserku and Kangtega, both very impressive mountains. From Monjo, the trek today is approximately 4 hours and the total distance is 5 miles/ 8 km.
Day 4 - Namche Bazaar (Acclimatization Day) – 3,600m/ 11,800 feet reached
Today is an acclimatization day where we will walk to the Sherpa Museum at 3,600m/ 11,811. From here you will have stunning views of Mount Everest and the surrounding mountains. The key is to rest, relax and acclimatize at this height and will make all the difference as we go to high and extreme altitude. The afternoon will be at leisure in Namche Bazaar, resting, eating, and enjoying the sites! Remember that it is still important to continue to drink 4-5 liters of water every day on the trail. Today, the walk up to the Sherpa Museum is only approximately 30 minutes.
Day 5 - Namche Bazaar (Acclimatization Day) – 3,900m/ 12,800 feet reached
This is where our itinerary is different. Instead of heading up to 3,900m/ 12,800 feet and sleeping in Tengboche, we will stay in Namche another night giving you the best possible acclimatization program. During this critical acclimatization phase, we will spend time resting and trekking to higher altitudes to aid in the process. We will wake early for our acclimatization hike today, up to Shangbouche Hill at 3,900m/ 12,800 feet, for beautiful vistas of the whole Everest Region. The goal is to spend some time acclimatizing at this elevation before returning to Namche for lunch. The afternoon can be spent sampling the delights of the Namche Bakeries and local stores! The hike to Shangbouche Hill will take approximately four hours round trip.
Day 6 - Tengbouche – 3,900m/ 12,800 feet
Today we will leave Namche and trek to Tengbouche at 3,900m/ 12,800 feet. From Namche, the well-worn Everest trail contours around the side of the valley high above the Dudh Kosi. As we follow the path, we will get excellent views of the great peaks of the Khumbu; Everest, Lhotse, Nuptse and Ama Dablam. Passing by several villages, we will descend approximately 300m/ 984 feet down to the Dudh Kosi River, where we stop for lunch. After lunch, we will make the steep 700m/ 2,296 feet uphill climb to Tengbouche. This is the home of the impressive and famous Tengbouche Monastery. You can visit the Monastery or the local bakery this afternoon. The hike will be approximately 5 to 6 hours today and covers 7.5 miles/ 12 km.
Day 7 - Dingbouche – 4,350m/ 14,271 feet
We will continue up the trail to Dingbouche today. Shaded by Rhododendron trees, the trail crosses an airy suspension bridge just beyond Debouche. From here, the trail continues approximately an hour before reaching the village of Pangbouche. From here, there are excellent views of Ama Dablam ('Mother's Charm Box') and where we stop for tea. If there is time, we may be able to visit the local Monastery, which was the first in the Everest Region. Contouring up the valley, we will re-cross the river and turn up the Imja Valley to reach the picturesque farming village of Dingbouche at 4,350m/ 14,271 feet above sea level. The hike will take approximately 5 – 6 hours today and cover 7.5 miles/ 12 km.
Day 8 - Dingbouche (Acclimatization Day) - 4,900m/ 16,000 feet reached
Today is spent as another acclimatization day at this critical elevation. Just above the town, while on our acclimatization hike, we will have stunning views of three 8,000/ 26,200 feet peaks; Makalu, Cho Oyu and Lhotse. Our goal today is to ascend to 4,900m/ 16,000 feet for some of the most beautiful views on the trip. This is one of Ian’s favorite days of the trip! After enjoying the views and spending some time at this new elevation, we will descend back to Dingbouche for lunch. The afternoon will be free to enjoy the village of Dingbouche and relax before some more challenging days ahead. The trek today will be approximately 4 hours round trip and you will gain 550m/ 1,804 feet of elevation.
Day 9 - Lobuche – 4,940m/ 16,207 feet
Today we will trek to Lobuche, continuing along the upper trail towards Thukla at 4,620m/ 15,157 feet. Ahead of us is the Lobuje East Peak at 6,119m/ 20,075 feet, and to our left is the formidable north face of Taweche. After approximately three hours walking slowly, we reach the small collection of lodges at Thukla where we will stop for an early lunch. After lunch, we continue the walk up for approximately one hour uphill to the Everest Memorial. From the Memorial, there are outstanding views of Ama Dablam, Cholatse and Taweche. After leaving the Memorial, the trail continues gradually parallel to the famous Khumbu Glacier, that runs off Mount Everest. After approximately another hour, the trail will eventually lead to a small cluster of tea houses pleasantly situated at Lobuche at 4,940m/ 16,207 feet. The total trekking time will be approximately 5 – 6 hours today and you will cover 7.5 miles/ 12 km in distance.
Day 10 - Gorak Shep (5,180m/ 17,126 feet) to Base Camp – 5,364m/ 17,600 feet
Today is the day we trek to Everest Base Camp! We will be up early to start our trek to Gorak Shep, which takes approximately 3 hours to reach 5,180m/ 17,126 feet. Today is a very challenging day on the trail, as we cross glacial moraine on mixed rocky terrain with a lot of up and down hill to cover. Gorak Shep was the site of the 1953 Everest Expedition's Base Camp and where we will stop for an early lunch before continuing to Everest Base Camp. From Gorak Shep, we will traverse more glacial moraine, with landslide potential, for another two hours before reaching Everest Base Camp! Everest Base Camp sits on the Khumbu Glacier and weather depending, we will have time to explore this once and a lifetime chance to be at the base of the World’s Highest Mountain! After approximately one hour here, we will retrace our steps back to Gorak Shep, where we spend the night. Total trekking time today is approximately 7 hours and covers 6.2 miles/ 10 km in distance.
Day 11 - Kala Patthar (5,645m/ 18,520 feet) to Pheriche – 4,200m/ 13,780 feet
Today is another big day, but one to remember forever! Normally, the plan is to start hiking at around 4 am, because you want to arrive at the top of Kala Patthar just before sunrise. The trail from Gorak Shep leads steeply uphill all the way to the top of Kala Patthar at 5,645m/ 18,520 feet. This takes approximately 2 hours to reach the top and the views off Kala Patthar are spectacular and you will be rewarded with the famous view of Mount Everest! After enjoying the mountain views at the top, we will return to Gorak Shep, which takes about one hour. There, we will pack bags and have breakfast before continuing back down the trail. We will then retrace our steps through the Lobuche, the Everest Memorial and usually stop in Thukla for lunch. From here, we will take the lower trail to the village of Pheriche at 4,200m/ 13,780 feet, for the night. The total distance today is 11.2 miles/ 18 km and will take approximately 7 – 8 hours.
Day 12 - Chuckung - 4,700m/ 15,419 feet
Today we will head to Chuckung at 4,700m/15,419 feet for our last night in a lodge for a few nights! Chuckung is a small settlement with some old and new larger lodges, where we spend the night. This is a 3-hour trek from Pheriche up to Chuckung. The first part of the trek is a steep ascent up a hill, followed by more gradual terrain, all the way into Chuckung. We will pass Dingbouche, where we spent two nights on the way up to Base Camp! On arrival, after a nice lunch, you will go through all climbing equipment and do some training in the afternoon. You will make sure your harness, crampons, Jumar, and all climbing equipment fits and is ready to use.
Day 13 - Island Peak Base Camp - 5,100m/ 16,732 feet
We will wake up this morning, have breakfast and once all of the gear is loaded on the animals, we will make our way to Island Peak Base Camp at 5,100m/16,732 feet. We will follow the glacial moraine up out of Chuckung, before moving down toward the runoff from the Imja Lake. The trail weaves between small hills before coming out onto a flat sand plain, right in front of Island Peak and Lhotse. From here, we walk around the right-hand side of Island Peak, where which leads directly into Island Peak Base Camp. The amazing views of the entire Imja Valley are surrounding us throughout the hike today! It will take us approximately 3 hours trekking to reach Island Peak Base Camp. If time allows this afternoon and the weather is good, then we will spend a bit more time training today, in preparations for moving higher on the mountain.
Day 14 - Island Peak Base Camp – 5,100m/ 16,732 feet - Training Day
Today is spent in Island Peak Base Camp, doing extra training on steeper terrain, and making sure you are fully comfortable with your climbing equipment. We will spend the morning (or as much time as needed) training and doing final gear checks. Now it is time to rehydrate, eat, relax, and try to get a good night’s sleep!
Day 15 - Island Peak High Camp – 5,500m/ 18,044 feet
We will be moving on to High Camp on Island Peak at 5,500m/18,044 feet. We will rest in Base Camp for the morning, pack up, and have lunch before moving higher. The initial hike takes us past the Imja Glacier and Lake, before we turn steeply uphill for approximately two hours. The trek into High Camp takes about 2 hours. You will now need to rest and rehydrate before leaving on the summit attempt the following morning.
Day 16 - Island Peak Summit – 6,189m/ 20,305 feet – Chuckung - 4,700m/ 15,419 feet
Today is planned as our summit attempt on Island Peak 6,189m/20,305 feet, however this may be changed due to weather conditions. You will have to be flexible and listen to the guides as they will decide based on the weather. We will aim to leave at 2am, as this is a long hard climb and we will need to pace ourselves for a long day. We first hit rocky scree for 150m/492 feet before a scramble and traverse across to a steeper section of rock. This is a mixture of trekking and scrambling and is very strenuous. Once you hit 5,700m/18,700 feet the altitude slows the pace dramatically and the final steep rock section never seems to end. Once you dig deep, we top out onto a narrow ridge which takes us to the start of the glacier and crampon point. At crampon point, we will put on our harness and crampons, get out our ice axe and rope up to climb across the glacier. From here, we make our way across the glacier. Depending on the conditions, there could be ladder crossings, steep climbing sections up and down and large crevasses to cross. This can take us approximately anywhere from 1 – 2 hours to reach the base of the Headwall, depending on conditions.
Once we reach the Headwall, we will take a break as our Sherpa team get to work setting the route. Our expert Sherpa team will fix our own climbing rope up the Headwall to ensure the route up the 150m/ 492 feet section, on a 50-65-degree angle, is set up safely. After the strenuous climb up the Headwall, you will reach the summit of Island Peak! The views off the summit are nothing short of spectacular! The summit is very small, and you always need to remain clipped into the rope. After you have enjoyed the views and taken all the pictures you can, we will then prepare to head back down the Headwall. The abseil down the Headwall needs to be done in a controlled manner, so that we can move quickly as a team off the glacier. This is why you need to be fully prepared and trained to abseil on a fixed line safely.
Once off the Headwall, we will rope back up and retrace our steps through the glacier, back to crampon point. From here, we can take off our climbing equipment and continue down the trail back to High Camp. Once we reach Camp, we will take a short rest, pack up our gear and move lower down the trail for one hour, to Base Camp for a meal. If time allows, then we will continue further down the trail to Chuckung, which takes approximately 2 hours. Once in Chuckung, we will enjoy a warm meal and quickly head to our well-deserved night of sleep in our beds!
Day 17 - Tengbouche – 3,900m/ 12,795 feet
After a great night’s sleep and a hearty breakfast, we will start to hike back down the trail. From Chuckung, it will take approximately one hour to reach Dingbouche, before we follow the main Everest trail back through Shomare and Pangbouche. After Pangbouche, we will cross the river before heading back uphill into Tengbouche for the night. If you feel up for it you can visit the Monastery or the local bakery, otherwise another good night’s sleep will help you recover and prepare for another long day tomorrow. The total trek today is approximately 4 – 5 hours.
Day 18 - Namche Bazaar – 3,440m/ 11,286 feet
From Tengbouche, the trail continues downhill for one hour, until we reach the river. From here, there is a one hour and thirty-minute ascent, back up to the Ama Dablam View Guesthouse, where we will have a short tea break. There is another approximately hour and thirty minutes before we reach Namche Bazaar by lunchtime. This hike should take 4 hours. It is now time to take a shower, relax and get some rest!
Day 19 - Lukla – 2,850m/ 9,350 feet
Today is the final day of trekking!! It will be another long day as we must get all the way back to Lukla for the night. The day starts with a one-hour descent from Namche, back to the high suspension bridge. Following the river from here, you will have to trek up and down stairs and trails, retracing our steps back to Phakding, where we will stop for lunch. After lunch, it will be a gradual two-and-a-half-hour ascent back into Lukla at 2,850m/ 9,350 feet. The hike today will take approximately 8 hours and we will not reach Lukla until late afternoon. The distance covered today is 13 miles/ 21 km and you will enjoy your final night spent in the Everest Region tonight.
Day 20 - Fly to Kathmandu – 1,400m/ 4,500 feet
We will wake early today and have breakfast before returning to the Lukla Airport for the flight back to Kathmandu. If the weather is cooperating, then you would be back in the hotel in Kathmandu by early morning! You can spend the day at Leisure in Kathmandu, enjoying the sites, including Pashupatinath, Swayambhunath and the districts of Bhaktapur and Patan. Durbar Square is also on the essential list, as is the shopping area of Thamel or get a treatment at one of the many spas in Kathmandu. We include a celebration team dinner in a nearby restaurant and the night in the hotel is also included on a shared basis.
Day 21 - Kathmandu
Today is the final day of our itinerary. We recommend that you do not book your return flight until no earlier than the evening on this day. That will be critical if there are any delays getting out of the mountains on the day before. We include your return transfer back to the international airport for your onward journey. If you want to spend any extra time in Kathmandu, we are happy to book additional nights for you in the hotel.
Equipment
Climbing Island Peak will definitely be a highlight of your trekking and climbing career. Making sure that you have the correct gear and clothing for the trip will be essential to your comfort and ultimately your success on the mountain. The following video will show you what you should consider packing for your Island Peak trek and climb.
Test all Your Gear
Remember you need to test your gear and get outdoors to make sure you are comfortable in your gear. You will want to break in your trekking boots and make sure your mountaineering boots are comfortable and working well. If you sign up to one of our Island Peak trips, then we send you our 40 page dossier. The Dossier includes an itemized kit list and further information on training and preparation for this exciting adventure.
If you are unsure of any piece of gear you can CONTACT US and we can help you pick the right gear for you. We are always available to talk through gear and clothing options once you sign up to one of our trips. Also, we rent a range of gear out of our Kathmandu office. We have sleeping bags, sleeping mats, trekking poles and down jackets. Just get in touch and find out everything you need for your Island Peak climb. We have developed a page with all our important Island Peak links for your to explore.
Think About Future Trips
This list below is an outline of mountaineering boots needed for the range of trips we manage. Consider future trips when selecting the right boots. When you finished on this page check out our recommendations for the best trekking boots that you can use for the approach to your chosen mountain. Or, you can just CONTACT US and chat about the best gear for your chosen adventure. There is also an option to sell and trade gear on geartrade.com
La Sportiva G2SM
1). My favorite mountaineering boots at the moment are the La Sportiva G2SM mountaineering boots. Super light and really warm. I always prefer the inner boot system and these boots can be used on 90% of the mountaineering trips I am currently undertaking. I use these boots on Island Peak, Mera Peak, Aconcagua, Mount Elbrus They are versatile for climbing in a wide range of conditions and terrain.
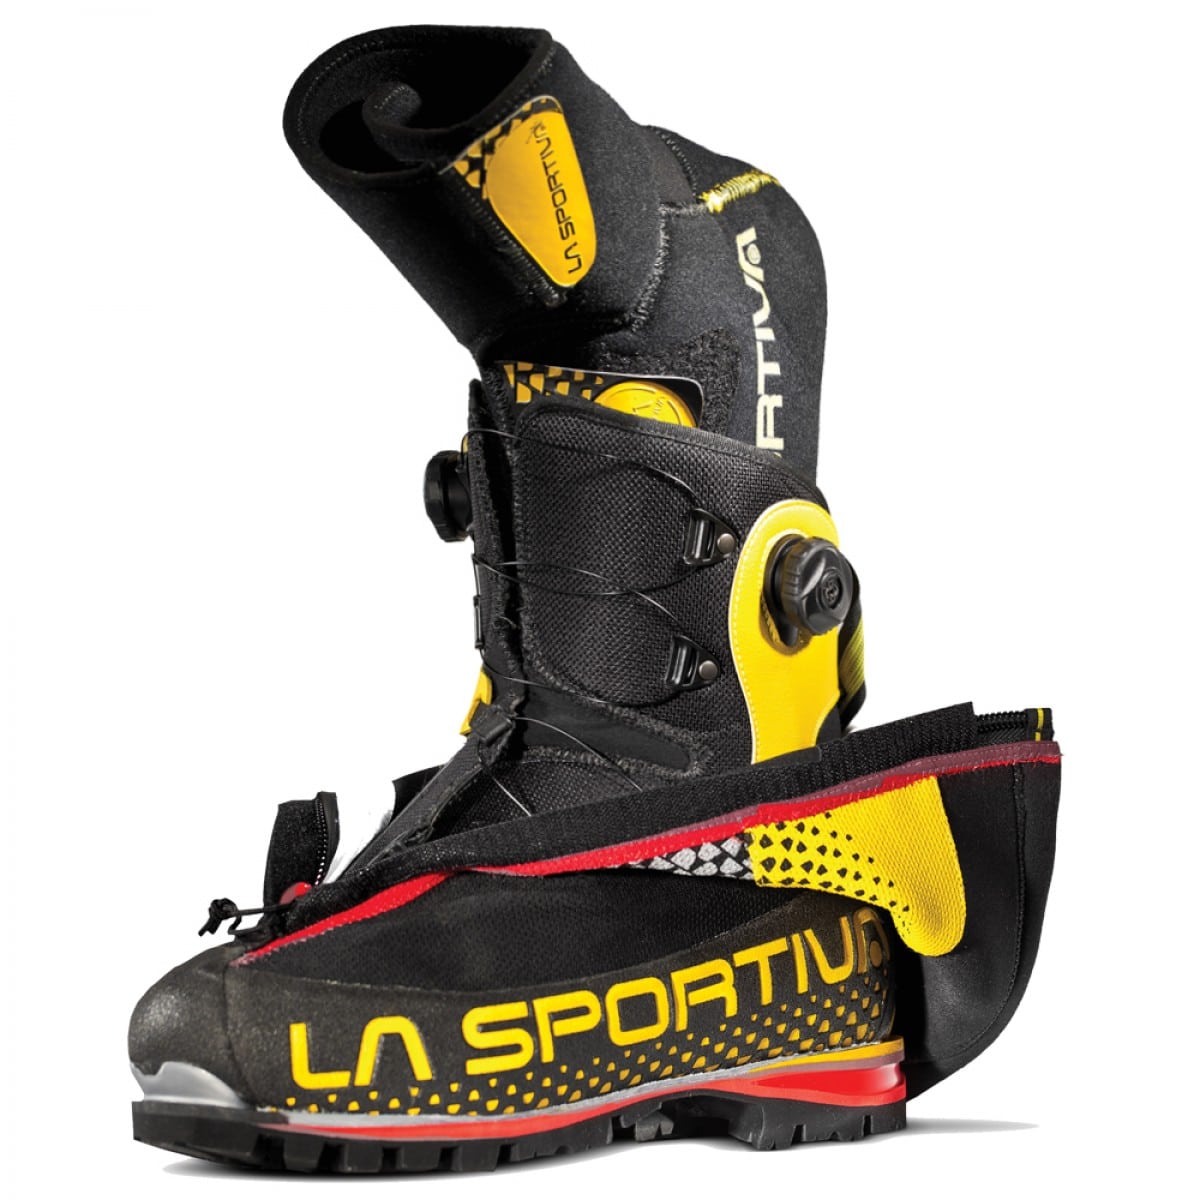
La Sportiva Baruntse
2). I really like the La Sportiva Baruntse mountaineering boots. A lot of our clients and guides have chosen to use these boots. They are great boots for Island peak, Mont Blanc and other Alpine climbs. They are a little bulky and heavier than the La Sportiva G2SM. They have the inner boots which I really like and they are warm and great option for your high altitude mountaineering adventures.

Scarpa Phantom 6000
3). We have a lot of clients using the Scarpa Phantom 6000 mountaineering boots these days. They seem to work very well in a wide range of conditions and are a versatile mountaineering boot that can be used in a wide range of environments. I have however seen some people have issues with the fit of this boot. You really need to make sure you use your boots in your training and break them in. Scarpa can be a narrow fit for a lot of people so make sure you have tried and tested your boots before going on the mountain.

Mammut Norwand
4). We have a lot of people using the Mammut Norwand Mountaineering boots on our Island and Mera peak climbs. These are also a popular boot with clients on our Elbrus and Aconcagua climbs. Although I have not personally used these boots, I have never seen or heard of any have any issues with these mountaineering boots.

La Sportiva Nepal EVO
5). Most people are showing up on our Himalayan climbs with these La Sportiva Nepal Evo mountaineering boots. They are not as warm as the double boots but a great option for Island peak, Lobuche peak and Mera peak in warmer months. They are a great overall mountaineering boot that can be used in Scotland and the Alps.
There are many different boots and brands out there at the moment. Many of them are of a very high quality as well. We are going to present six different trekking boots that we have personal experience with, so we know they will work. However, if the boot that you like to use is not on this list, that does not mean it is a good option. If you have questions on your boot or any boot that you are considering to purchase for your trek with us, GET IN TOUCH and we can assist. First of all, watch our trekking video below before reading further. Read some REVIEWS from our treks. CHECK OUT our upcoming treks to Everest. Read more advice for this trek.
1). La Sportiva TXS GTX
This is a new boot from La Sportiva, that has replaced our beloved Trango Trek GTX. We prefer a more rigid sole under foot and these boots do a great job. They are warm, lightweight and waterproof. Some of our Sherpa and Kilimanjaro guides wear these boots as well. Ian used these boots on four Kilimanjaro climbs this year along with three Everest Base Camp trips, and they are still in great condition for the same again next year. We would also use them training and on other treks in Nepal and South America.
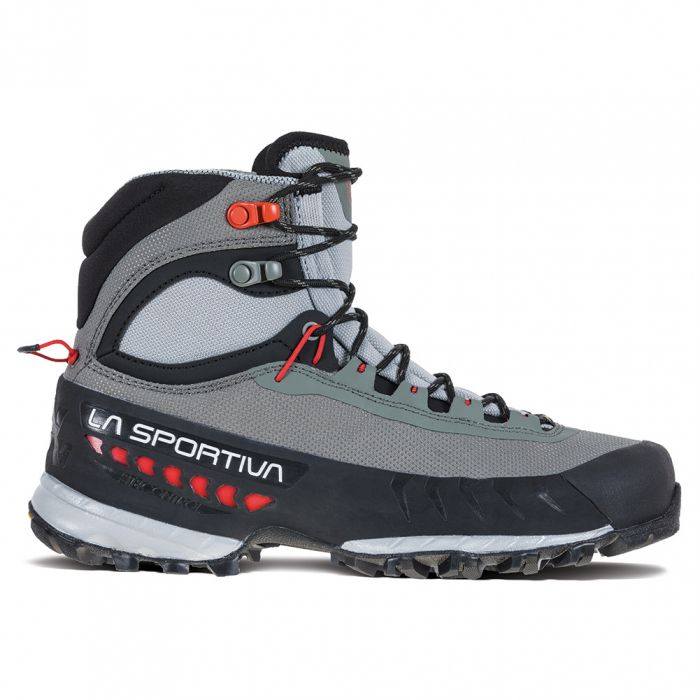
2). Salomon Quest 4 GTX
Another great option is the Salomon Quest 4 GTX Trekking boots. More and more people are using these trekking boots on a wide range of our trekking adventures in Nepal and around the world. They are comfortable, sturdy, waterproof and a very resilient trekking boot. We would recommend these boots for Everest Base Camp, Kilimanjaro, Mount Elbrus, and a range of other treks.
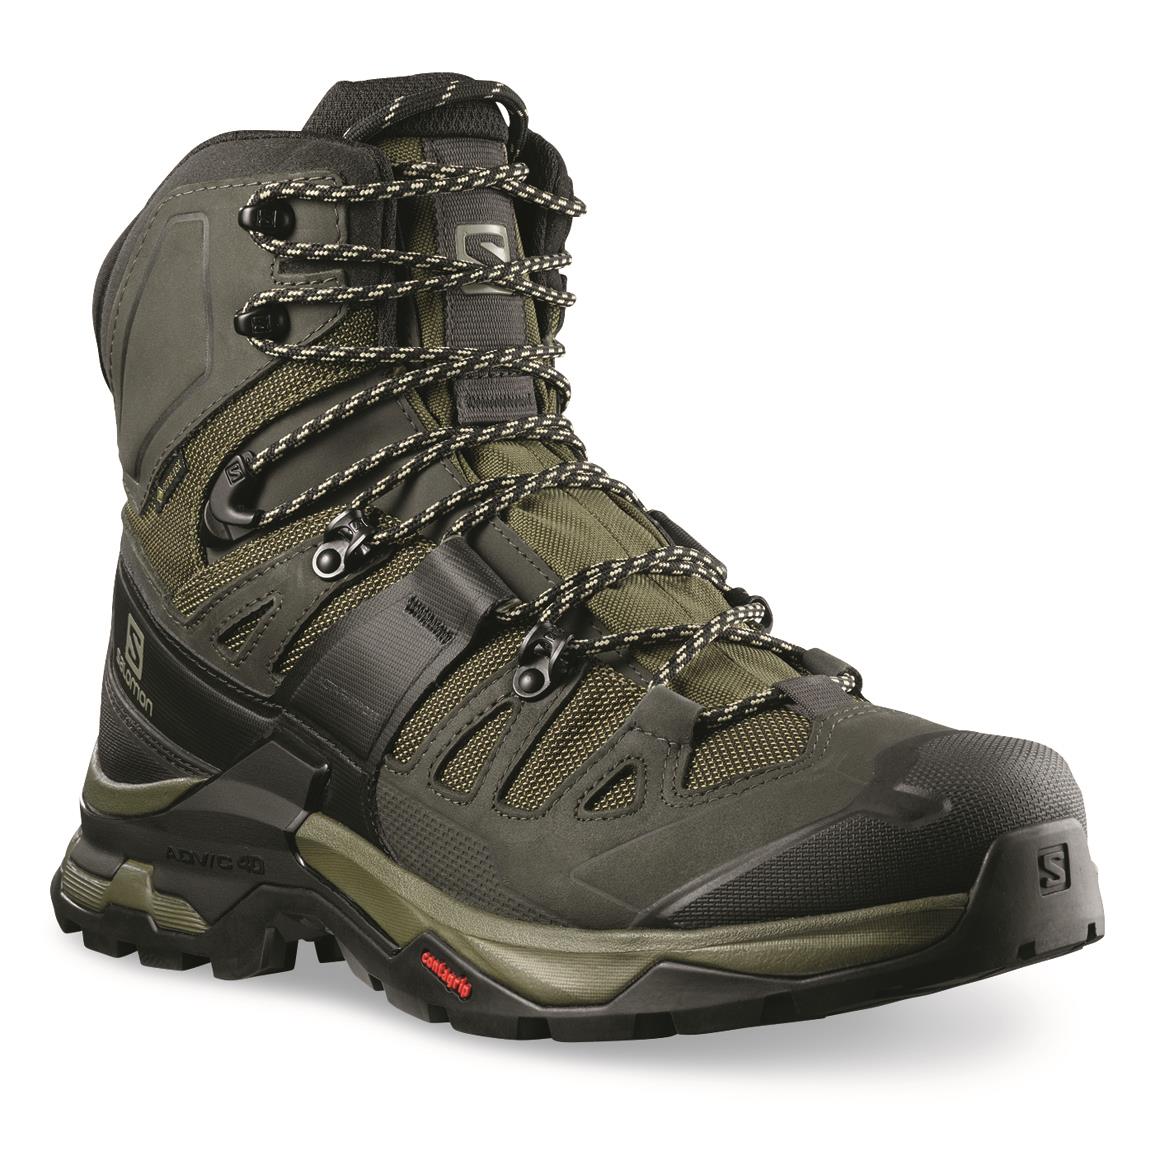
3). Scarpa Zodiac Plus GTX
Scarpa has come out with a new lighterweight option in the Zodiac. These boots are Gore-Tex, so a waterproof boot to keep you dry if you experience moisture on the trail. They also have good ankle support and lacing system. These boots, similar to the La Sportiva TXS, have a more rigid sole, which is ideal for the terrain on the trail to Everest Base Camp. Scarpa are always re-inventing trekking boots and if they fit your foot correctly, then they may be the right boot for you. They work great and last a long time. We would also recommend these boots for a Kilimanjaro climb, Elbrus or the Inca Trail.
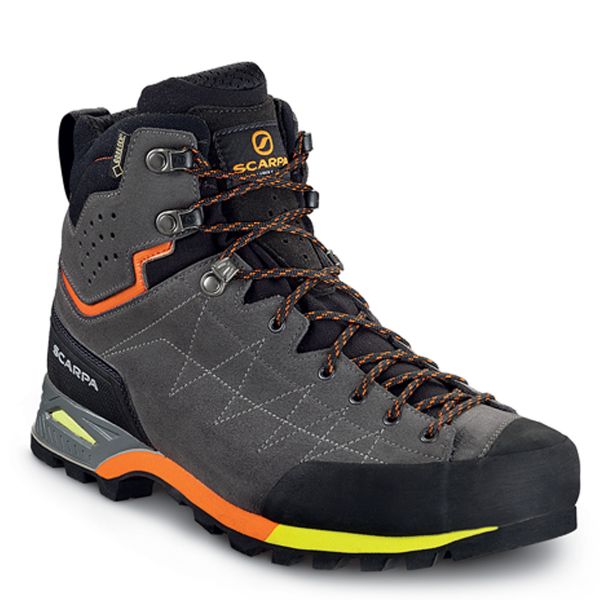
4). Merrell Moab Mid 2 Waterproof
The Merrell Moab Mid 2 Waterproof Trekking Boot has been around for years and there is a good reason for that, they are a great boot! These boots boast a waterproof membrane, good ankle support, comfortable and sturdy fit. The Merrell boot may be the option for you if you have a slightly wider foot or need more room in your toe box. This boot is a reliable and durable option that will be ideal for your Everest Base Camp Trek! We would also recommend this boot for Kilimanjaro, Annapurna Base Camp or the Inca Trail.
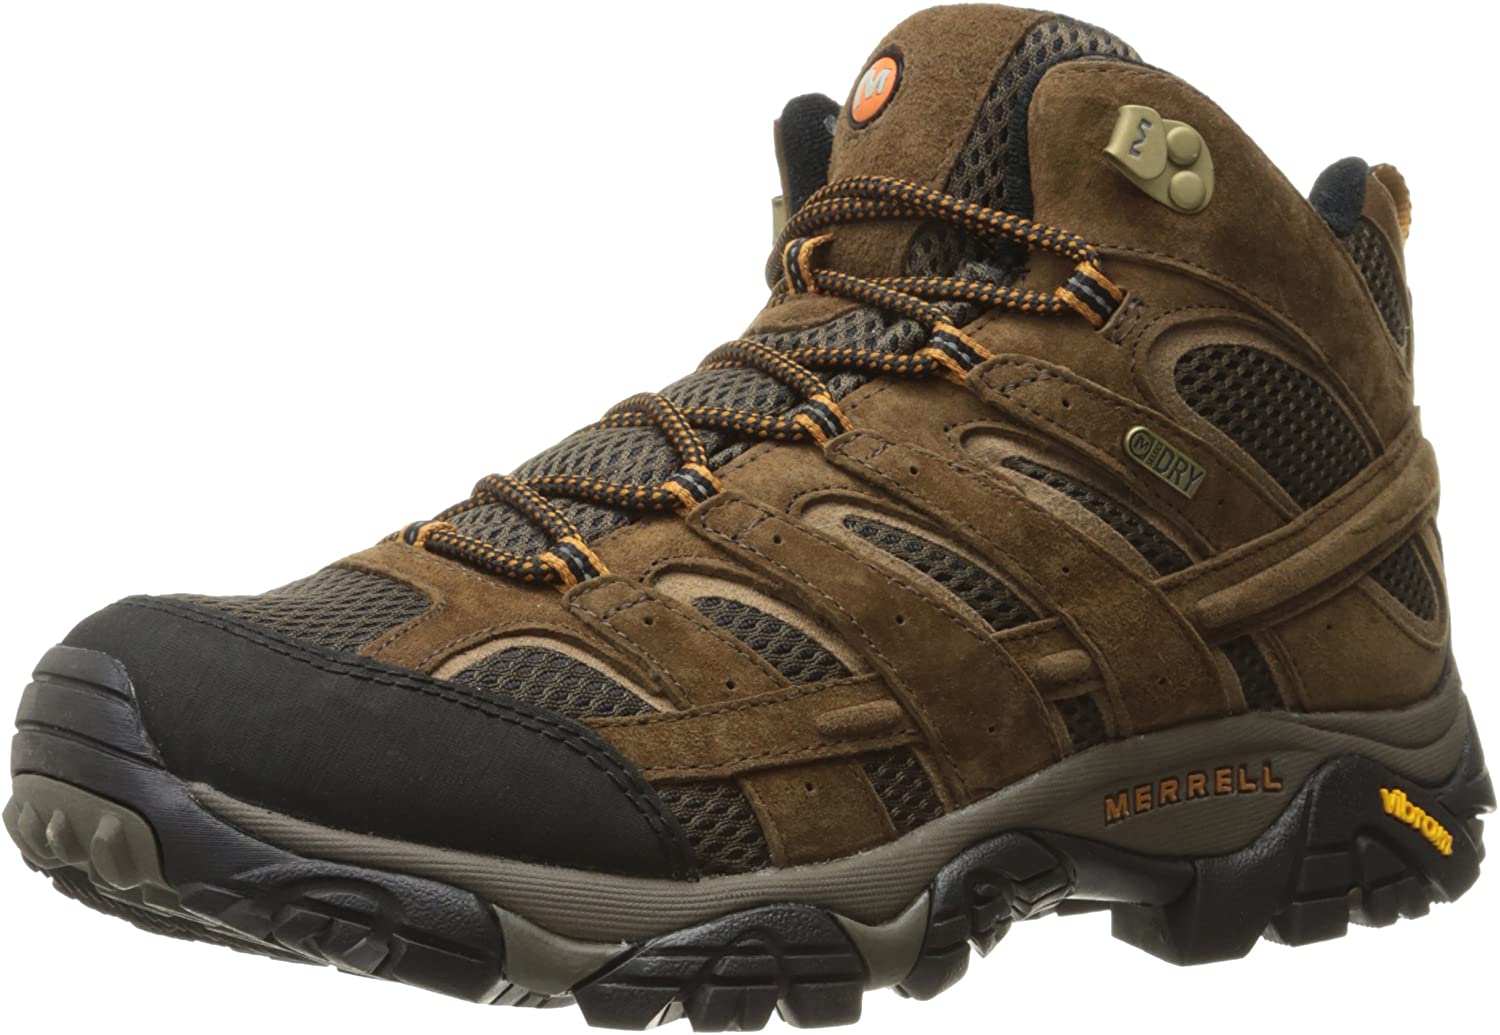
5). Meindl Vakuum
You could also consider using the Meindl Vakuum trekking boots. These are a good option for Everest Base Camp treks and a wide range of trekking peaks and multi-day trekking adventures. These are a very popular boot and we see a lot of clients arriving to Nepal in this option. They are an excellent choice for mixed rocky terrain and long distance hiking. These boots will be with you for many miles as they are an extremely durable boot. Also, this could be a good option for you if you feel the cold in your feet as they will be a warmer option.
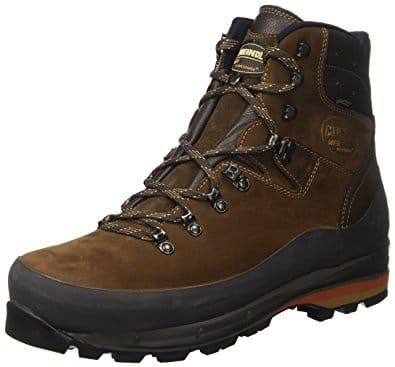
The Best Trekking Boots for your Everest Base Camp Trek
The boots we have listed above are not just good for your Everest Base Camp Trek. We want to make sure that you get a boot that could work for a wide range of trekking or mountaineering treks. Therefore, these boots would all be great for climbing Kilimanjaro and walking into Mera peak, Island peak, Elbrus, Aconcagua and any trekking trip that we offer. All of these boots also come in Men’s or Women’s styles. Therefore, they should work for anyone coming on one of our Everest Base Camp trips!
FAQ'S
Q). How much does a visa cost to enter Nepal?
A). Visa entry for Nepal costs USD $50 for a 30 day visa and USD $100 for 90- day visa.
Q). How much is a meal in Kathmandu?
A). An average meal in Kathmandu is approximately USD $10 – $15 per meal.
Q). How much should you tip your guides after Island Peak?
A). The tip given at the end of a trek and climb should be roughly USD $250 – $300.
Q). Can I leave spare luggage in the Kathmandu hotel while I am on the trek?
A). Yes, the hotel we use in Kathmandu has a luggage storage room for any travel clothes or spare items you want to bring with you to Nepal, but not on trek.
Q). Where do I get water from on a trek to Everest and Island Peak?
A). You should use water purification tablets in the 4/5 liters of water you will be drinking each day. Avoiding water borne illness on the trek is imperative! You can buy these in Kathmandu or on the trail to Mount Everest. Bottled water (plastic) has been outlawed in the Everest region as of 2019. Therefore, you will not be able to purchase bottled water anywhere along the trail any longer. You will want to make sure that you have adequate amounts of water purification tablets with you for the entire trek. 30 minute treatment is ideal. Check when you purchase.
Q). Is there water at Island Peak High Camp?
A). Yes there is water close to Island Peak High Camp. We have enough staff and support staff to be able to collect water from the glacier near Island Peak High Camp.
Q). Is the Everest Region expensive?
A). The higher up the trail you go in the Everest Region, the higher the price tags are for items! Anything you want to purchase in the region has to be carried in on the back of a porter or animal, which is why things are more expensive the further they have to travel. Boiled water in Nalgene, for example, is between USD $2 – $4 and this will vary the higher up you go. Coffee can be $3 – $5.
Q). When is the best time to climb Island Peak?
A). This depends on your experience and the experience you are looking to have. Some of our favorite times to be in the region are March and late October into November. There are usually less people, which we prefer. The temperatures are a bit colder, bringing the crisper and clearer views. Traditionally the climbing season is March, April and May. The monsoon rolls into Nepal in May and stays until September. We like to return to Island Peak in late September, October and November.
Q). When is trekking season in the Himalayas?
A). There are two distinct trekking seasons in the Himalayas; pre-monsoon (February, March, April and May) and post monsoon (late September, October, November and December). It is also possible to make the journey in January and early September. Our personal favorites are March, April, late October and November.
Q). When is the Everest Base Camp quiet?
A). The quietest time to visit the Mount Everest Base Camp are January, February March, September, November and December.
Q). When is the warmest time to climb Island Peak?
A). May and late September are usually the warmest times to climb Island Peak. However, while we normally see warmer temperatures in May, we have also seen years where it has snowed on the trail and been quite cold along the way! You never know what the weather will be like in the region, but generally May is a warm time to be there.
Q). When is the main climbing season in Mount Everest?
A). The main climbing season on Mount Everest is April and May each year. This means that if you want to see Everest Base Camp with all the tents and action, then one of the trips during the months of March, April or May would be best for you.
Q). What vaccines do I need for Nepal?
A). The recommended vaccines to receive before trekking to Mount Everest Base Camp include tetanus, Hepatitus A, Hepatitus B, Typhoid, Poliomyelitis, Rabies, Meningoccal Meningitis, Japanese Encephalitis, and the Covid-19 Vaccine.
Q). How do I choose the right lodges for a trek to Everest & Island Peak?
A). Ian Taylor Trekking offer some of the best accommodation on offer for every trek. Our service is second to none. We use the same lodges on every trek. The lodge owners know us and we know them. This helps us offer you consistency for your trek. We have been building relationships in the region for years to make sure you have the most comfortable experience on your journey to Island Peak.
Q). Is it difficult to trek to climb Island Peak?
A). Firstly, you must know that Island Peak is NOT a trekking Peak. You need to come with proficient mountaineering skills to take on this climb. Secondly, you need to make sure that you choose the right itinerary, that gives you adequate acclimatization to the low levels of oxygen. And finally, you need to come with excellent physical preparation to tackle this mountain.
One of the most common questions we get is people asking if it is difficult to trek to Everest Base Camp and climb Island Peak? This is a relative question. For people who are used to hiking long distances, with a weighted back pack over years, they might find the trip very manageable. However, for people who have no access to hills, or that are not used to hiking, climbing or mountaineering or training on a regular basis. They will need to train hard for this trip and will likely find it very difficult. Likewise, the older you are, the more training is needed. Learn More.
What people said about our Island peak climb

Claire Greaves
Island Peak 2010
Going to the Khumbu Region in the Himalayas is no easy task. It is long…it is hard…and it is truly amazing. From day one I knew I was being looked after. I got a full training program and all questions were answered. It is a feat of endurance and stamina, that requires preparation and commitment. At times, I questioned my own abilities, my endurance levels. However, doing this trip with Ian Taylor Trekking quickly absolved all of these fears, and I was at peace on my summit bid of Island Peak, knowing that I had Ian Taylor Trekking at my back the entire time. I can’t wait to work with them on my next challenging adventure.”an excellent introduction to Himalayan high altitude mountaineering, and can be used as a stepping stone to higher peaks.
Leona Gilchrist
Island Peak 2010
While climbing Mont Blanc in 2008 with Ian Taylor, I met some wonderful people who I still know as friends. Ian’s love of mountaineering is infectious and he encourages climbers to not just endure the trek, but enjoy it. He encourages a fun atmosphere. Mountaineering can be scary but it’s much easier to relax and enjoy yourself when you feel safe. This is achieved by Ian’s attention to the preparation and training of his climbers. He always has words of motivation in your tough moments too. And so my decision to go on another expedition to the most vast and breathtaking mountain range in the world, the Himalaya, with Ian in 2010 was an easy one. Unforgettable.
Ready to go?
We have designed the best itinerary and service for your Island Peak climb. Get in touch today and start planning for your Island Peak adventure with us.
We pride ourselves on making sure that our clients have every opportunity to succeed on the mountains, including professional training advice, gear lists and video links on how to pack your bag, and much more. We are always available to answer any questions you may have by email, phone or skype, so contact us today!
