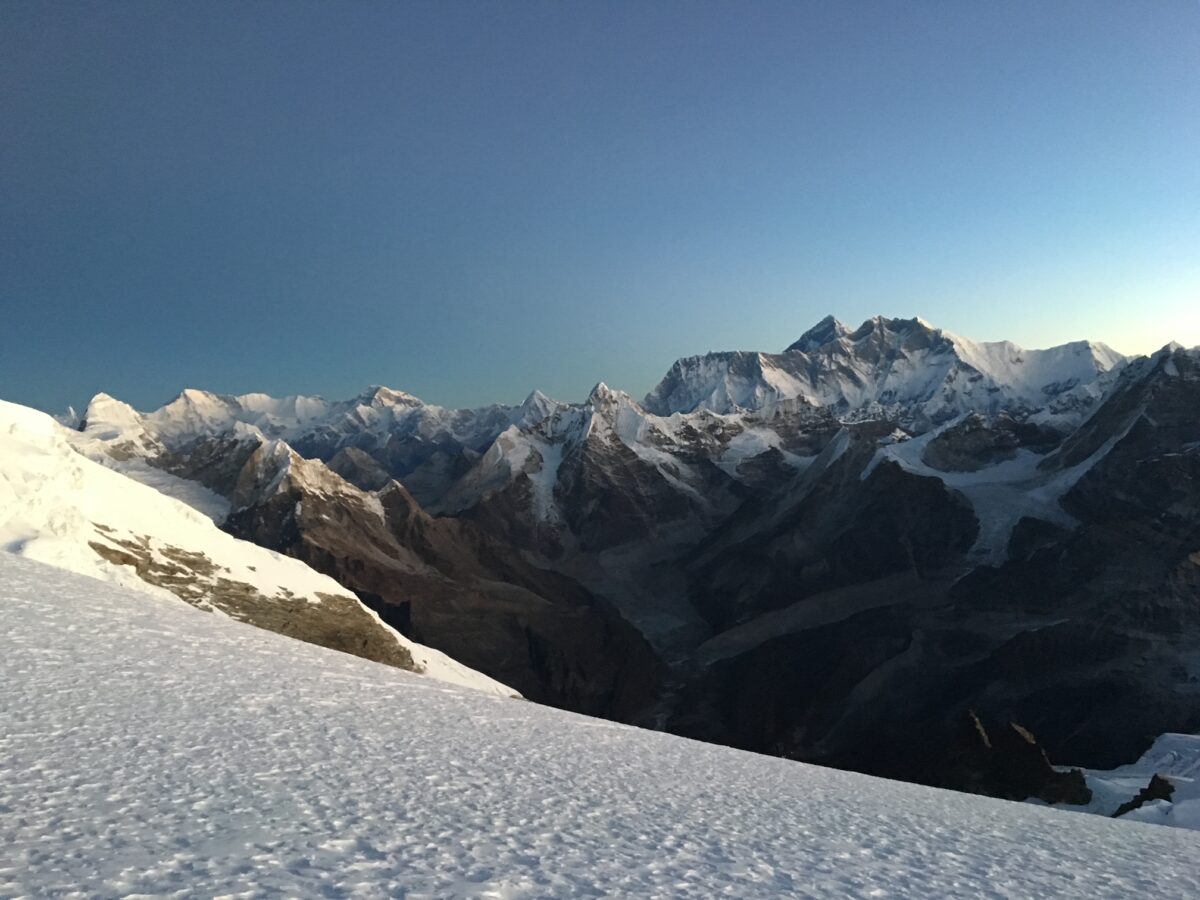
Mera Peak
On this journey you will see 5 out of 6 of the world’s highest mountains in the world. Our Mera peak climbs have an excellent tried and tested acclimatization program. The two keys to success climbing Mera peak are coming with excellent physical strength and acclimatization. You also need multiple summit attempts in case of bad weather. The cost start from USD $4,500.
Tips and Advice
1). Our Team
Ian Taylor Trekking have 3 guides for every group of 10 climbers. We have a maximum of 10 climbers per team along with our support team so we can carry ropes and mountaineering equipment high on the mountain. Safety is our priority on Mera Peak. We want to make sure all of our teams have the best chance at safely reaching their goal. With more staff on the trail with your team, they will be able to more efficiently manage your safety on the trail and mountain and also give you a better experience along the way. We also have a western guide on all our Mera Peak trips.
We do not outsource any of our trips in Nepal and we have our own office in Kathmandu and our own staff who manage all of our trips. Therefore, this gives us far more consistency in our service on the ground. We have great climbing Sherpa’s working with us for eight years and therefore, this helps us offer you quality trips to Mera Peak.
2). Supporting the Community
We continue to support the local community and have helped to establish the Goli Village Trust in Nepal. This was put into place after the earthquake in 2015, when the Village where many of our staff have come from was devastated. We have built two schools in the Goli region and we have placed stoves in over 60 homes. We do need donations and help, therefore if you would like to donate, set up a trek to the village, give funds, clothes or school items, then get in touch. Please let us know and we can help you figure out how you can best help!
3). Quality Run Trips
We run only run quality treks with more staff, better lodges and better food. Read some REVIEWS from our trips. A lot of times people are only given the same food each day for every meal, and we don’t do this. You are allowed to pick what you eat for each meal in all the lodges we stay in. Our team will cook healthy meals for the rest of the trip and high on Mera Peak. We pay our staff correctly and do not over load them with weight. We do not cut corners on any aspects of our treks or climbs.
4). Expert Training Advice
We offer personal service with training advice for our clients, 5 days a week. A lot of people underestimate acclimatization, the trek into Khare, along with the challenge of extreme altitude on Mera Peak. We do not want to see this happen with our clients. Therefore, we want to make sure that you have the best information on how to complete this trek and climb safely and successfully. Learn more. The summit night and day alone can be 10 hours with cold and harsh conditions high on the mountain. We run courses in Colorado and Scotland in support of our Mera Peak climbs.
There are some long 8+ hour days, covering over 18km on this trip. There are also some days with over 700m/ 2,296 feet of up and down hill on steps or stairs while on the trail. We have professional training advice available to you 5 days a week. All you have to do is e-mail us and we can schedule calls with you as often as needed once you sign up to our trips.
5). More Acclimatization
After a decade of experience we know trip safety requires more time to acclimatize to the lower levels of oxygen, in order to reach 21,246 feet. We know that excellent acclimatization is the key ingredient to a safe and successful trip to high and extreme altitude. Our itinerary has eight days trekking up to 4,950m/ 16,240 feet. Then we have three nights at this elevation for additional mountaineering training and acclimatization. We then have an additional two nights at Mera Peak Base Camp 5,350m/ 17,552 feet before moving to Mera Peak High Camp at 5,800m/ 19,028 feet.
This will help to give your body the time it needs to acclimatize correctly. Most companies are not doing this and we have seen over the years that it is a main factor in why more people on our trips are making it safely to the summit of Mera Peak!
6). Climb with a Western Guide
All of our Mera Peak Expeditions are led by a western guide. You can walk through the region with someone who has extensive experience in the mountains lead groups to a safe and successful experiences. If you book far enough in advance, you will be apart of a professionally led trip on our unique itinerary. We also have satellite communication on all our trips so guides can access weather updates and react in emergency situations.
All of our guides hold current Wilderness First Aid Certificates and mountaineering guiding qualifications. Also, our guides will carry satellite and local phones with them .in case of an emergency. All our guide have led many trips on Island peak, Mera Peak, Lobuche, Tent Peak, Everest North Col, Cho Oyu, Ama Dablam and Mount Everest and so many more. Read some Reviews from our Mera Peak trips and get in touch for further information.
7). 25 Years Experience
We have years of experience managing teams on the ground in Nepal. Our head Climbing guide Ang Kami Sherpa has climbed Mera Peak over 100 times and climbed Mount Everest numerous times, Island Peak over 200 times, Aconcagua along with, many other peaks. He is from Goli village and helped built the first school we built in the region. We have other Climbing Sherpa’s Pasang Lima and Ong Chu Sherpa who help manage our Mera Peak teams. We also have Lhapka Sherpa who has climbed Everest numbers times, Manaslu 17 times, K2 twice and 10 of the highest mountains in the world.
On our Mera Peak climbs, we use quality, North Face Tents. We use these tents on all our trekking and mountaineering itineraries in Nepal. All our mountaineering gear is stored in Lukla and we carry it into Mera Peak each season. Our own cook Dilip or Karma will trek with the team to Mera peak. Our porters and support staff carry all equipment up to Mera Peak High Camp.
8). Four Star Hotel in Kathmandu
We include two nights in a four star hotel in Kathmandu. One night before your trip and one night after the trip. All of our trips are on a shared basis, but if you prefer a single room, this can be offered at an additional cost. We use the Buddy hotel and Spa in Thamel, which is the main tourist district of the city. You can also upgrade to 5 star hotel option if you like, just ask us for further information.
9). Small Group Sizes
We only work with small group sizes. The maximum number of people per team trekking to and climbing Mera Peak will be 10 people. Some of our groups are even less people with only 6 or 8 team members. This will therefore give you are more personalized experience on our unique trek into Khare and Mera Peak. You can move as a team and experience more of this world class trail in a smaller groups.
10). More Summit Attempts
We have more days for summit attempts. Three in total if needed. We have two nights in Mera Peak Base Camp this can be shortened to one night if there is a better weather window for a summit attempt. Additionally four nights can be spent in Khare, then move to Mera Peak Base Camp, then High Camp before a summit attempt. The itinerary is developed with this in mind so the guides can manage the team, safety and summit attempts while having good options. You may need this flexibility.
1). Be Comfortable Camping
On the Mera Peak trip, you will be sleeping in tents out in the elements for a portion of the time. Our trips spend some nights in the local tea houses and some nights in tents. This will help you to prepare for the nights on the mountain. You will need to be prepared to sleep multiple nights in a row in the great outdoors! The weather can vary drastically, with a wide range of conditions. You need to be comfortable with setting up tents, being capable and proficient at managing your camp craft, and be able to maintain a good level of hygiene in a camping environment.
2). Have the Right Clothing, Gear and Equipment
Mera Peak can throw out a mix of weather, at any time of the year. The weather is never guaranteed to be stable, so you need to be experienced and ready for a range of weather conditions. This means that you need to make sure that you have the right mountaineering boots and gear required for this cold and hostile environment. CLICK HERE for our Mera Peak packing video.
There is no one size fits all when it comes to gear, so we think that the best option is to seek out our advice on an individual basis to make sure you have the right gear for the time of year you plan on climbing Mera Peak. CONTACT US or call us, as we are happy to cover all aspects of the equipment and kit needed for climbing Mera Peak.
3). When Should you Climb Mera Peak
We recommend climbing Mera Peak in late April, May, late September, October and November. We find that when we climb on Mera Peak, generally the best months are May and October. If you decide to climb in late March, early April or late October into November, you need to be ready for colder conditions. It can snow in any of these months. Therefore, you will need to adjust your gear and equipment to suit the colder weather conditions you will encounter on the Mera Peak climb.
4). Specific Physical Conditioning is Needed
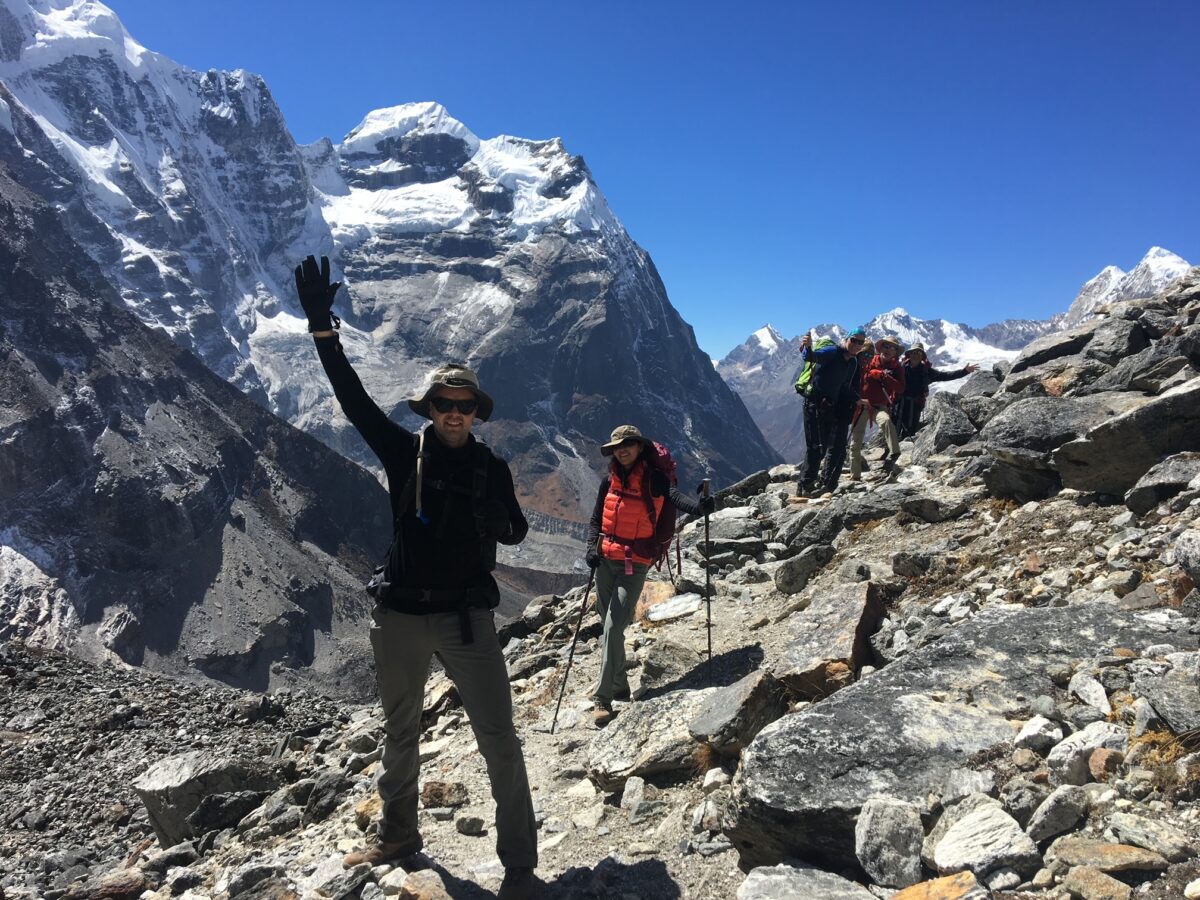
Trekking into Mera Peak on the route we use is very strenuous. There are lots of steps up and down and the trail is very demanding. CONTACT US for pictures and more information. When you climb higher on Mera Peak, you are climbing into the lower realm of the death zone at 5,500m/ 18,044 feet. Above this height, nothing can survive. Your digestive system is starting to shut down and your body is shutting down. In saying this, you can adapt enough to the low levels of oxygen, however, you need the right acclimatization schedule and to have done the right training.
Climbing Mera Peak requires excellent physical conditioning and you need to be training months in advance of your climb. You will have a long and challenging trek into Khare 4,950m/ 16,240 feet and Mera Peak Base Camp 5,350m/ 17,552 feet, which will require you to have come with a lot of previous hiking experience. Our summit day is on day fourteen, therefore, we have excellent acclimatization. You need to be training with a backpack on, out in the hills if possible, building from 3 to 6 hours of hiking up and down hills. Also, you should be building carrying from 6kg to 15 kgs (13lbs to 33lbs) of weight in your bag. You should also be out doing multi-day hiking to prepare your body for day after day of strenuous activity.
All of this should be supplemented with four to five days a week of gym work. You will need to build your strength and endurance to be able to trek for days on end. If you sign up to one of our Mera Peak climbs, then we will be available to you to help you prepare fully for the climb.
5). Pick the Right Itinerary
Have a look at our itinerary. We have 13 days acclimatization before we head up to high camp at 5,800m/ 19,028 feet and onto the summit at 6,476m/ 21,246 feet. Do not under estimate the acclimatization schedule. Many teams on Mera Peak are skipping Base Camp, and this is not a good plan. Yes, you can save money by cutting out days and you will see a range of prices for the trip. However, this is not always going to be the best decision for your safety or for your chance of success on the climb.
Make sure you choose a quality acclimatization schedule. You want an itinerary that includes 3 nights in Khare at 4,950m/ 16,240 feet, with quality training provided before moving higher. We also have additional days in reserve in case the weather is not suitable for the summit day. All these elements give you the best possible chance at making a safe and successful summit of Mera Peak. We have the team and schedule in place to make this happen.
6). Have Previous Altitude Experience
Don’t try to attempt climbing Mera Peak as your first altitude or mountaineering experience. You need to know how your body reacts at 5,000m/ 17,000 feet, before going to higher extreme altitudes. We recommend as much hiking, trekking and multi-day altitude experience as possible before taking on this challenge. Your previous experience will help you prepare and understand how your body adapts to low oxygen environments. Also, having previous experience will help you understand the gear, clothing and you will be more comfortable in this wilderness environment. Only by having this knowledge and experience should you consider tackling higher altitudes and climbing Mera Peak.
7). Manage Your Personal Hygiene and Health
As you will be in a wilderness region and away from real medical care, you need to bring your own personal medical kit along with antibiotics and any medicines you may need. You will be out in the wilderness for days on end and possibly running into very few people until arriving in villages like Khote, Tangnang and Khare. You will need to keep your hands, feet and body clean on the journey. Also, always remember to use hand sanitizer at all times.
We also recommend that you use a nail brush to keep your nails clean and have nail clippers. You need to have factor 50 sun cream and do not get sun burned on the trip. Managing your personal hygiene correctly can be the difference between success and failure on a long wilderness trip. Having previous camping and wilderness experience will also help you on the journey. We also recommend you talk to us about this element of the trip and how best to manage yourself in a wilderness camping environment.
8). Think About Additional Winter Skills Training
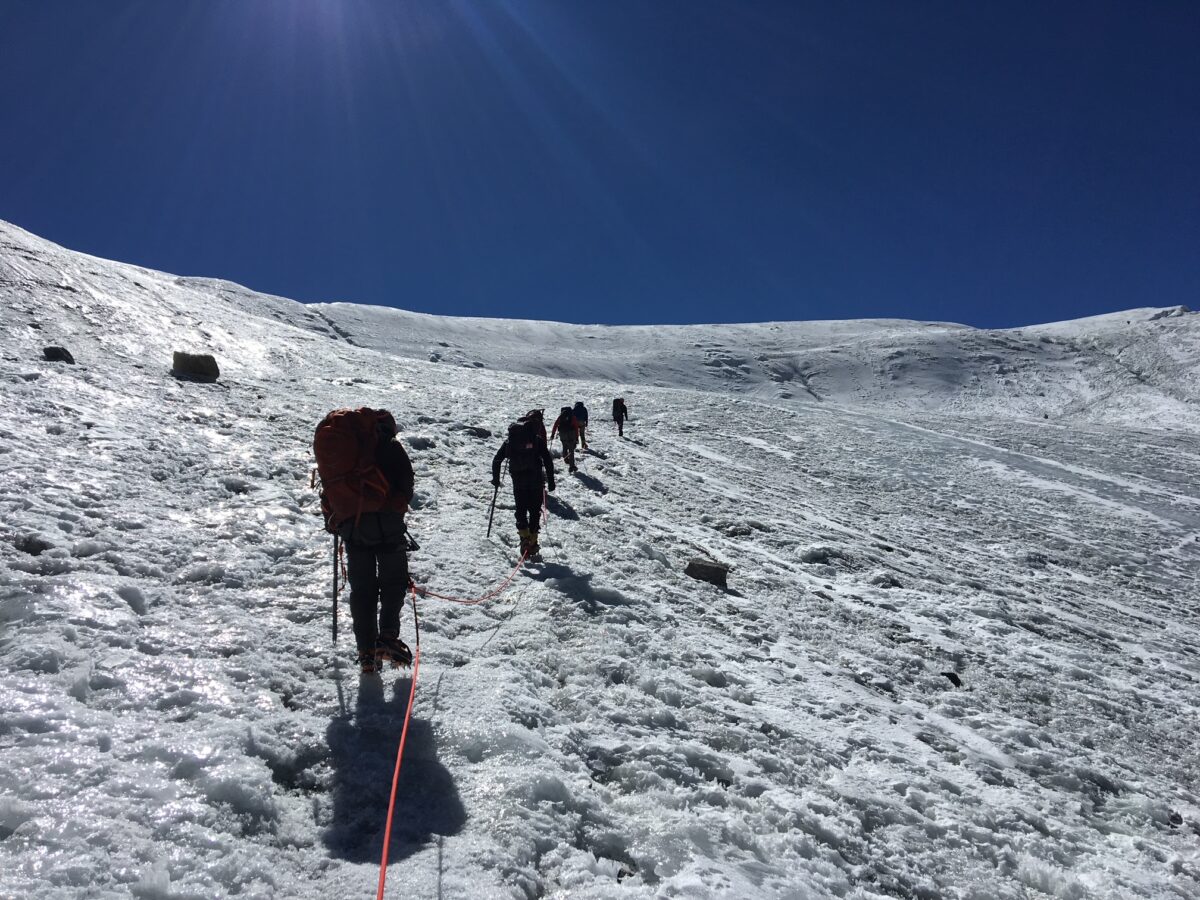
You will be attached to other climbers, walking Alpine style in unison on this glacier route up the summit. The route will be crossing a glacier with crevasse fields. You will be managing your breathing and temperature in a low oxygen environment, so if you are proficient in using crampons, harness, and an ice axe before arriving to climb Mera Peak, this will give you additional experience and confidence going to the summit. We have training courses in Scotland but there are a range of other regions for training around the world. We can help you get this additional training that will be very useful for your Mera Peak climb.
9). Break in Your Trekking and Mountaineering Boots
Having the right footwear is vital to success. Having the wrong footwear could ruin your trip. You will need both trekking boots and mountaineering boots for a Mera Peak ascent. They will both need to be worn in before you start your journey to Mera Peak. Likewise, you need to make sure you are training with your mountaineering boots on as they will use different muscles and are heavier then your trekking boots. Many times we see people with poor quality mountaineering boots on Mera peak. Generally, this will lead to people being airlifted with frost bite off Mera Peak. This should never happen. Make sure you have the right footwear. Do make the extra effort to train with your mountaineering boots. It will pay off when you are on the mountain.
10). Have a Qualified Climbing Guide
There are a lot of companies out there who offer the Mera Peak climbs, many of which outsource their guiding services. Therefore, they just find whoever they can to lead your trips. They will likely also have limited climbing experience, are not able to fix ropes or know how to manage people at high altitude. You need to make sure you have a western guide or climbing Sherpa who can fix ropes, manage training in Khare, pace the team and bring you safely up and down Mera Peak. We don’t outsource any of our Mera Peak climbs.
We bring our own ropes up the mountain and fix them on the final summit pitch. Also, we use a high camp at 5,800m/ 19,028 feet, which gives you the best possible chance at a safe and successful climb on Mera Peak. We have been leading climbs on Mera peak for 8 years now. Experience is everything on these big mountains.
Preparation and Training
Acclimatization is Critical for Success
The best advise I can give you for any high altitude adventure without a doubt is, the more days acclimatizing the better. Simple put, have more days in your itinerary. We have the right acclimatization program and itinerary in place for you on our trips. We don’t attempt a summit of Mera peak until day 14 which is the right approach. You can train all you like but you do not have the right acclimatization schedule you might as well not come. Be informed and be prepared!
We know what it takes to give a team the best possible chance at success. First, we have developed a new route in to Mera Peak. Others try and copy us for good reason. Secondly, we have 3 nights in Khare at 4,950m/ 16,240 feet. Thirdly, we have two nights in Mera Peak Base Camp at 5,350m/ 17,552 feet. Most trips don’t do this and this is important for safety and success. Finally, we use High Camp at 5,800m/ 19,028 feet. We have built in plenty of days for acclimatization, bad weather and additional summit attempts.
Do not Underestimate the Amount of Preparation Needed
All you need to do is come prepared, in good health, fully trained and mentally prepared for 18/20 days in the wilderness. We recommend previous high altitude trekking experience having trekked above 5,000m/ 16,404 feet. If you have no idea how your body reacts to low levels of oxygen, don’t waste your time coming on a Mera peak trip. Understanding how your body reacts to low oxygen environments is critical before signing up to a trip like this. Why not chat with our team first, before signing up to a Mera Peak Expedition.
Long Days Hiking and Daily Gym Work are Important
There is some very specific training you need to be doing before your Mera Peak adventure. Firstly, you need to be hiking up and down hills. You will doing this in a low oxygen environments for days on end. Secondly, you will be carrying 6+kg/ 13+lbs each day on the trail. On any given day you will be carrying with 2/3 liters of water, rain gear, camera, sun cream and snacks. Higher up the trail you will have to carry gloves, down jacket, fleece, warm hat, crampons, harness and Ice Axe. Finally, we recommend you build up to carrying 15 kg/ 33 lbs
Endurance and Leg Strength are Two Key Ingredients
Depending on where your training starts, you should consider doing a fitness test. You will need to have a mix of cardio, pushing your lactic threshold higher. Your goal is to perform at higher heart rates for longer. You will need to come with excellent strength and conditioning for a Mera Peak trip.
The two key elements you need to consider our strength and endurance. Low oxygen environments find weakness in the body so you need to develop a strength and conditioning program. We can help you develop a program that works for you. On the route we use into Mera peak there are a lot of up and down before reaching Khote, so the first 6 days have a lot of excellent acclimatization but lots of steps up and down through the forest trails.
Carry Weight in Your Training
You also need to build an endurance program that gets you training in a similar to the actual trail. Training with weighted back pack building up to carrying 15 kg/ 33 lbs is critical in this part of your training. You will be walking up and down steps, steep trail, across and up and down a glacier, with heavier mountaineering boots with crampons on. You need to consider all elements of the trail and lack of oxygen while developing the correct training plan. If you are going to be walking 4 to 8 and up to 14 hours a day you need to be training in a similar manor. As you get closer to your trip, it is important to get in some multi-day hiking. Remember when hiking to build slowly, starting with 2/3 hours and build towards 6/8 hours if possible.
Build Endurance and get the Hours Into Your Legs
My recommendation is to training 5 days a week. Train on a stair master and incline treadmill 4 days a week start with minimal weight in your back pack 6kg/ 13 lbs. Doing a fitness test is a really good idea so it is important to train in specific heart rates.
You should be doing most of your training in the endurance zone. Building from 1 to 2 hours per day for 4 sessions. You then need an longer endurance session once per week and a day or two off. This longer endurance session is best completed up and down hills with weight on your back. If you have no access to hills you should consider a long bike ride. You can also consider a longer gym session mixing up the machines that you use.
We can help you figure this one out. You should be looking at building from 6 to 12 hours of training per week. You should do this for 2 months and then start adding in some weight training developing your quads, calves, and core. In the last 2 months you should consider adding in interval training while you are still doing the endurance training building up the weight you are carrying.
Do Not Underestimate This Trek and Climb
To sum up, you are going on the climb to enjoy it and have the experience of a lifetime. The better prepared you are the better. You should consider doing an introduction to mountaineering. Being competent using Crampons, Ice Axe, Jumar and abseiling using a figure of 8 is really important. CONTACT US today and find out more specifics that will help you achieve your goal of climbing Mera peak. We look forward to talking to you and helping you map out a training plan that will work for you.
The Best way to Train for Downhill
Not everyone will have access to hills, but this is the best way to train your body and legs for down hill hiking. Depending on your chosen adventure you do need to assess the level of downhill. We have elevation gains available for all of our key trips. I encourage you to review the daily elevation drops and what type of terrain you will be walking on.
For example, on our Inca trail treks you will be drop 700m/ 2,296 feet to 1,000m/ 3,280 feet on different days all on steep rocky stairs. On Kilimanjaro you will drop 2,800m/ 9,186 feet in one day on scree and rock and this is very challenging on your legs and joints.
You have just walked for days on end you have reached your goal but not you have to retrace your steps, often in a quicker time frame. Hiking downhill will take its toll on your joints. Fore sure, the downhill hike will take more wear and tear on your joints and muscles than the uphill.
You do need to use effective training techniques to minimize the impact on your body. Descending using good technique means that you move faster and feel lighter. Remember, 80% of accidents happen on the way down.
Keeping Knees Healthy
We live in Eagle-vail Colorado with amazing access to altitude and a wide range of mountain terrain to train on. In Colorado we can train all year round on hilly terrain preparing for Kilimanjaro, Himalayan trekking and mountaineering trips. I know most of you are joining our trips from sea level and with minimal access to hill training. I encourage you to get out to Colorado doing some multi-day hiking in preparation for your chosen adventure.
If you do not have access to hills and mountains, you must figure out other ways to prepare your knee joints to handle downhill stress. From a knee perspective, downhill hiking means eccentric loading and typically thousands of repetitions of it. Eccentric loading (the lengthening phase of a contraction) is especially challenging to what is called the patellofemoral joint of the knee. This is where the knee cap, meets the femur. Inadequate strength, poor mechanics and lack of exposure to this type of loading can turn downhill forces into injury producing stress. Prior to your trekking trip you need to start implementing sport specific training into our general preparedness programming.
Hiking Uphill and Downhill
Hiking uphill is all concentric muscle action (muscle active while shortening) at the knee joint without any eccentric loading (loading while muscle is lengthening). Concentric only exercises tend to cause less mechanical stress, load and pain to joints and tendons than do exercises that have eccentric phases. What goes up must come down.
You must prepare our body and specifically your knees to handle downhill hiking. Depending on the trip, you really need 6 months of some sport specific training into our general preparedness programming.
The strength movements below are similar but slightly different in specific ways. We purposely only hit each one once per week because too much volume of these exercises could quickly lead to an over training injury, so be careful. I would recommend adding in additional hip flexor and quadriceps mobility work at the end of your training sessions as well to maintain good length tension relationships and to protect your spine.
The Point of These Exercises
Increase vertical loading volume of the knees with a sight posterior to anterior (back to front) force vector. Get exposed and accustomed to decelerating the vertical and forward forces using primarily a knee strategy. Transition from doing most lunges and squats with a 3 points of contact foot position to a more heel elevated position where we contact and press through the forefoot.
The 3 points of contact foot position is the most stable position for the foot and encourages a balance of hip and thigh musculature – great for general preparedness training. Transitioning to a heels elevated position where the forces are applied through the forefoot places most of the stress on the quadriceps and knees – optimal for downhill hiking training.
Exercises for Downhill Hiking
You should consider adding these movements into your weekly training 2 times per week. Add 3-5 sets of 10-15 repetitions (per leg)
1). Heels Elevated Goblet Squat
2). Forward Alternating Lunge with Farmers Carry Loading
3). Forward Alternating Drop from Box Lunges
4). Banded Posterior to Anterior (PA) Forward Lunges
Carrying Weight
One of the best ways of mitigating the risk of musculoskeletal issues is by carrying a light pack. Then build up the weight you carry over time. An overly heavy backpack is not recommended in the early stages of your training.
Extract its biggest toll on your body during steep and/or long downhill sections, so a hiker should always aim to travel as lightly as the dictates of their skillset and the environment into which they are venturing allow.
If you are carrying weight on longer hike you should slowly build up the weight you carry. You should also consider carry water uphill and dump as much water/ weight as possible for your downhill. Always assess the weight you are carrying for each hike and always build up slowly over time. You do not want to get injured.
Tips for Hiking Downhill
1). Do not have your trekking boots too tight on the way uphill. Most certainly keep your boots tight for the downhill portions of your hike/ trek. Not so tight that they restrict blood flow.
2). Tighten your hip belt and shoulder straps – on steep and uneven descents this will assist in minimizing pack movement, which can impede your balance if left unchecked.
3). If you’re carrying trekking poles, lengthen them accordingly. Poles that are too low will have you reaching unnecessarily forward, thereby disrupting your center of gravity.
4). On big downhill’s like Kilimanjaro, Don’t forget to trim those toenails.
5). Don’t lean forward, don’t lean back – while descending a mountain your center of gravity should be low and over your legs.
Learning from High Altitude Guides
I have trekked to Everest Base Camp over 40 times, Kilimanjaro 40 plus times and have watched some local guides move very efficiently downhill. They effortlessly make their way along rugged, steep and rocky trails. They keep a low center of gravity, the way they bend their knees, they shortened their stride. Taking baby steps, they flow rather than hike down the mountains trails.
Minimize Weight Bearing Impact While Descending
Gravity is not your friend when it comes to downhill hiking. Hiking downhill takes significantly more toll on our bodies than other types of walking. Increased moment and knee flexion angle yield a 3 to 4 times bigger femoropatellar joint compressive force for downhill walking compared to level walking,
You can start by always keeping your downhill leg slightly bent on impact. This will help minimize stress on the knees, as the muscles rather than the joints take the brunt of the strain. Slowing down for steep steps, turn your body sideways and lower your weight down steep terrain is also using on steep steps and steep terrain.
Use Trekking Poles
Poles can help by redistributing some of the load to your arms and shoulders, thereby reducing strain on the lower body. As a bonus, poles can also assist with balance and stability by providing two extra points of contact with the trail; particularly helpful for folks that aren’t especially surefooted and/or have pre-existing leg issues. Trekking poles are great on the Inca trail stairs, Everest trail, Aconcagua and pretty much every steep downhill.
When the gradient is steep like on Kilimanjaro, taking smaller steps will help to keep your center of gravity over your legs, thereby promoting greater balance and control.
Pay extra attention to where you are placing your feet. Most accidents, slips and falls occur on downhill stretches that immediately follow long ascents. After the exertion of the climb, it is extremely important to remain focused on the descent.
Build up to Longer Hikes Carrying More Weight
The reason to carry weight in your backpack is to stress test your overall strength and conditioning for multi-day trekking. Building strength in the appropriate muscles for hiking up and down hill. By diligently practicing good technique, over time the speed and confidence with which you descend will increase and allow you to physically be able to carry more weight which will build your overall strength for trekking.
Be Careful Descending Snow Slopes
How you descend on a glacier or snowy terrain is dependent upon the condition of the snow and the gradient of the slope. A commonly used technique is the plunge step. Landing heel first, let the weight of your body drive your foot into the snow.
The harder the snow, the more aggressive the effort needs to be. Keep your knees slightly bent to avoid hyperextension. When descending steep snow slopes, reduce the gradient by zigzagging across the terrain. Make sure all of your gear is stored inside your backpack or safely secured.
Patience is your friend. If the snow is simply too solid you need to revert to side stepping and taking smaller steps as you manage your moving downhill.
Descending Scree Slopes
Take your time, Monitor your momentum and be careful of big rocks underneath the surface. This is a big deal descending Kilimanjaro, care is needed when descending on scree and loose rock. Take short, controlled steps. Keep your center of gravity over your legs at all times.
If there is someone below you, be sure to give them plenty of space, in case you accidentally trip, dislodge a largish rock or can not control your balance. Once you have the necessary techniques down pat, stay as loose as possible. Think flow. Move with the terrain, rather than against it.
Daily Distances
Day 1
Arrive into Kathmandu International Airport. Arriving the morning or afternoon before the trek. You will be meet by an Ian Taylor Trekking representative and brought to your 4 star hotel in Kathmandu. You will be able to pick up any last minute items along with exploring the streets of Kathmandu by night. Our trip briefing will be around 5:30pm. We will have our guide check your gear to make sure you have everything needed for the climb of Mera Peak.
Day 2
You will be up early for the exciting flight to Lukla 2,850m/ 9,350 feet. Fingers crossed the weather is in our favor. This is a 45 minute flight from Kathmandu to the small town of Lukla and gateway to the Everest region. We will get breakfast in Lukla before starting out on the trek south down around the airport and downhill past Surke 2,300m/ 7,546 feet and away from Mount Everest and then back up hill to Poyan 2,800m/ 9,186 feet.
Day 3
From Poyan, we will follow the route south over a river and traverse around the side of the hill before turning east off the main trade route and gradually up hill to the town of Pangkongma 2,846m/ 9,337 feet. We will stay in a nice lodge as we enter this local Sherpa village. We might be lucky enough to be invited into some of the locals homes and see how the locals live in these Himalayan foot hills.
Day 4
After breakfast and packing up, we will take a stroll up to the local monastery which has recently rebuilt. We will then pass through the Rhododendron forest on a steep winding stairs up to the Pangkongma la 3,174m/ 10,413 feet From here we will follow the ridge line on a long descent down over 1,000m/ 3,281 feet to our lunch spot beside the Hinku Khola river. We will then climb up 600m/ 1,969 feet to the stunning campsite of Nashing Dingma at 2,600m/ 8,530 feet. This is a long day on some beautiful local trails.
Day 5
We will be up again early at 7am for breakfast and start hiking at 8am gradually up through beautiful green fields before a steep stair case up before topping out on the Surka La. As we reach the top with a couple of lodges selling snacks. We cut around the back of the lodge through a forest, fir trees and rhododendron trees. We then move onto a rocky path and back up on rocky stairs to a wide open camp site at Chalem Kharka 3,600m/ 11,811 feet. There is a new lodge in the area and we will stay there.
Day 6
We will be off again on a long ascent up to our high point of 4,500m/ 14,764 feet. We walk out the back of our campsite on a gradual slope and we emerge out into a rocky and baron landscape. This is a beautiful hike and we can some times reach the snow line and snow scattered across the hills. After the initial 45 minutes out of camp you can see the rocky stair case up ahead and this is a long grind up for a few hours. We will stop at the top for lunch and it can be cold so make sure you have your down jacket. We will gradually descend over rugged, rocky terrain. We will pass a couple of lakes in a beautiful mountain setting before dropping down into a serene mountain valley where we will camp at Chunbu Kharka 4,200m/ 13,779 feet.
Day 7
Today we will descend down into Khote 3,600m/ 11,811 feet. after 20 minutes of up hill walking we get great view looking back from the Panch Pokhari view point. From here we contour around the and down high above the Hinku valley. We follow the rocky path down hill which leads us back into the tree line. We continue further through the forest and come out at the valley floor at 3,500m/ 11,483 feet. We head north cutting in and out of the forest up and down before coming to a small wooden bridge which takes 45 minutes and arriving in Khote for the night. This a beautiful setting and one to be remembered as we get great views of the back of Mera Peak.
Day 8
After a good nights sleep we have a nice trek to Tangnag 4,360m/ 14,304ft. The first hour is a beautiful walk with giant mountains in all directions. We then stay on the left hand side of the river, watching out for rock fall on our left. The trail and terrain is gradual mixed rock and pastures where yaks graze in the summer months. Tangnag is growing all the time and we will camp in this beautiful mountain setting. You can sit in a lodge and warm up with a nice fire in the evening.
Day 9
If the team are feeling well we will move to Khare 4,950m/ 16,240 feet. today. We may take the opportunity to stay in Dig Kharka 4,650m/ 15,256 feet. if needed. The route turns to the east as we trek through the valley floor and slowly make our way past stunning high altitude peaks, Black Mera is a spectacular mountain rising right out of the valley, we pass amazing lakes, glaciers, in one of the great Himalayan valleys. We will hopefully arrive in Khare after lunch and relax for the rest of the day.
Day 10
We will spend the day in Khare 4,950m/ 16,240 feet. Today is another acclimatization and training day. We will spend the morning getting our climbing gear sorted. We will rig up a climbing scenario and practice using crampons, Jumars, abseiling and we will practice until you are comfortable doing all the different techniques. We will rest up and enjoy this amazing mountain setting.
Day 11
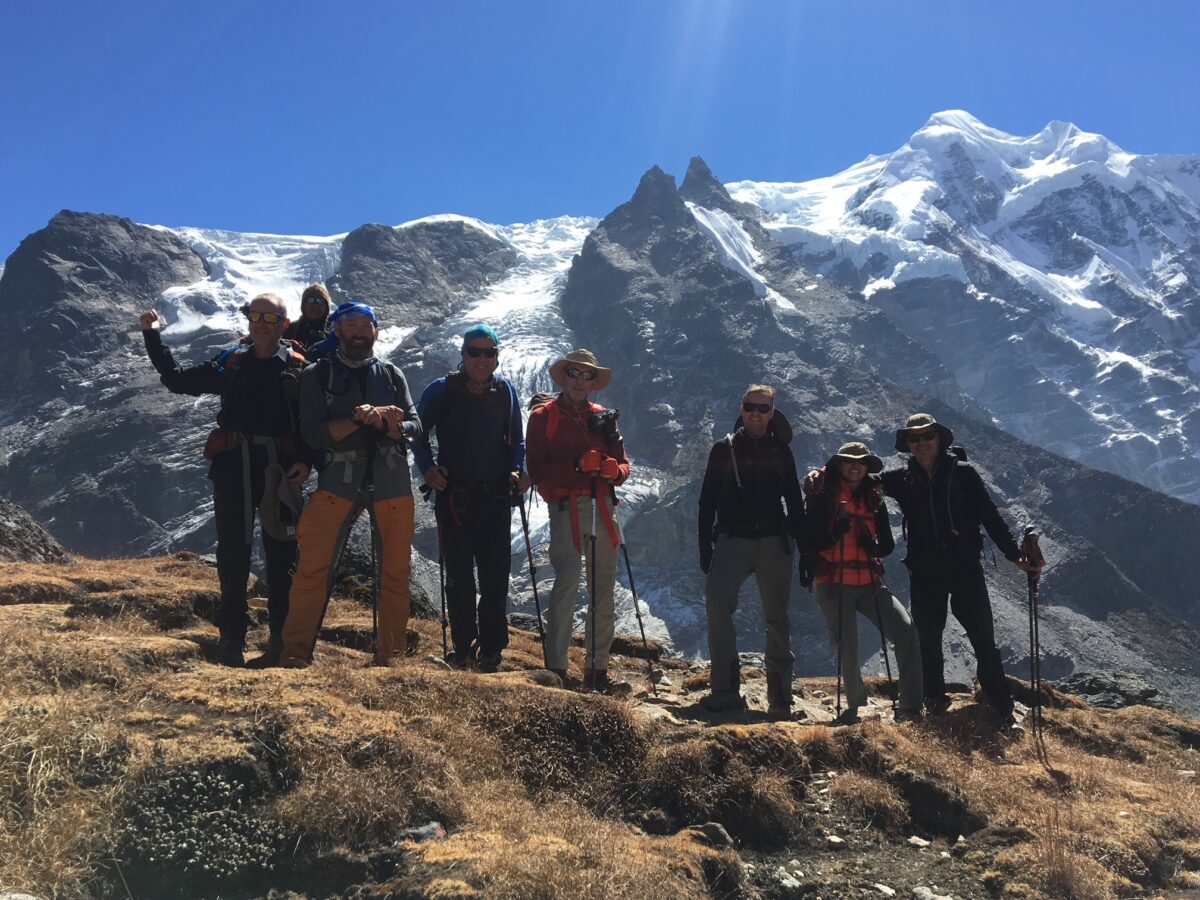
Today is another important acclimatization day. We will do an acclimatization trek up to 5,350m/ 17,552 feet on a stunning hill over toward the Mera La. It is important to get up to this elevation today and spend some time up here, weather permitting. This acclimatization hike gives everyone a chance to get in some beautiful views of glacier running all the way up to high camp on Mera Peak and you inspired by the sheer size of Mera peak and the glacier that rolls off the mountain. After spending some time high above Khare we will had back down the trail for lunch. You can relax in Khare, do more rope work and prepare your gear for moving higher.
Day 12
Today we will make the move from Khare to Mera Base Camp 5,350m/ 17,552 feet. today we climb up to the Mera La 5,400m/ 17,717 feet. We will climb up to the Mera Glacier. At first it is easy but the trek up to the glacier is steep in sections and you will need to pace yourself and make sure you are getting your foot placements correctly. There is a chance of rock fall so wearing helmets, crampons are needed. The walk across the glacier is outstanding, with views and memories you will never forget. The descent from the glacier to the campsite is short. We walk between the moraine and the glacier on the northern side as it descends from the col down to the campsite which you can easily see from the glacier.
Day 13
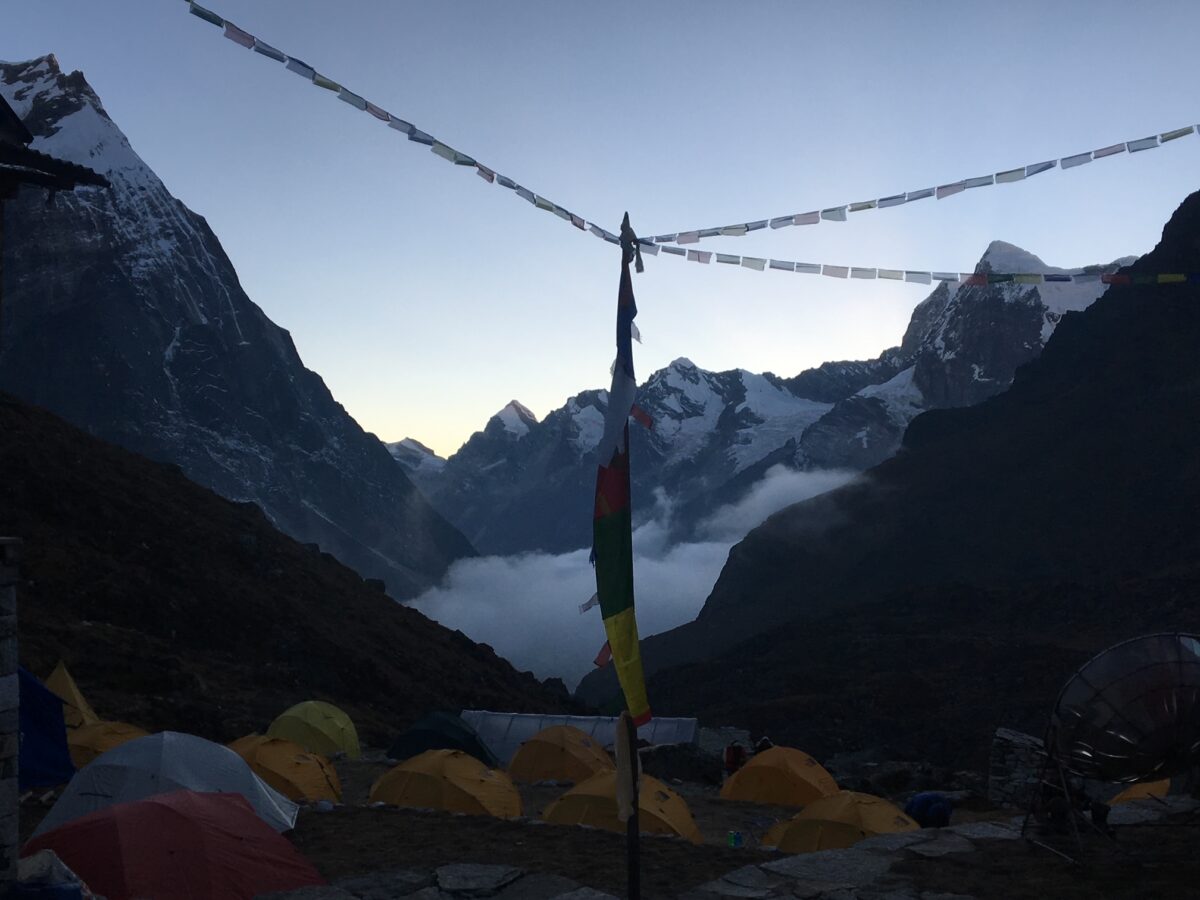
We will have further acclimatization at Mera Peak Base Camp and you can do further training on the side of the glacier. This a great chance to enjoy this unique mountain location. You can practice jumaring and rapelling close to Mera Peak Base Camp you can also prepare for moving higher on Mera Peak. Our staff may move some equipment up to High camp so we can have food ready for you when you arrive. This day can also be used to move higher. The weather on Mera Peak can be challenging with high winds and you may want to move higher to make a summit attempt early and our guides will assess weather with our office staff before moving higher.
Day 14
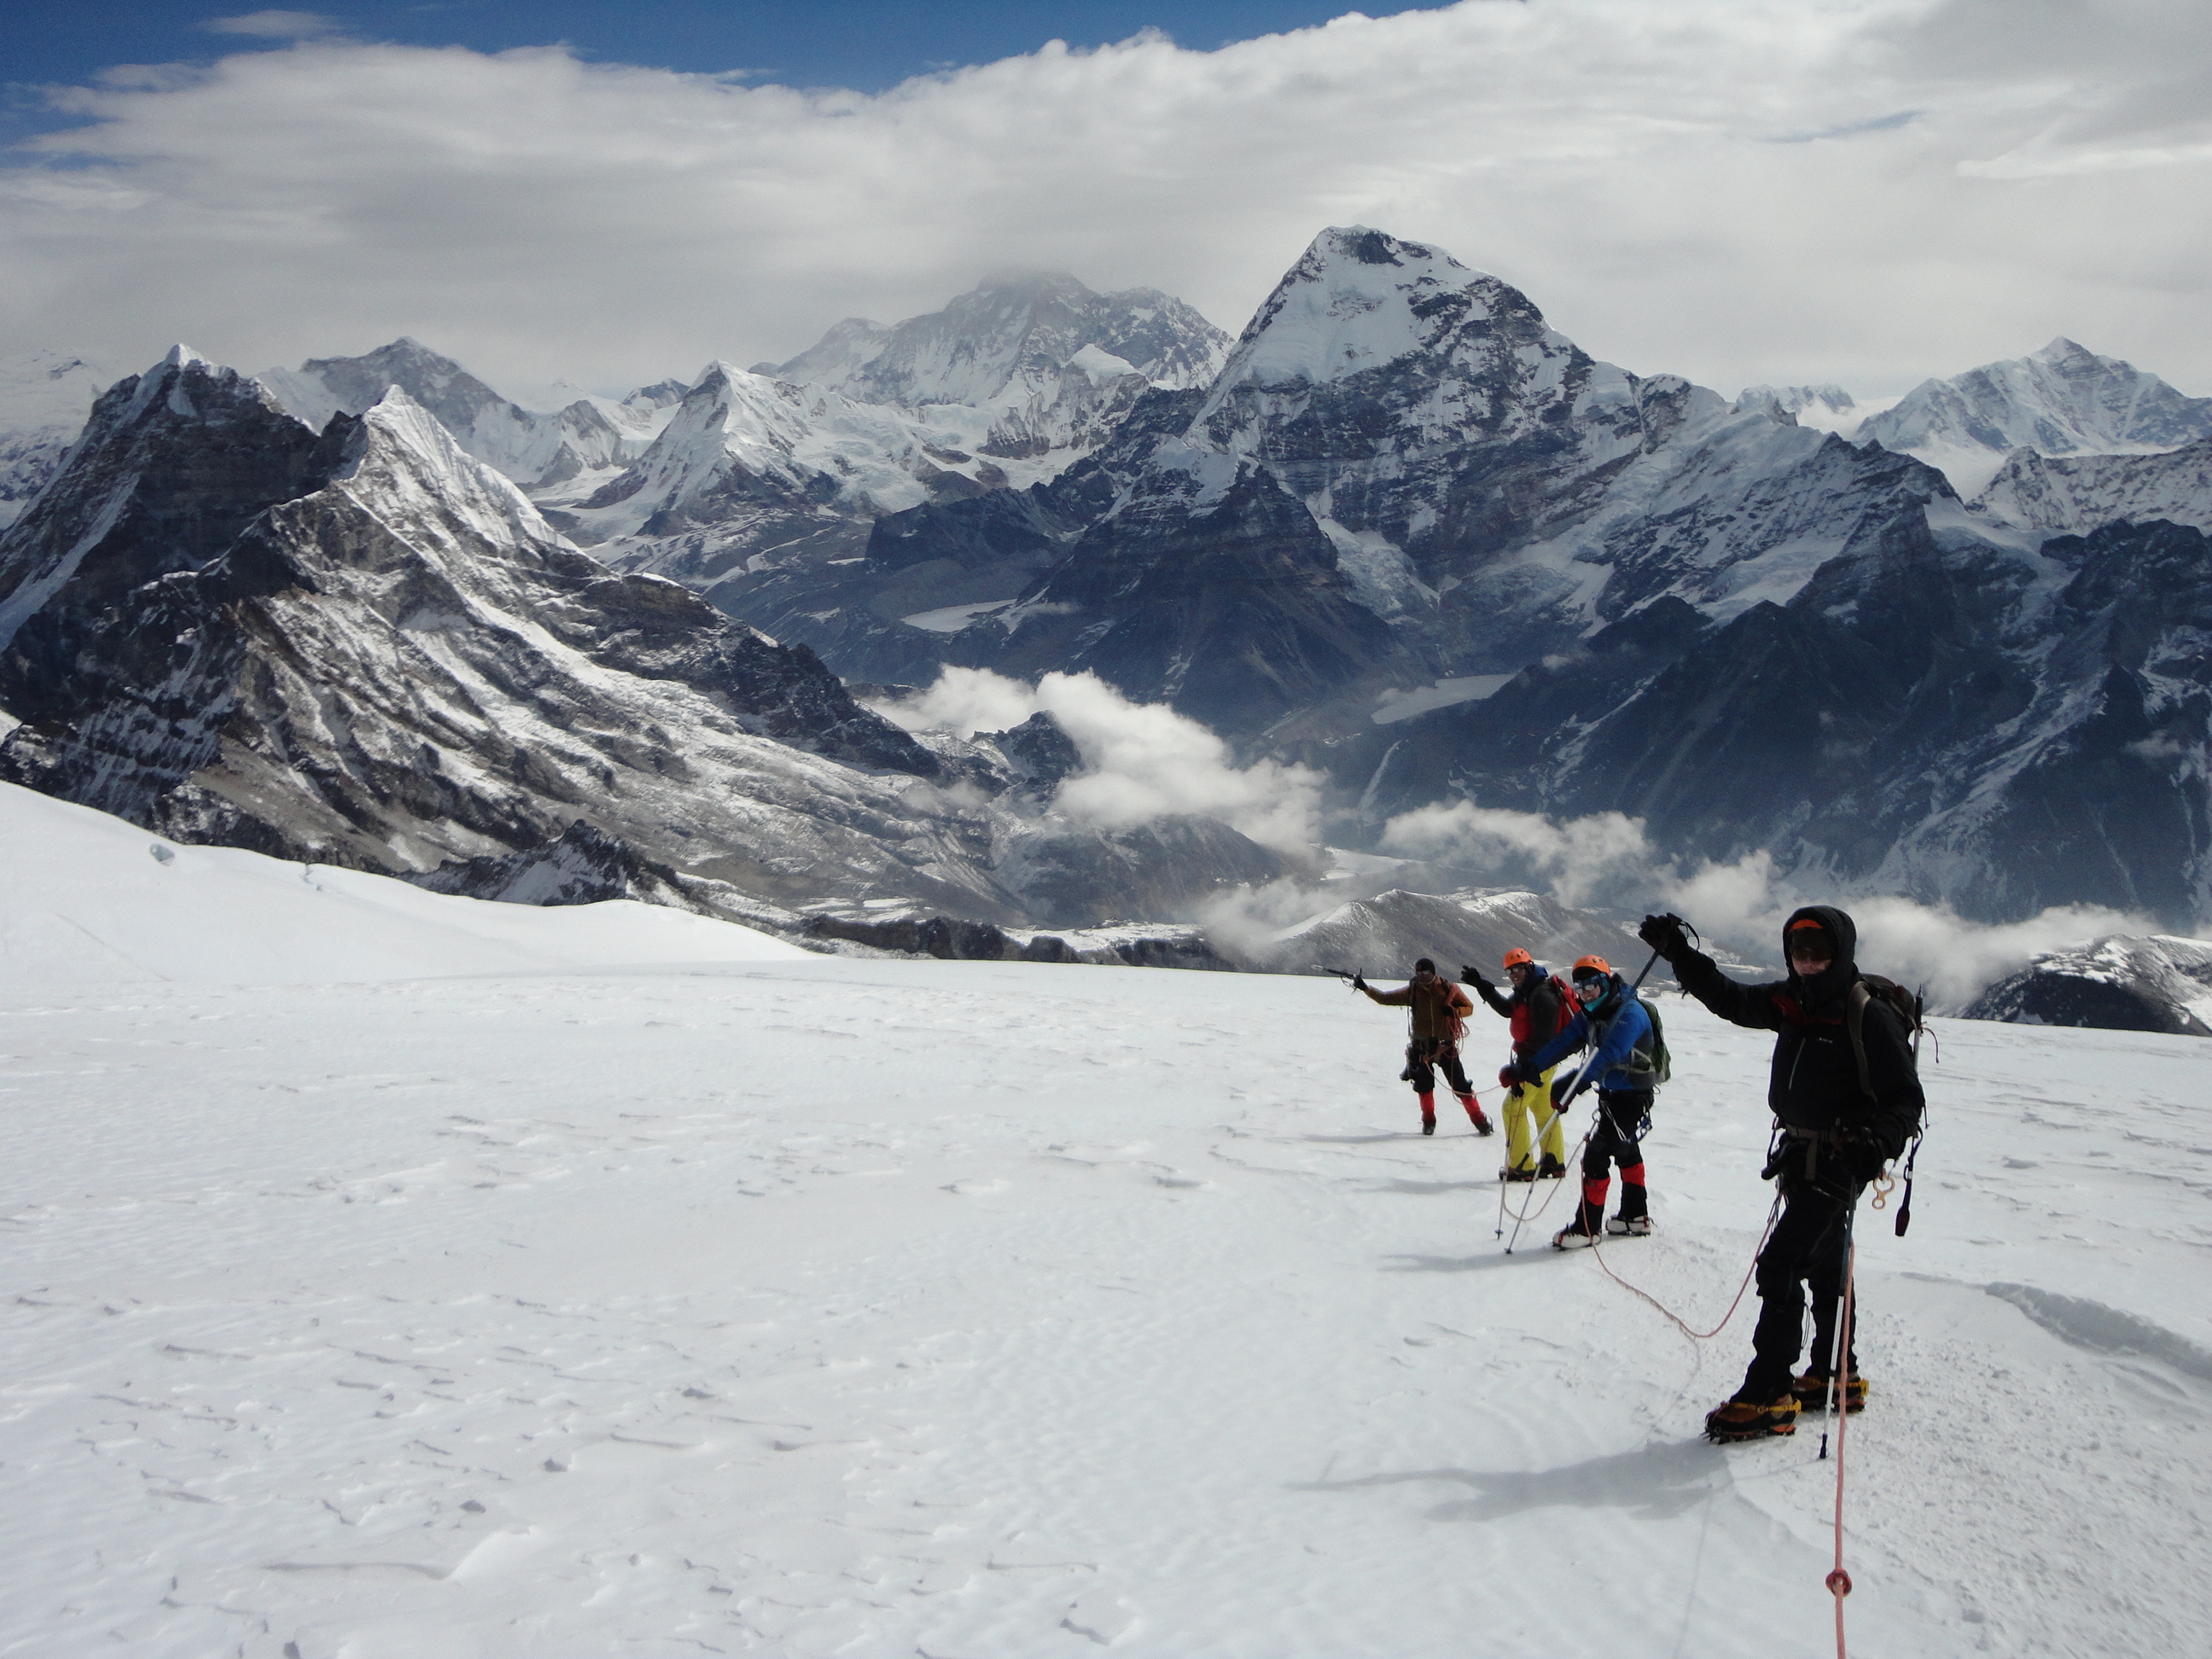
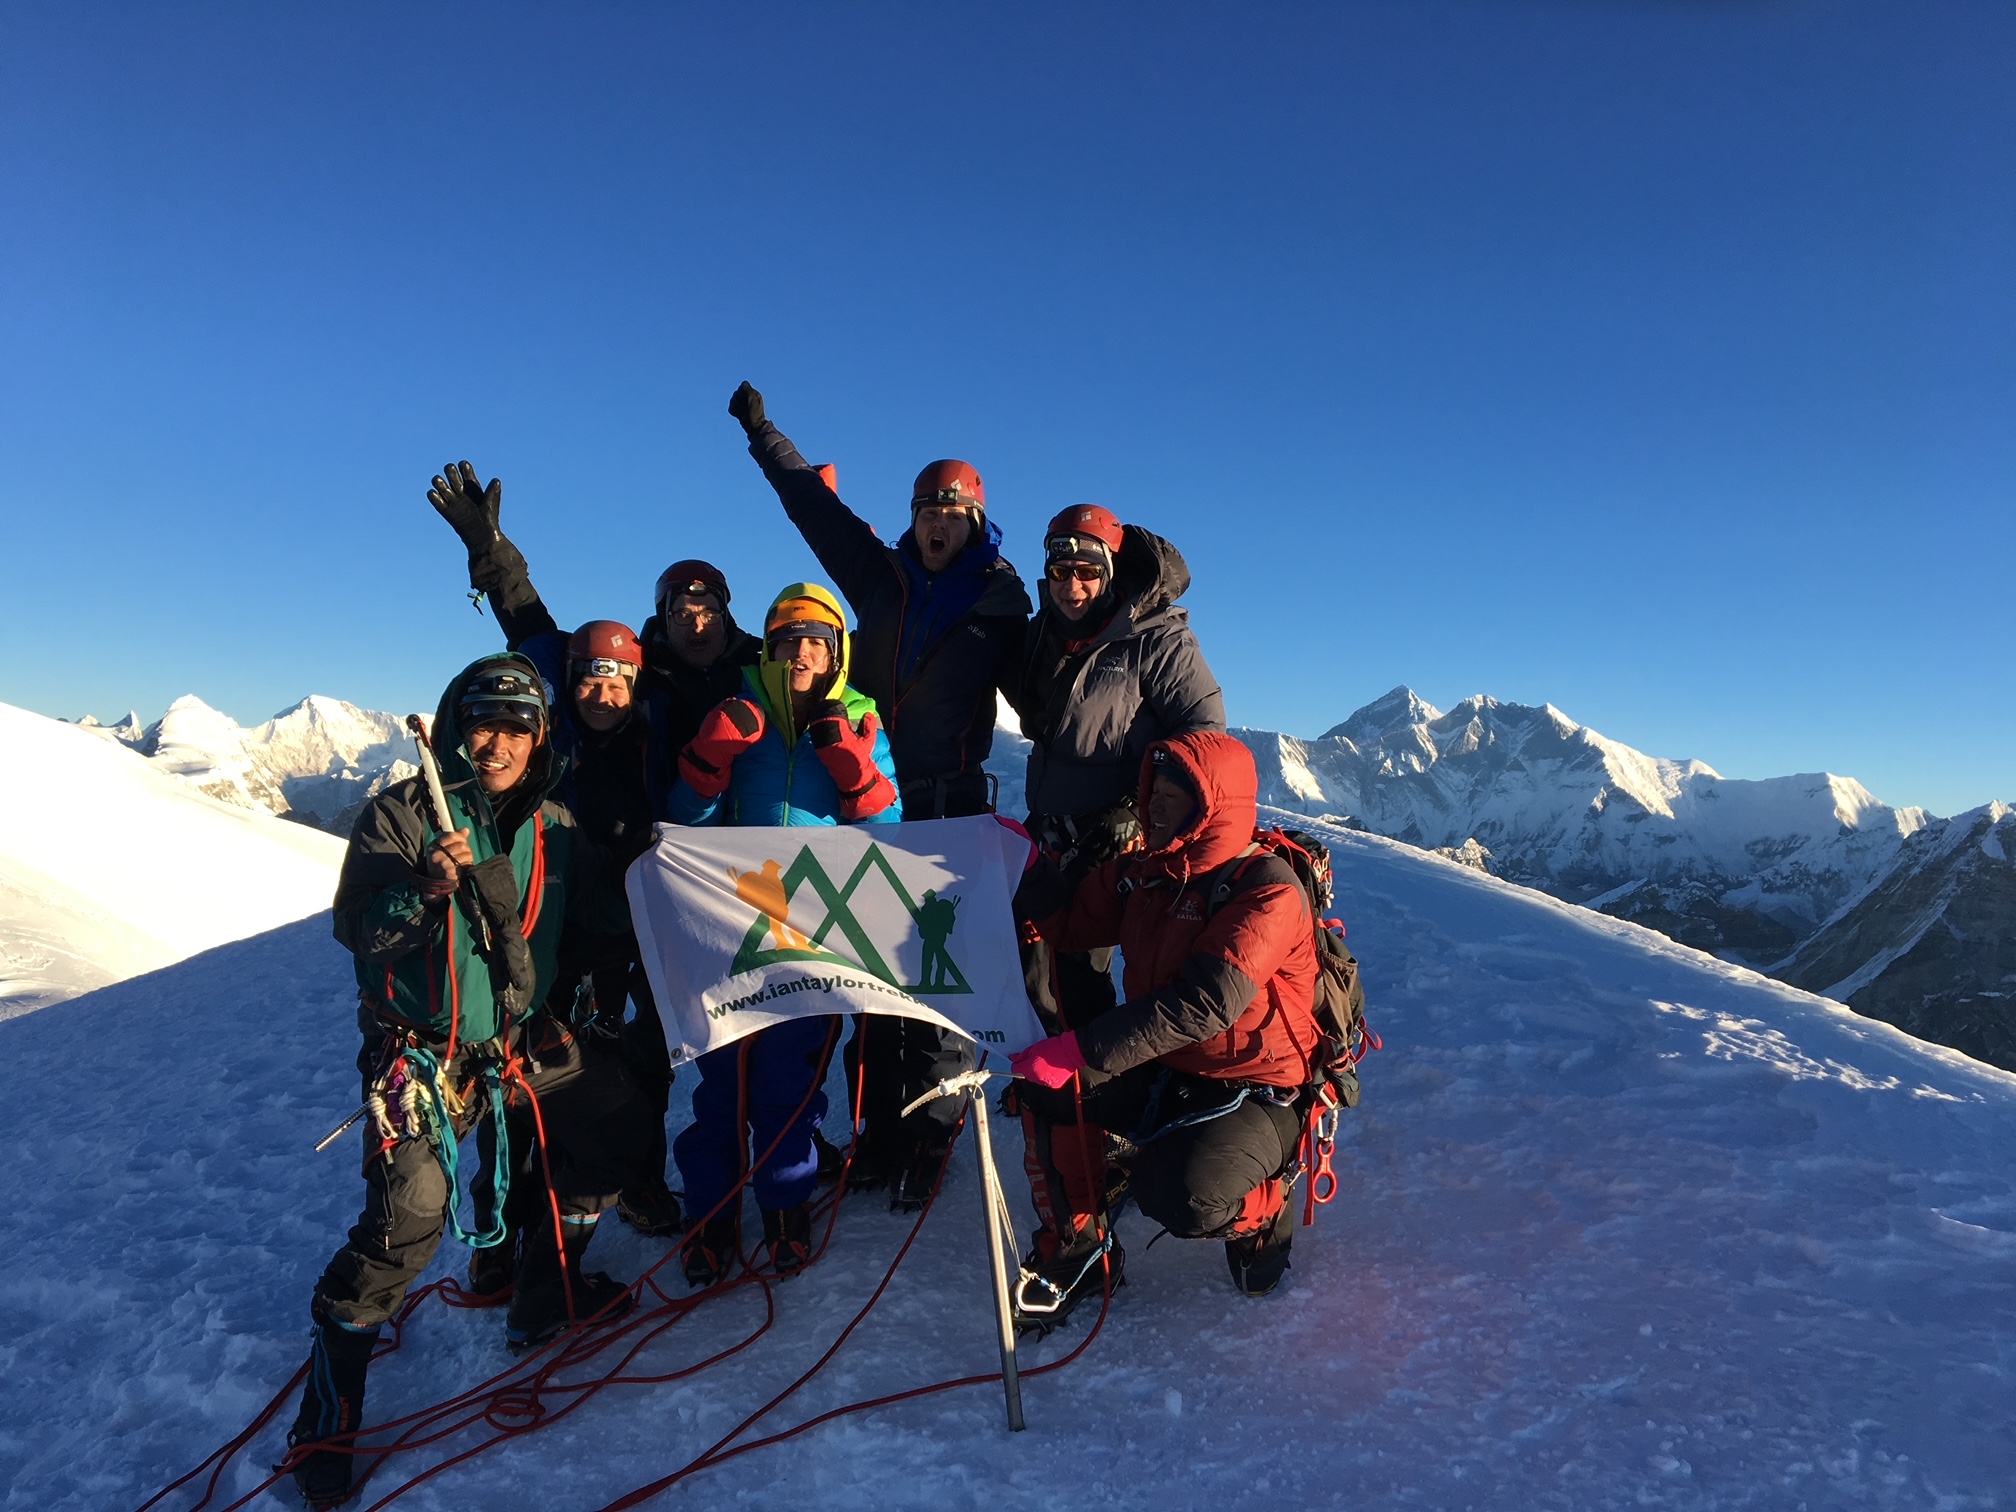
We will ascend to Mera High Camp 5,800m/ 19,029 feet. We head back onto the glacier to where we dropped off yesterday and follow the easy graded snow slopes, and after a short distance arrive at an area of crevasses which we will have to navigate carefully. We then make are way slowly up to High camp. Remember to look behind you where you will see views of Everest, Makalu, Nuptse and Lhotse and this trek up to high camp holds some Himalayan treasures. This camp is hidden behind a rocky section. The camp site is small and has some drop offs on the right as you enter the camp. It is time to re hydrate and recover for summit push.
Day 15
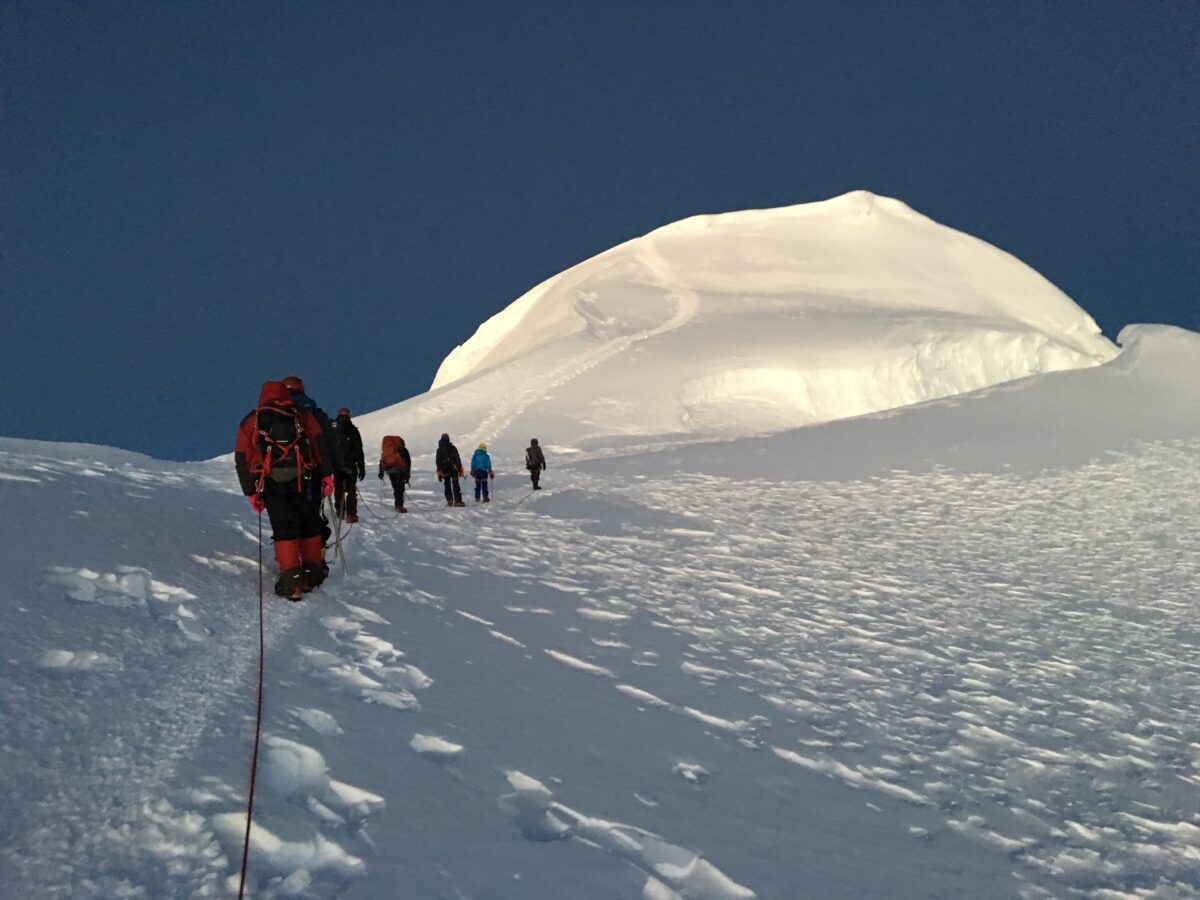
The climb to the summit of Mera Peak starts gradually, and much depends on weather conditions. Once we leave high camp usually at 2am it should take 5/6 hours to reach the summit. Getting into a rest step and taking our time will be critical to conserving energy for the decent. The central summit appears above the wide glacier, flanked by 2 ridges. We climb the snowfields avoiding the crevasses. This steep section can take 2 hours and is slow going. The route swings to the east of the left hand ridge before turning back towards the main summit ridge of Mera. Mera peak has 3 summits, our objective is the highest. This short steep snow slope is easily climbed, but the last 30m/ 98 feet requires a lot of effort, some times Jumaring on a short steep ice section and you arrive on the summit. After reaching the summit and enjoying amazing views over the Himalayas, we have a short abseil before the long descent back to High camp. We will rest for one hour before descending back down to Khare at 4,950m/ 16,240 feet.
Day 16
After a good nights sleep we will get up early and make our way back to Khote 3,600m/ 11,811 feet. It will take two hours to retract our steps to Tangnag 4,360m/ 14,304 feet and then another 3 hours back to Khote.
Day 17
The route back to Lukla takes us over the shorter route. We cross some ridges making our way to Chhatrabuk 4,300m/ 14,107 feet.
Day 18
Today be move from Chhatrabuk to Chhutanga. This is another long day hiking as we move closer to getting back to Lukla.
Day 19
We This is the easiest and shortest day of the trek. We descend from Chhutanga to Lukla through the dense forest which takes about 3 hours. We will arrive back into Lukla and relax for the rest of the day, before our flight back to Kathmandu early the next day.
Day 20
We will be up early for our morning flight back to Kathmandu, shower change and head out to finish off your Kathmandu sightseeing. You can either fly home this evening or spend another day in Kathmandu. We also cover one nights accommodation in Kathmandu at the end of the trip.
Day 21
Pick up some last minute items, spend the afternoon at the Kathmandu Spa and prepare for your flight home or onward journey.
Equipment
Making sure you have the right gear for your Mera Peak climb is essential. Our itinerary on Mera Peak takes you off the beaten path, with a combination of camping and staying in Tea Houses. Being out in the elements without the right gear could ruin your trip. Make sure that if you have put in the effort to train and prepare for the trek, that you don’t show up with the wrong gear!
Here is what you should consider packing for your Mera Peak trip. We run approximately 6 Mera Peak Expeditions per year. Firstly, watch our packing video below, then CONTACT US to find out more. If you sign up to one of our trips, then we will also send you our 30 page trips dossier. which includes an itemized kit list and so much more.
Packing for your Mera Peak Climb
Remember you need to test your gear and get outdoors to get comfortable with your gear. One of the most important factors is to make sure you break in your trekking boots and mountaineering boots. Being comfortable in your trekking boots is essential. Also, make sure that you have done some training with your mountaineering boots on. Make sure that you are used to wearing the more rigid and larger boot.
In Kathmandu, we also have the option to rent your sleeping bag, sleeping mattress, down jacket, and trekking poles. If you do not want to invest in any of these items, just let us know, and you can rent them from us!
There are many different boots and brands out there at the moment. Many of them are of a very high quality as well. We are going to present five different trekking boots that we have personal experience with, so we know they will work. However, if the boot that you like to use is not on this list, that does not mean it is a good option. If you have questions on your boot or any boot that you are considering to purchase for your trek with us, GET IN TOUCH and we can assist. First of all, watch our trekking video below before reading further. Read some REVIEWS from our treks. CHECK OUT our upcoming treks to Everest. Read more advice for this trek.
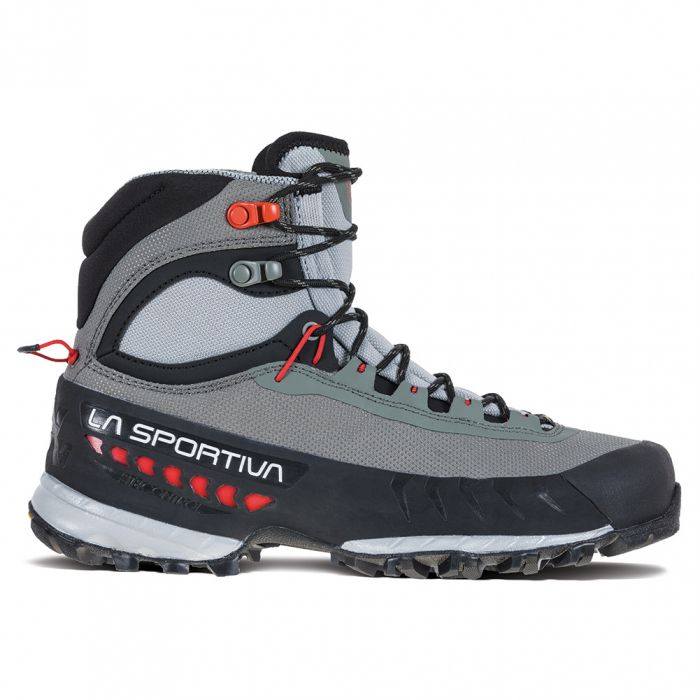
1). La Sportiva TXS GTX
This is a new boot from La Sportiva, that has replaced our beloved Trango Trek GTX. We prefer a more rigid sole under foot and these boots do a great job. They are warm, lightweight and waterproof. Some of our Sherpa and Kilimanjaro guides wear these boots as well. Ian used these boots on four Kilimanjaro climbs this year along with three Everest Base Camp trips, and they are still in great condition for the same again next year. We would also use them training and on other treks in Nepal and South America.
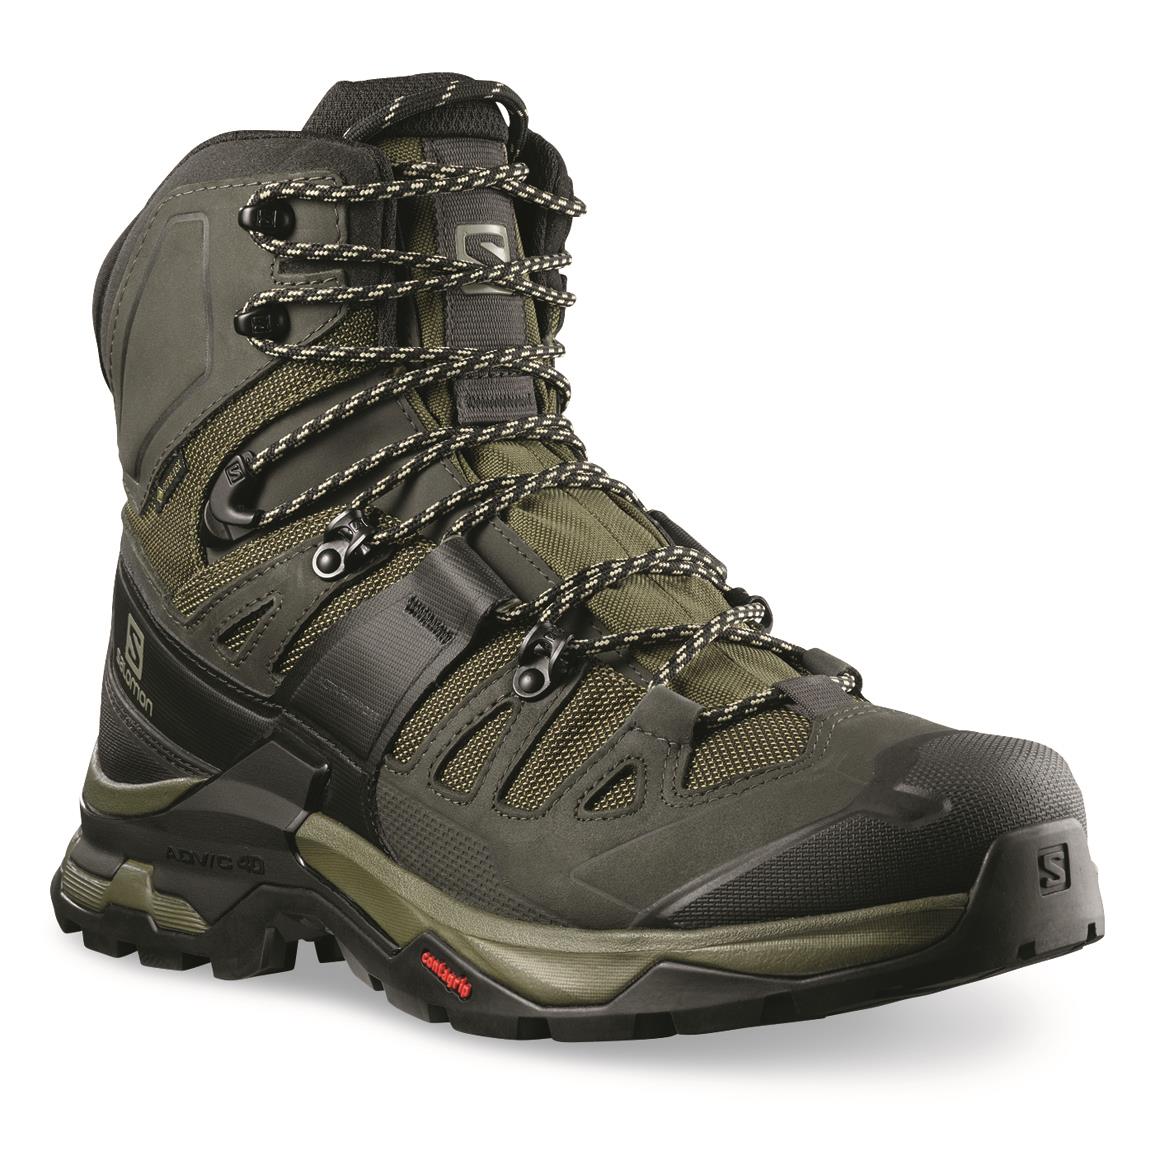
2). Salomon Quest 4 GTX
Another great option is the Salomon Quest 4 GTX Trekking boots. More and more people are using these trekking boots on a wide range of our trekking adventures in Nepal and around the world. They are comfortable, sturdy, waterproof and a very resilient trekking boot. We would recommend these boots for Everest Base Camp, Kilimanjaro, Mount Elbrus, and a range of other treks.
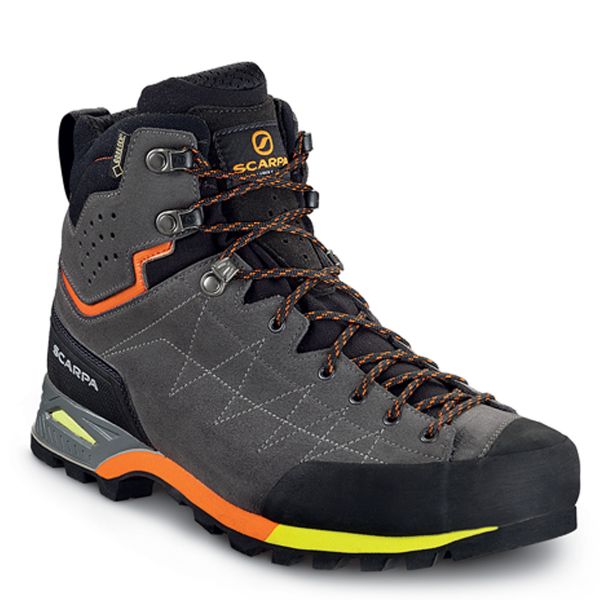
3). Scarpa Zodiac Plus GTX
Scarpa has come out with a new lighterweight option in the Zodiac. These boots are Gore-Tex, so a waterproof boot to keep you dry if you experience moisture on the trail. They also have good ankle support and lacing system. These boots, similar to the La Sportiva TXS, have a more rigid sole, which is ideal for the terrain on the trail to Everest Base Camp. Scarpa are always re-inventing trekking boots and if they fit your foot correctly, then they may be the right boot for you. They work great and last a long time. We would also recommend these boots for a Kilimanjaro climb, Elbrus or the Inca Trail.
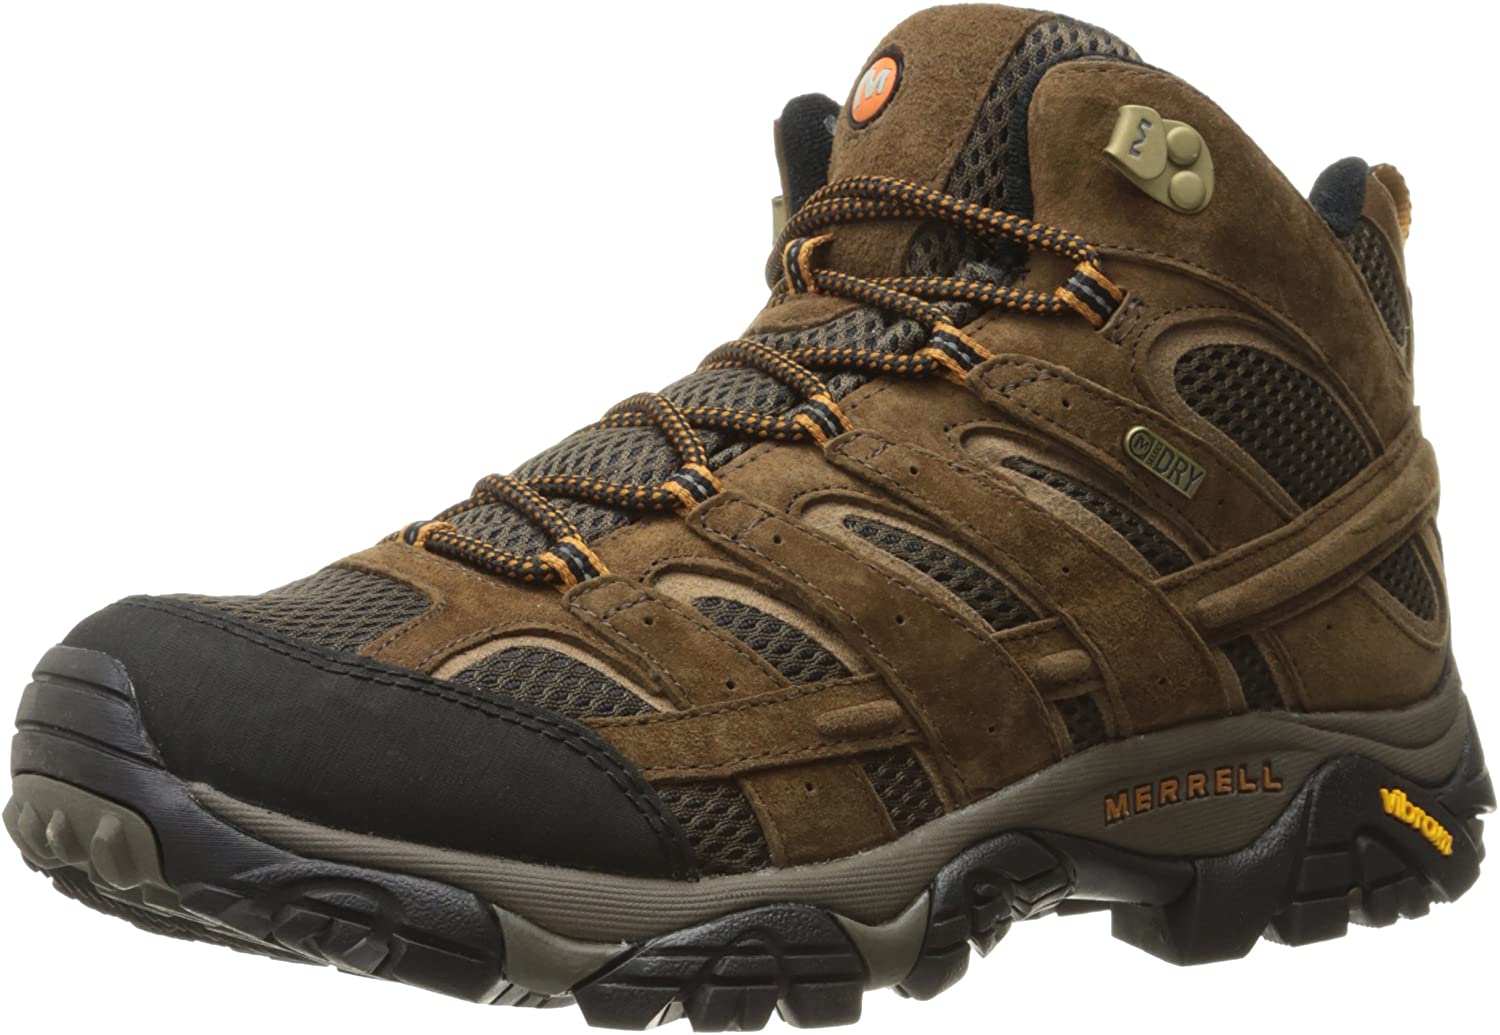
4). Merrell Moab Mid 2 Waterproof
The Merrell Moab Mid 2 Waterproof Trekking Boot has been around for years and there is a good reason for that, they are a great boot! These boots boast a waterproof membrane, good ankle support, comfortable and sturdy fit. The Merrell boot may be the option for you if you have a slightly wider foot or need more room in your toe box. This boot is a reliable and durable option that will be ideal for your Everest Base Camp Trek! We would also recommend this boot for Kilimanjaro, Annapurna Base Camp or the Inca Trail.
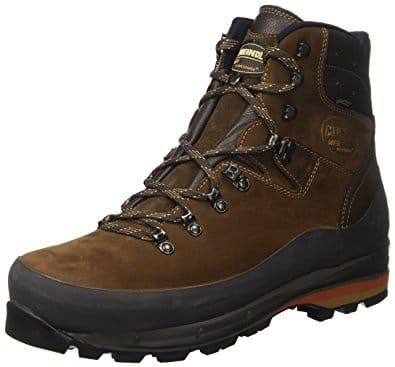
5). Meindl Vakuum
You could also consider using the Meindl Vakuum trekking boots. These are a good option for Everest Base Camp treks and a wide range of trekking peaks and multi-day trekking adventures. These are a very popular boot and we see a lot of clients arriving to Nepal in this option. They are an excellent choice for mixed rocky terrain and long distance hiking. These boots will be with you for many miles as they are an extremely durable boot. Also, this could be a good option for you if you feel the cold in your feet as they will be a warmer option.
Think About Future Trips
This list below is an outline of mountaineering boots needed for the range of trips we manage. Consider future trips when selecting the right boots. When you finished on this page check out our recommendations for the best trekking boots that you can use for the approach to your chosen mountain. Or, you can just CONTACT US and chat about the best gear for your chosen adventure. There is also an option to sell and trade gear on geartrade.com
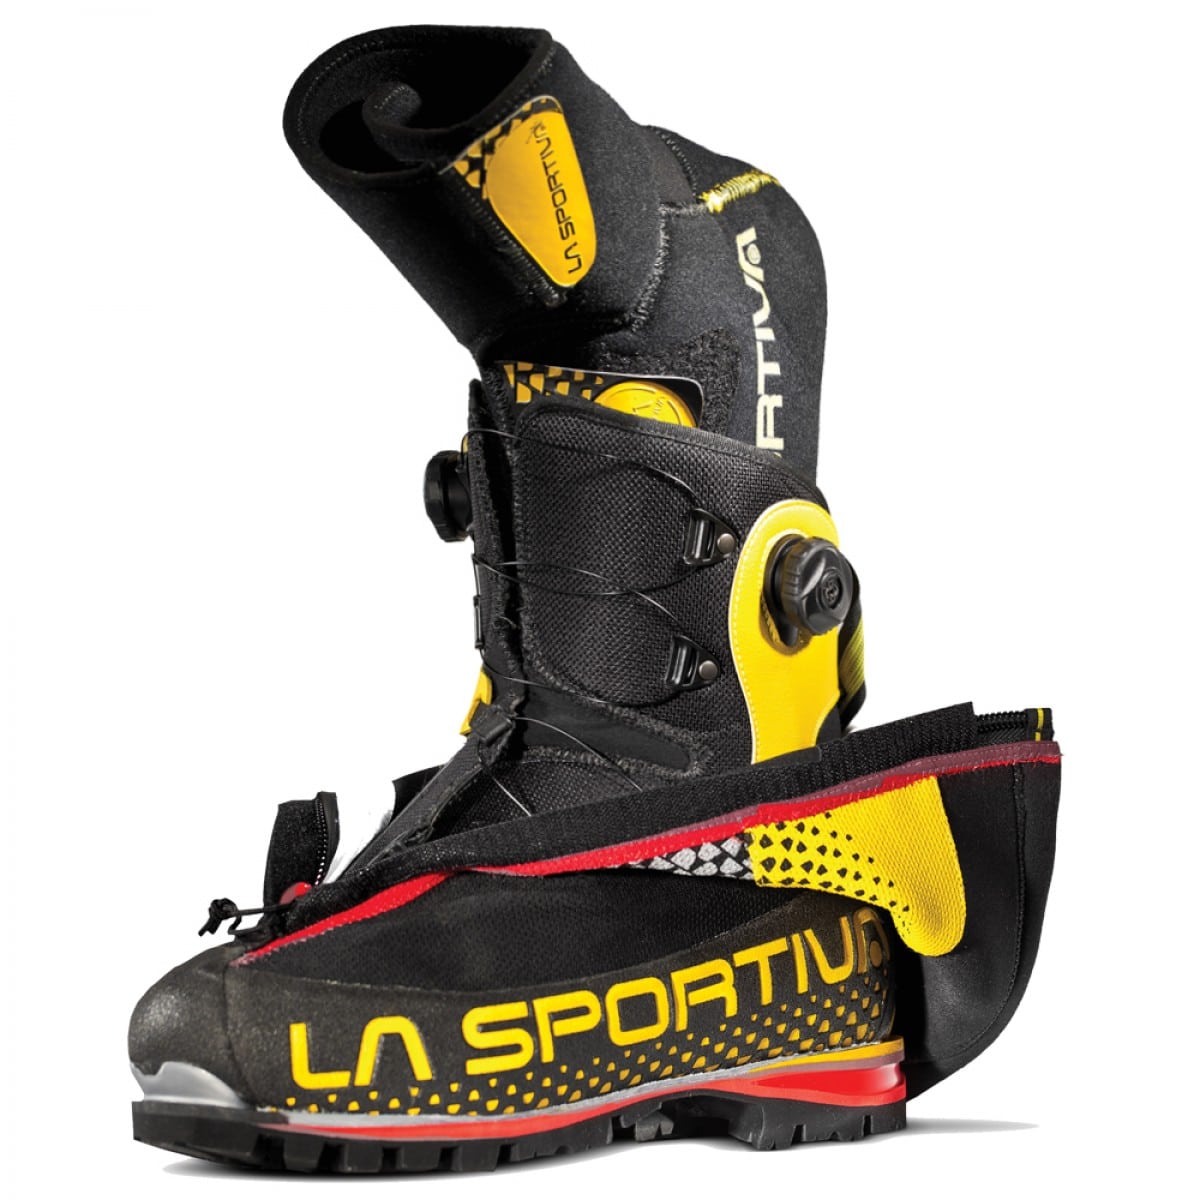
La Sportiva G2SM
1). My favorite mountaineering boots at the moment are the La Sportiva G2SM mountaineering boots. Super light and really warm. I always prefer the inner boot system and these boots can be used on 90% of the mountaineering trips I am currently undertaking. I use these boots on Island Peak, Mera Peak, Aconcagua, Mount Elbrus They are versatile for climbing in a wide range of conditions and terrain.
La Sportiva Baruntse
2). I really like the La Sportiva Baruntse mountaineering boots. A lot of our clients and guides have chosen to use these boots. They are great boots for Island peak, Mont Blanc and other Alpine climbs. They are a little bulky and heavier than the La Sportiva G2SM. They have the inner boots which I really like and they are warm and great option for your high altitude mountaineering adventures.

Scarpa Phantom 6000
3). We have a lot of clients using the Scarpa Phantom 6000 mountaineering boots these days. They seem to work very well in a wide range of conditions and are a versatile mountaineering boot that can be used in a wide range of environments. I have however seen some people have issues with the fit of this boot. You really need to make sure you use your boots in your training and break them in. Scarpa can be a narrow fit for a lot of people so make sure you have tried and tested your boots before going on the mountain.

Mammut Norwand
4). We have a lot of people using the Mammut Norwand Mountaineering boots on our Island and Mera peak climbs. These are also a popular boot with clients on our Elbrus and Aconcagua climbs. Although I have not personally used these boots, I have never seen or heard of any have any issues with these mountaineering boots.

La Sportiva Nepal EVO
5). Most people are showing up on our Himalayan climbs with these La Sportiva Nepal Evo mountaineering boots. They are not as warm as the double boots but a great option for Island peak, Lobuche peak and Mera peak in warmer months. They are a great overall mountaineering boot that can be used in Scotland and the Alps.
What people said about our Mera Peak climbs

Shane Jenson
Mera peak 2012
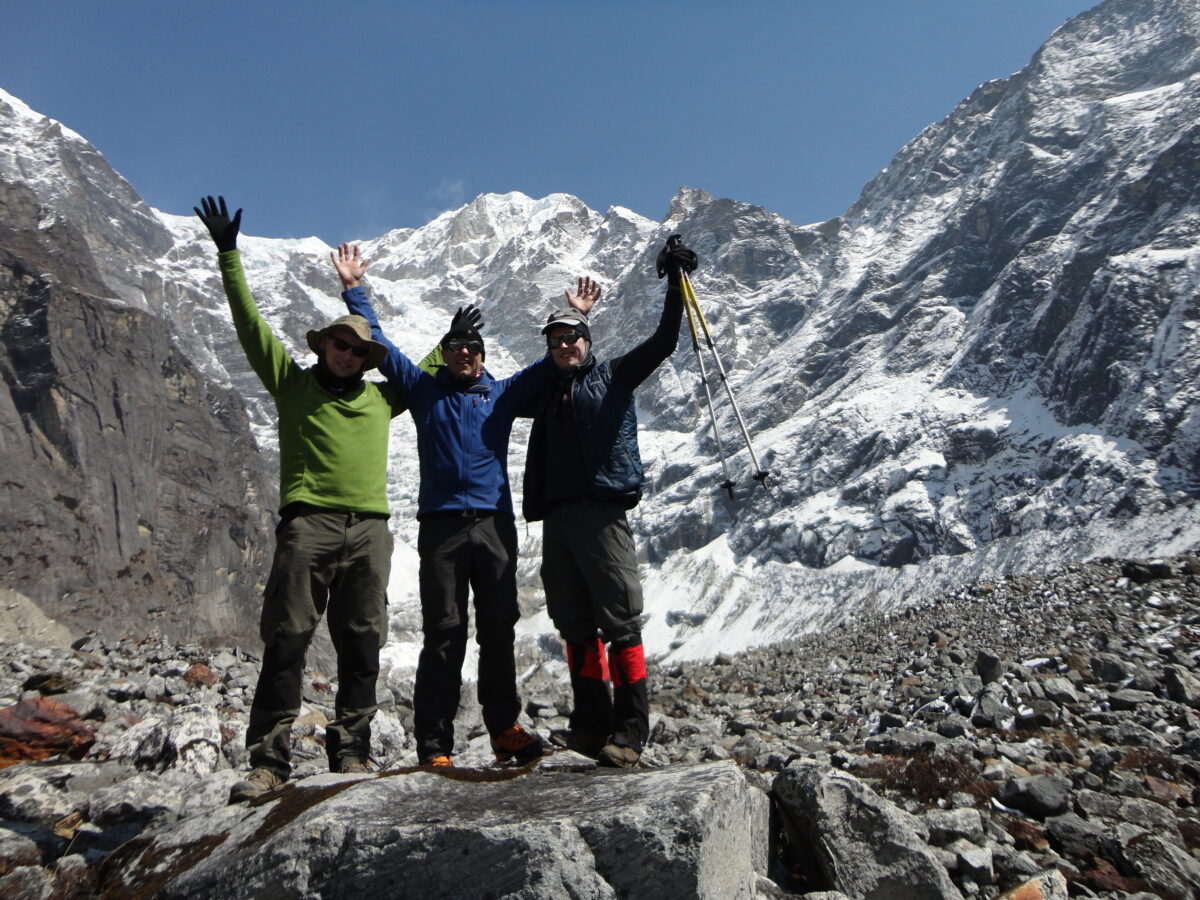
Dreams do come true. I stood on the summit of Mera peak gazed at Mount Everest for the longest time, I couldn’t believe where I was standing. It was a moment I will never forget. Thanks to Ian and team we all made the summit and enjoyed such a special moment high on Mera peak. What an amazing journey.
Mairead Ryan
Mera Peak 2013
Mera peak was more amazing than I ever expected and one mountain I can recommend you should climb. I was so impressed with Ian Taylor Trekking, the service, team, guides and support exceeded my expectations.
Ready to go?
If you pick the correct itinerary, Mera Peak is one of the most amazing trekking experiences in the world. Ian Taylor Trekking are committed to your safety and preparation. We are available 5 days a week to take calls, answer e-mails and giving you professional assistance and advise about your chosen climb.
Call us about Mera Peak, training and taking that next step in your journey.
